JVC DLA-QX1G Instruction Manual
JVC DLA-QX1G - D-ila High Resolution Projector Manual
 |
View all JVC DLA-QX1G manuals
Add to My Manuals
Save this manual to your list of manuals |
JVC DLA-QX1G manual content summary:
- JVC DLA-QX1G | Instruction Manual - Page 1
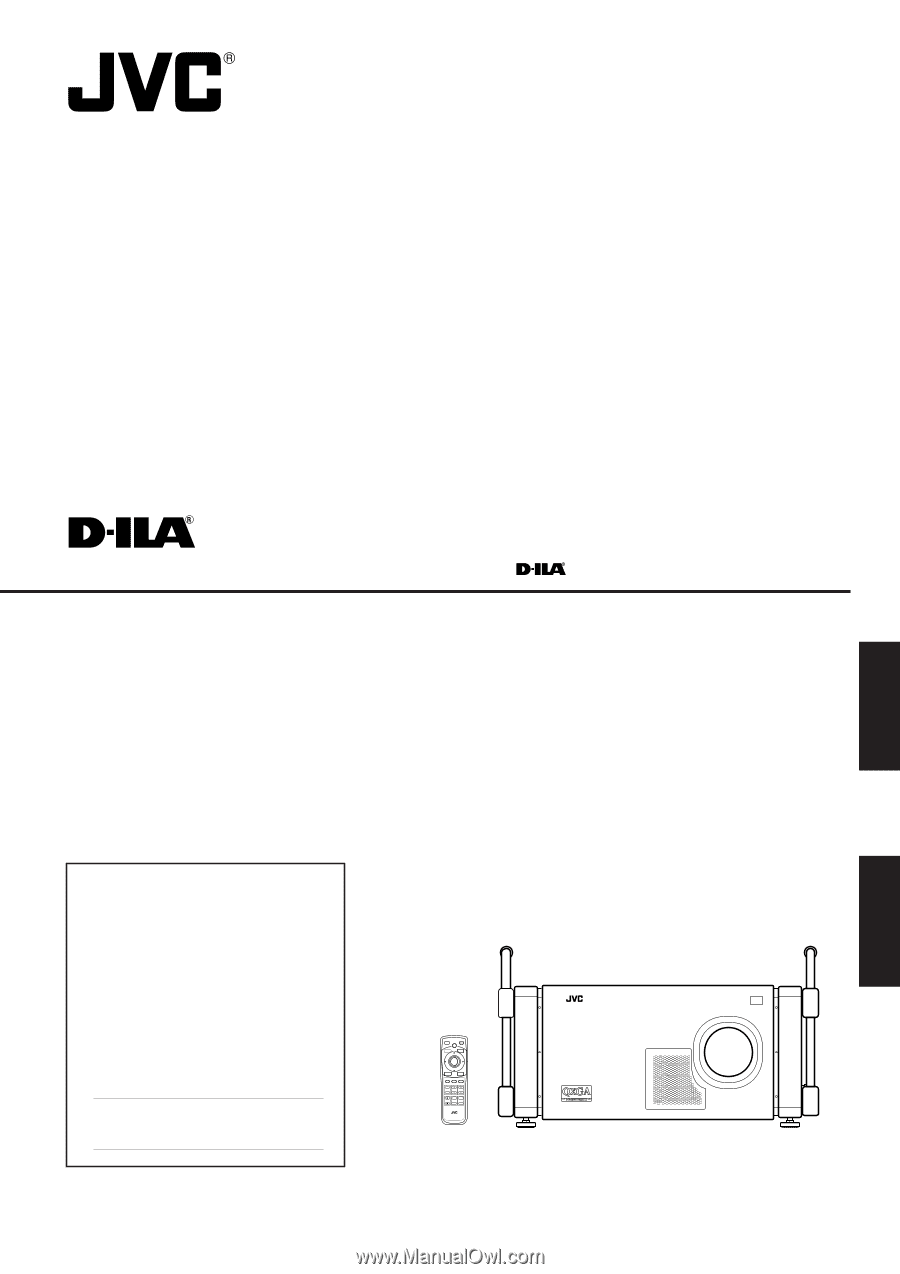
SUPER PROJECTOR MANUEL D'INSTRUCTIONS : SUPER PROJECTEUR DLA-QX1G INSTRUCTIONS ENGLISH DLA-QX1G LOCK UNLOCK OPERATE HIDE BACK LIGHT ENTER EXIT MENU VIC 1 VIC 2 VIC 3 T ZOOM W SHIFT FOCUS ON KEYSTONE SHUTTER OFF T DIGITAL ZOOM W RM-MQX1G REMOTE CONTROL UNIT (Lenses are not supplied - JVC DLA-QX1G | Instruction Manual - Page 2
- JVC DLA-QX1G | Instruction Manual - Page 3
INSTRUCTIONS SUPER PROJECTOR DLA-QX1G ENGLISH - JVC DLA-QX1G | Instruction Manual - Page 4
servicing to qualified service not approved by JVC could void the Class A digital device, pursuant instruction manual projector is equipped with a 3-blade grounding-type plug to satisfy FCC rule. If you are unable to insert the plug into the outlet, contact your dealer. About burning-in of the D-ILA - JVC DLA-QX1G | Instruction Manual - Page 5
service to qualified service personnel under the following conditions: a) When the power supply instructions. Adjust only those controls that are covered by the Operation Manual, any service or repairs to this product, ask the service technician illumination lamp is turned on. Exposure of your - JVC DLA-QX1G | Instruction Manual - Page 6
is provided and the manufacturer's instructions have been adhered to.) For attempt to service this product yourself as opening or removing covers lamp. For any unclear points, consult your product dealer. - Use only the accessory cord designed for this product to prevent shock. The power supply - JVC DLA-QX1G | Instruction Manual - Page 7
supply. If a new main plug has to be fitted, then follow the instruction ELECTRICIAN. Information on the power cord plug The power cord of this projector does not have a RS232C CONTROL IN RS232C CONTROL OUT HD-SDI IN Power supply cord Shielded cable Shielded cable Shielded cable Shielded cable - JVC DLA-QX1G | Instruction Manual - Page 8
Digital HD Devices 29 Connecting to Devices which Control the Projector 30 Connecting the Power Cord (Supplied 31 Basic Operations 32 1. Turning On the Power 32 I Turning Off the Power ....... 48 Replacing the Light-Source Lamp ......... 50 Troubleshooting 51 Warning Messages 53 Appendix 55 - JVC DLA-QX1G | Instruction Manual - Page 9
R6-size dry cell battery (×2) (for checking operation) (For USA) (For Europe) Power code [approx. 9.8 ft (3.0 m)] Remote control cable [approx. 49.2 ft (15 , and Pr video signal) input function to the projector. PK-Q01HSDG A board to be used for adding HD-SDI video signal input function to the - JVC DLA-QX1G | Instruction Manual - Page 10
and 11. 5 AC IN (power input) terminal This is the power input terminal where the supplied power cord is connected. For details, refer to "Connecting the Power Cord (Supplied)" on page 31. 6 MAIN POWER switch This is the main power switch. When it is turned on, the projector goes into stand-by mode - JVC DLA-QX1G | Instruction Manual - Page 11
cooling fan for the light-source lamp power supply. This fan continues running as long as the MAIN POWER switch is on. p, q Exhaust vents Vents for cooling fans through which warm air comes out. To remove the handles Remove two screws fixing the handle to the projector with a hex wrench. • Keep the - JVC DLA-QX1G | Instruction Manual - Page 12
seconds while the projector is in stand-by mode, the MAIN POWER switch is turned on and the OPERATE indicator lights up. Press it again, and the projector goes into the 15° vertically. p Status code display A 2-digit number appears here to show the status of this projector. Refer to the right. 10 - JVC DLA-QX1G | Instruction Manual - Page 13
no signal is input. 10 The lamp goes off during projection. 20 Trouble in the light-source lamp power supply. 21 Trouble in the power supply of the projector. 22 Trouble in the power supply of the fan. 23 Trouble in cooling process of R-device. 24 Trouble in cooling process of G-device - JVC DLA-QX1G | Instruction Manual - Page 14
to directly connect the remote control unit to the projector. Use the remote control cable supplied. 2 RS-232C OUT terminal (D-sub 9 pin) This is an RS-232C interface-specified terminal. When another DLA-QX1G is connected to this projector using this terminal, you can enable a computer to control - JVC DLA-QX1G | Instruction Manual - Page 15
Analog VIC Y Pb Pr ı Å ı HD-SDI VIC IN OUT ENGLISH How to install the optional VICs 1 Remove the slot panel from the slot of the projector. 1) Remove two screws on the slot panel, one on each end, from an empty slot. 2) Take off the slot panel. 2 Install the VIC. 1) Aligning both - JVC DLA-QX1G | Instruction Manual - Page 16
T DIGITAL ZOOM W RM-MQX1G REMOTE CONTROL UNIT 1 2 3 4 5 6 7 8 9 p 1 Remote control's signal transmitter 2 OPERATE button When the projector is projector. The OPERATE indicator lights up. • About 30 seconds after the power has turned on, video image will appear on the screen. When the projector - JVC DLA-QX1G | Instruction Manual - Page 17
VIC 1 VIC 2 VIC 3 T ZOOM W SHIFT FOCUS ON KEYSTONE SHUTTER OFF T DIGITAL ZOOM W RM-MQX1G REMOTE CONTROL UNIT 1 2 3 4 5 6 7 8 9 wired unit, connect the supplied remote control cable between this terminal and the REMOTE terminal on the connector panel of the projector. For details, refer to - JVC DLA-QX1G | Instruction Manual - Page 18
ENTER (Menu Operation) Button The remote control unit supplied for this projector has only one button to navigate through the menus. Batteries run for six months to one year in normal use. But the batteries supplied are for confirming operation and may not run that long. When the remote control - JVC DLA-QX1G | Instruction Manual - Page 19
; otherwise it could cause color variation or harm the lamp life. • Do not block the exhaust vents. Do not use a cover which encloses the projector intake or blocks the exhaust vents. Allow sufficient space around the projector. When the projector is enclosed in a space of the following dimensions - JVC DLA-QX1G | Instruction Manual - Page 20
on it securely. For safety and maintenance purposes, a suitable facility is necessary to easily lift and lower the projector from the shelf for maintenance. 305 mm (12") or more STAND BY OPERATE HIDE VIC SELECT 1 KEY STONE 2 3 EXIT MENU T ZOOM FOCUS ENTER W CONTROL REMOTE - JVC DLA-QX1G | Instruction Manual - Page 21
(Cont.) Adjusting the Inclination of the Projector The vertical angle and the leveling of the projector can be adjusted with the adjustable feet on the bottom of the projector. I Adjusting the vertical angle of the projector Lift the projector, rotate the front adjustable feet, and adjust the - JVC DLA-QX1G | Instruction Manual - Page 22
the projector is not projector was shipped out the factory. If the lens does not either move up or down by your lens shift adjustment using the buttons on the remote control unit or the setting menu, the shift center lock pin might not have been removed. In this case, consult your dealer or service - JVC DLA-QX1G | Instruction Manual - Page 23
value is only a guide (reference). • If the keystone is adjusted, the projected screen becomes smaller. I Optional Lenses This projector does not include a Powered focus, short focal length lens (subject ratio 1.5:1), manual vertical shift function provided, 0% to ±50% influence. Powered zoom/powered - JVC DLA-QX1G | Instruction Manual - Page 24
lens shift function: When the lens shift is set to 50%, install the projector so that the bottom edge of the projection screen is at the same height lens shift function or when the lens shift is set to 0%: Install the projector so that the center of the projection screen is at the same height as the - JVC DLA-QX1G | Instruction Manual - Page 25
Installing the Projector (Cont.) Lens Shift Function (Cont.) ENGLISH Py(%) Maximum amount of shift The maximum amount of vertical shift is restricted by the amount of horizontal shift - JVC DLA-QX1G | Instruction Manual - Page 26
50° horizontally, 15° vertically. 50° A 15° B I Using as a wired remote control unit Connect the supplied remote control cable between the remote control unit and the REMOTE terminal on the connector panel of the projector. Using it as a wired remote control unit, you do not have to worry about the - JVC DLA-QX1G | Instruction Manual - Page 27
• Before connection, be sure to turn off the projector and devices. • Read the manual which comes with each device thoroughly. I Analog RGB input terminal of the Analog HD VIC. NTSC is not available. I Digital HD signals The digital HD signals can be input to the input terminal of the HD-SDI - JVC DLA-QX1G | Instruction Manual - Page 28
and the equipment. • Also, read the manuals which came with the equipment. Example of a basic system • By connecting an RGB switcher, a variety of input sources can be input to the projector using RGB signals. Using the remote control unit supplied, you can select the channel for an input - JVC DLA-QX1G | Instruction Manual - Page 29
connection, be sure to turn off both the projector and RGB devices. • Read the manuals which comes with each device thoroughly. • R V H/CS To V To H/Cs To monitor connector RGB connection cable (not supplied) • RGB output devices Laser video disc player, etc. To R To G To B To H/Cs - JVC DLA-QX1G | Instruction Manual - Page 30
can use analog HD devices equipped with the Y, Pb, and Pr terminals. Before connection, be sure to turn off both the projector and devices to be connected. • Read the manual thoroughly which comes with each device to be connected. • Prepare and use the separately available HD analog connection cable - JVC DLA-QX1G | Instruction Manual - Page 31
When you install an HD-SDI VIC (Video Input Card) to the projector, you can use digital HD devices equipped with the SDI interface. Before connection, be sure to turn off both the projector and devices. • Read the manual thoroughly which comes with each device to be connected. • Prepare and use - JVC DLA-QX1G | Instruction Manual - Page 32
both the projector and computer. • Read the manual thoroughly which comes with each device to be connected. • Prepare and use the separately available RS-232C connection cable. CONTROL REMOTE RS-232C OUT RS-232C IN RS-232C connection cable (not supplied) • When another DLA-QX1G is connected - JVC DLA-QX1G | Instruction Manual - Page 33
, do not turn on the MAIN POWER switch yet. • Do not turn on the projector without installing the lens unit (not supplied). Doing so will cause the lens-hole blind cover (black one) initially installed to be deformed by heat from the light-source lamp. I Preparation for United Kingdom only Attach - JVC DLA-QX1G | Instruction Manual - Page 34
BACK LIGHT ENTER OPERATE 2 button Projector's indicator STAND BY OPERATE Notes • After the power is turned on, the screen may appear jumbled for a few seconds, but this is not a malfunction. • After the OPERATE indicator comes on, it can take a minute or so for the lamp to warm up and operate - JVC DLA-QX1G | Instruction Manual - Page 35
KEY STONE 2 3 EXIT MENU T ZOOM FOCUS W ENTER CONTROL REMOTE RS-232C OUT RS-232C IN R G H/CS RGB Analog VIC BV Projector's indicator STAND BY OPERATE 2 MAIN POWER switch Note • You cannot cancel the turning-off process until "07" changes to "06" or "00" on the status code display - JVC DLA-QX1G | Instruction Manual - Page 36
button to select the desired VIC.) Remote control unit VIC 1 VIC 2 VIC 3 Projector VIC SELECT 1 2 3 Screen display VIC 1 Line display I Remote control unit VIC 2 VIC 3 T ZOOM W SHIFT FOCUS ON KEYSTONE SHUTTER OFF T DIGITAL ZOOM W VIC 1, 2, 3 buttons * When "5sec" is selected as the - JVC DLA-QX1G | Instruction Manual - Page 37
size: Press the ZOOM W (Wide) button. Remote control unit T ZOOM W Projector T ZOOM W I Remote control unit LOCK UNLOCK switch OPERATE HIDE BACK LIGHT VIC 3 T ZOOM W SHIFT FOCUS ON KEYSTONE SHUTTER OFF T DIGITAL ZOOM W FOCUS +/- buttons 4. Adjusting Focus Adjust focus with the FOCUS - JVC DLA-QX1G | Instruction Manual - Page 38
VIC 2 VIC 3 T ZOOM W SHIFT FOCUS ON KEYSTONE SHUTTER OFF T DIGITAL ZOOM W RM-MQX1G REMOTE CONTROL UNIT For Operating Other Functions I Turning off HIDE button again: Video image comes on again. Remote control unit HIDE Projector HIDE Note • When the video image input is changed, the HIDE - JVC DLA-QX1G | Instruction Manual - Page 39
KEYSTONE buttons EXIT MENU VIC 1 VIC 2 VIC 3 T ZOOM W SHIFT FOCUS ON KEYSTONE SHUTTER OFF T DIGITAL ZOOM W RM-MQX1G REMOTE CONTROL UNIT Remote control unit KEYSTONE Projector KEY STONE Notes • Before adjusting the trapezoidal distortion, adjust the shift setting. For details, refer to - JVC DLA-QX1G | Instruction Manual - Page 40
KEYSTONE SHUTTER OFF T DIGITAL ZOOM W RM-MQX1G REMOTE CONTROL UNIT I Setting the amount of lens shifting (SHIFT) When the lens unit (not supplied) has the lens shifting function, the projected screen can be moved vertically in position. • When using the projectors in stack configuration (stacked - JVC DLA-QX1G | Instruction Manual - Page 41
HDTV/HD-SDI VIC menu mode. When the MENU button is pressed, the projector enters one of these modes by judging the input signal being received. I 1024 x 768 Options Frequency H 48.5kHz Language Frequency V 80 Hz Information Lamp time 123 h Main : Information Back to "Main : Options" Note • - JVC DLA-QX1G | Instruction Manual - Page 42
menu Menu Image adj. VIC Slot 1 RGB Setting Switcher CH.0 VIC menu Resolution1024 x 768 Options Frequency H 48.5kHz Language Frequency V 80 Hz Information Lamp time 123 h Main : Information Back to "Main : Image adj." Note • The display languages of the menus are set to "English" when - JVC DLA-QX1G | Instruction Manual - Page 43
Lens shift UP DOWN Lens shift menu Menu Image adj. VIC Slot 1 RGB Setting Switcher CH.0 VIC menu Source 1080/50i Options Language Information Lamp time 123 h Main : Information Back to "Main : Image adj." Note • The display languages of the menus are set to "English" when shipped from - JVC DLA-QX1G | Instruction Manual - Page 44
for the menu operation. I To display the main menu Remote control unit Projector MENU MENU • When the menu is displayed, you can clear the menu VIC 2 VIC 3 T ZOOM W SHIFT FOCUS ON KEYSTONE SHUTTER OFF T DIGITAL ZOOM W RM-MQX1G REMOTE CONTROL UNIT • 5/∞ usually works for selecting the - JVC DLA-QX1G | Instruction Manual - Page 45
Menu Operations (Cont.) I Projector's buttons Menu Operation Procedure Menu operating buttons VIC SELECT 1 2 MENU VIC 1 VIC 2 VIC 3 T ZOOM W SHIFT FOCUS ON KEYSTONE SHUTTER OFF T DIGITAL ZOOM W RM-MQX1G REMOTE CONTROL UNIT Menu operating control and buttons 5 Press 3/2 to adjust the - JVC DLA-QX1G | Instruction Manual - Page 46
the selection number of the switcher connected to the projector. "CH.0" means that the switcher is not /25sF, 720/60p] Lamp time : Shows the accumulated use hours of the lightsource lamp. I Image adj. ILA device-2048 x 1536, the video image is then enlarged to a virtually full screen size of D-ILA - JVC DLA-QX1G | Instruction Manual - Page 47
Menu Operations (Cont.) Contents of the Menu (Cont.) The values in the [ ] are initial settings. I VIC menu (VIC menu 1/2) In this menu, the setting of the installed VIC can be adjusted. When RGB VIC is selected as the current input terminal, "VIC menu" is available. When HDTV/HD-SDI VIC is - JVC DLA-QX1G | Instruction Manual - Page 48
baud rate (transmission speed). [19200] Sleep time [min]: Sets the length of sleep time. A set sleep time after input signal is depleted, the projector goes into stand-by mode. (If you select "OFF," the sleep time will be cleared.) [OFF] Back color : Specifies the background color shown when - JVC DLA-QX1G | Instruction Manual - Page 49
Menu Operations (Cont.) Contents of the Menu (Cont.) The values in the [ ] are initial settings. I Disp. Posi. menu Disp.Posi. Scanning position Picture position ENTER I Keystone menu Keystone 0 Keystone : Adjusts the trapezoidal distortion of the projected image within the range of 0 to 127 - JVC DLA-QX1G | Instruction Manual - Page 50
Off the Power" on page 33. 2 Remove the filter cover. Using a Phillips screwdriver, remove the screws fixing each filter cover. Two filters are used, one on the left side (six screws) and the other on the front (four screws) of the projector. D-ILA SUPER PROJECTER D-ILA SUPER PROJECTER D-ILA SUPER - JVC DLA-QX1G | Instruction Manual - Page 51
. Finally, be sure to reinstall the filter covers. Notes • Install the filters correctly; otherwise the projector will not operate normally. • If the filters and/or filter covers are damaged, the projector may fail to operate. Then, replace with new parts. CAUTIONS • Put on rubber gloves when using - JVC DLA-QX1G | Instruction Manual - Page 52
approximately 1000 hours. When the light-source lamp approaches the end of its service life, degradation progresses rapidly. The number display on the projector and the message on the screen warn you that replacement of the lamp is required. I When the lamp's use hours exceed 900 hours "80" appears - JVC DLA-QX1G | Instruction Manual - Page 53
Troubleshooting Solutions to common problems related to your projector are described here. If none of the solutions presented here solves the problem, unplug the projector and consult your dealer. Symptom Power is not supplied. Light is not emitted, or light level is low. With power on, operation - JVC DLA-QX1G | Instruction Manual - Page 54
lamp's use hours on the menu, and if the lamp life is near its end, consult the dealer where you purchased the projector power and disconnect the power cord from the wall AC outlet. Then reconnect the power cord to AC outlet and turn on the main power again. For the turning on and off the main power - JVC DLA-QX1G | Instruction Manual - Page 55
the first line of the massage. • Input the video signals whose frequency is within the projector's specified range. SLOT1 RGB No image signal is shown for this type. Lamp replacement EXIT Warning Lamp replacement EXIT The word "Warning" blinks. • Though the frequency of the input video signal is - JVC DLA-QX1G | Instruction Manual - Page 56
switch and wait until the projector cools down, and turn on the MAIN POWER switch again. If the error code is still indicated, consult your dealer. • Check the room temperature and ventilate the room. • The lamp is turned off while projecting. • There may be something wrong in the light-source - JVC DLA-QX1G | Instruction Manual - Page 57
and projection screen sizes differs depending on the lens unit (not supplied) you are using. • The projection distance and projection screen sizes listed here are only for a guide. Use them as reference when setting the projector. GL-MQ1010G Projection screen size (Diagonal length) 55" (1.40) 60 - JVC DLA-QX1G | Instruction Manual - Page 58
Appendix (Cont.) GL-MQ1015SG Projection screen size (Diagonal length) 55" (1.40) 60" (1.52) 70" (1.78) 80" (2.03) 90" (2.29) 100" (2.54) 110" (2.79) 120" (3.05) 130" (3.30) 140" (3.56) 150" (3.81) 160" (4.06) 170" (4.32) 180" (4.57) 190" (4.83) 200" (5.08) 210" (5.33) 220" (5.59) 230" (5.84) 240" - JVC DLA-QX1G | Instruction Manual - Page 59
Appendix (Cont.) GL-MQ1020ZG Projection screen size (Diagonal length) 73" (1.85) 80" (2.03) 87" (2.21) 90" (2.29) 100" (2.54) 106" (2.69) 110" (2.79) 116" (2.95) 120" (3.05) 130" (3.30) 140" (3.56) 150" (3.81) 160" (4.06) 170" (4.32) 180" (4.57) 190" (4.83) 200" (5.08) 210" (5.33) 220" (5.59) 230" - JVC DLA-QX1G | Instruction Manual - Page 60
Appendix (Cont.) GL-MQ1023SZG Projection screen size (Diagonal length) 55" (1.40) 60" (1.52) 70" (1.78) 73" (1.85) 80" (2.03) 90" (2.29) 100" (2.54) 110" (2.80) 120" (3.05) 130" (3.30) 140" (3.56) 150" (3.81) 160" (4.06) 170" (4.32) 180" (4.57) 190" (4.83) 200" (5.08) 210" (5.33) 220" (5.59) 230" - JVC DLA-QX1G | Instruction Manual - Page 61
ILA device, 1 lens, 3 primary color optical shutter method • D-ILA : 4 : 3) • Light-source lamp 2.0 kW xenon lamp Electrical system • Resolution • Scanning frequency * RS-232C-interface specified control terminal for controlling this projector with a personal computer. • RS-232C OUT : 1-line - JVC DLA-QX1G | Instruction Manual - Page 62
AC 200 V to 240 V, 50/60 Hz • Power consumption 16 A (at 200V) • Allowable operation temperature + 5°C to + 35°C ( to page 7.) * Design and specifications are subject to change without notice. * D-ILA devices are manufactured with a very high-precision technology, allowing 99.99% of the pixels - JVC DLA-QX1G | Instruction Manual - Page 63
Specifications (Cont.) Outside dimensions I Top 30 (1-3/16) Unit: mm (inch) ENGLISH 59 (2-3/8) 59 (2-3/8) 838 (33) I Front 720 (28-3/8) 820 (32-5/16) 820 (32-5/16) 720 (28-3/8) φ 50 (φ 2) 660 (26) 368 (14-1/2) ~ 420 (16-9/16) 420 (16-9/16) ~ 472 (18-5/8) 30 (1-3/16) I Side 42 (1-11/16) - JVC DLA-QX1G | Instruction Manual - Page 64
1 bit None * Initial value. To change the value, refer to page 46. 2. Command Format 2-1. Command data format (from the computer to the projector) When sending a control command, use the following data format. Header ID SP [ Command SP ] Parameter CR Header : Designates the head of data - JVC DLA-QX1G | Instruction Manual - Page 65
value Designates the 2-byte hexadecimal value with the sign as the 4-digit (byte) characters. Designation allowable range : "8000" to "7FFF" (2) ON/OFF Designates the status (ON/OFF) of the projector, such as POWER and HIDE. Character "0" "1" Hex. 30 31 Meaning OFF ON (3) Special parameters - JVC DLA-QX1G | Instruction Manual - Page 66
Memorandum - JVC DLA-QX1G | Instruction Manual - Page 67
MANUEL D'INSTRUCTIONS SUPER PROJECTEUR DLA-QX1G FRANÇAIS - JVC DLA-QX1G | Instruction Manual - Page 68
et respectez attentivement toutes les instructions pour profiter au maximum des Tout changement ou modification non approuvés par JVC peut annuler l'autorisation de l'utilisateur d'utiliser revendeur. À propos de la brûlure du dispositif D-ILA Ne projetez pas la même image fixe pendant longtemps ni - JVC DLA-QX1G | Instruction Manual - Page 69
endommagé. L'appareil doit être monté conformément aux instructions du fabricant et doit utiliser un support recommandé par le fabricant. - Quand vous utilisez l' és. - Ne regardez pas dans l'objectif de projection quand la lampe d'éclairage est allumée. Une exposition de vos yeux à une forte lumière peut - JVC DLA-QX1G | Instruction Manual - Page 70
un bâti sauf si une ventilation correcte existe et si les instructions du fabricant ont été respectées.) Pour une ventilation correcte, sé gaz xénon est contenu sous haute pression à l'intérieur de la lampe source de lumière (module lampe) de ce projecteur. Si vous la laissez tomber, la frappez ou - JVC DLA-QX1G | Instruction Manual - Page 71
édiatement afin d'éviter tout risque d'électrocution en cas de connexion accidentelle au secteur. Si vous devez fixer une nouvelle fiche, suivez les instructions données ci-dessous: AVERTISSEMENT: CET APPAREIL DOIT ÊTRE MIS À LA TERRE. IMPORTANT: Les fils du cordon d'alimentation secteur de cet - JVC DLA-QX1G | Instruction Manual - Page 72
la mise au point 35 Pour utiliser les autres fonctions 36 s Mise hors service de l'image vidéo (HIDE) ..... 36 s Interruption de l'éclairage du Nettoyage et remplacement des filtres 48 Remplacement de la lampe source de lumière 50 Guide de dépannage 51 Messages d'avertissement 53 Appendice 55 - JVC DLA-QX1G | Instruction Manual - Page 73
Accessoires Les accessoires suivants sont fournis avec ce projecteur. Vérifiez s'ils sont bien tous présents. Si l'un de ces accessoires manquait, veuillez contacter votre revendeur. LOCK OPERATE MODE BLAICGKHT UNLOCK ENTER MENU EXIT VIC 1 VIC 2 VIC 3 T ZOOMW SHIFT KEYSTONE FOCUS T - JVC DLA-QX1G | Instruction Manual - Page 74
fourni doit être connecté. Pour les détails, référez-vous à "Connexion du cordon d'alimentation (fourni)" à la page 31. 6 Interrupteur d'alimentation MAIN POWER C'est l'interrupteur d'alimentation principale. Quand il est mis sur la position ON, le projecteur entre en mode d'attente et l'indicateur - JVC DLA-QX1G | Instruction Manual - Page 75
lumière) Cet évent évacue l'air chaud provenant du ventilateur de refroidissement de l'alimentation de la lampe source de lumière. Ce ventilateur continue de fonctionner aussi longtemps que l'interrupteur MAIN POWER est sur la position ON (sous tension). p, q Évents de sortie d'air Évents pour les - JVC DLA-QX1G | Instruction Manual - Page 76
: Si vous appuyez sur la touche OPERATE, le projecteur ne se met pas sous tension. 2 Touche HIDE Utilisez cette touche pour mettre hors service l'image temporairement. Appuyez de nouveau pour rétablir l'image. Pour les détails, référez-vous à la page 36. 3 Touches KEYSTONE Utilisez ces touches pour - JVC DLA-QX1G | Instruction Manual - Page 77
de sortie d'air pendant le mode de refroidissement. • Le ventilateur de refroidissement pour l'alimentation de la lampe source de lumière continue de fonctionner aussi longtemps que l'interrupteur MAIN POWER est sur la position ON (sous tension). w Touche EXIT Utilisez cette touche en mode de menu - JVC DLA-QX1G | Instruction Manual - Page 78
commande fourni. 2 Prise RS-232C OUT (D-sub 9 broches) C'est une prise d'interface RS-232C spécialisée. Quand un autre projecteur DLA-QX1G est connecté à ce projecteur, vous pouvez autoriser un ordinateur à commander plusieurs projecteurs en même temps. Pour les détails, consultez votre revendeur - JVC DLA-QX1G | Instruction Manual - Page 79
Panneau de connexion (suite) À propos des cartes VIC optionnelles Carte VIC analogique HDTV Å DEL Ce témoin DEL s'allume quand la carte VIC analogique HDTV est choisie. ı Prise d'entrée Y, Pb, Pr (BNC x 3) Ce sont les prises d'entrée Y, Pb, Pr pour le signal HD (SMPTE260M/274M/296M). Carte VIC HD- - JVC DLA-QX1G | Instruction Manual - Page 80
", page 11. • La touche OPERATE ne fonctionne pas pendant environ 1 minute après que la lampe source de lumière a été allumée. Utilisez cette touche une minute plus tard environ. Mémo au point s'approche. Pour les détails, référez-vous à la page 35. 8 Touches DIGITAL ZOOM T/W Ne sont pas en service. - JVC DLA-QX1G | Instruction Manual - Page 81
MENU VIC 1 VIC 2 VIC 3 T ZOOM W SHIFT FOCUS ON KEYSTONE SHUTTER OFF T DIGITAL ZOOM W RM-MQX1G REMOTE CONTROL UNIT 1 2 3 4 5 6 7 8 9 sur "UNLOCK". y Touche HIDE Utilisez cette touche pour mettre hors service l'image temporairement. Appuyez de nouveau pour rétablir l'image. Pour les - JVC DLA-QX1G | Instruction Manual - Page 82
Commandes et fonctions (suite) Touche de curseur (5/∞/2/3) / ENTER (commande des menus) La télécommande fournie avec ce projecteur possède une seule touche pour naviguer dans les menus. Appuyer sur la touche de commande des menus trop fort peut entraîner une commande incorrecte. C'est pourquoi, - JVC DLA-QX1G | Instruction Manual - Page 83
en arrière ou d'arrière en avant; sinon, cela pourrait entraîner une variation des couleurs ou réduire la durée de vie de la lampe. • Ne bloquez pas les évents de sortie d'air. N'utilisez pas de couverture recouvrant le projecteur et bloquant les évents de sortie d'air. Laissez suffisamment d'espace - JVC DLA-QX1G | Instruction Manual - Page 84
la suspension du projecteur au plafond • Pour éviter que le projecteur ne tombe ou se renverse, il est recommandé de fixer le projecteur à son support avec des boulons. • Lors du montage du projecteur au plafond, installez d'abord une tablette spéciale et placez le projecteur solidement dessus. Pour - JVC DLA-QX1G | Instruction Manual - Page 85
Installation du projecteur (suite) Ajustement de l'inclinaison du projecteur L'angle vertical et le niveau du projecteur peuvent être ajustés avec les pieds ajustables situés sous l'appareil. s Ajustement de l'angle vertical du projecteur Soulevez le projecteur, tournez le pied ajustable avant et - JVC DLA-QX1G | Instruction Manual - Page 86
broche de verrouillage central du décalage n'a peut-être pas été retirée. Dans ce cas, consultez votre revendeur ou un centre de service. • Lors de l'utilisation de la configuration à empilement, installez d'abord le cadre spécialement conçu pour la configuration à empilement. Décidez l'emplacement - JVC DLA-QX1G | Instruction Manual - Page 87
La longueur diagonale d'un écran au format d'image 16:9 est d'environ 91,8%, celle d'un écran au format d'image 4:3. Cette valeur est un guide uniquement (référence). • Si la distorsion trapézoïdale est ajustée, l'écran projeté devient plus petit. s Objectifs optionnels Ce projecteur ne comprend pas - JVC DLA-QX1G | Instruction Manual - Page 88
Installation du projecteur (suite) Fonction de décalage de l'objectif Certains des objectifs vendus séparément possèdent une fonction de décalage de l'objectif. Pour les objectifs avec une fonction de décalage: Si le décalage de l'objectif est réglé sur 50%, installez le projecteur de façon que le - JVC DLA-QX1G | Instruction Manual - Page 89
Installation du projecteur (suite) Fonction de décalage de l'objectif (suite) Valeur maximale du décalage La valeur maximale du décalage est limitée par la valeur du décalage horizontal réalisé. La valeur du décalage est définie comme suit: Quand la largeur de l'écran est comptée comme 1, le dé - JVC DLA-QX1G | Instruction Manual - Page 90
Installation du projecteur (suite) Plage et distance efficace de la télécommande La télécommande peut être utilisée comme télécommande sans fil ou avec fil. s Utilisation comme télécommande sans fil Dirigez la télécommande sur le capteur de télécommande à l'avant du projecteur ou sur le panneau de - JVC DLA-QX1G | Instruction Manual - Page 91
Connexion de divers appareils Signaux pouvant être entrés dans le projecteur Les signaux suivants peuvent être entrés dans le projecteur par les cartes VIC (carte d'entrée vidéo) correspondantes. • Avant la connexion, assurez-vous de mettre hors tension le projecteur et les appareils connectés. • - JVC DLA-QX1G | Instruction Manual - Page 92
Connexion de divers appareils (suite) Exemples de configuration du système Avant la connexion, assurez-vous de mettre hors tension le projecteur et les autres appareils à connecter. • Lisez aussi les modes d'emploi qui accompagnent chaque appareil. Exemple d'un système de base • En connectant un - JVC DLA-QX1G | Instruction Manual - Page 93
Connexion de divers appareils (suite) Connexion d'appareils RVB Avant la connexion, assurez-vous de mettre hors tension le projecteur et les appareils RVB. • Lisez attentivement les modes d'emploi qui accompagnent chaque appareil. • Préparez et utilisez des câbles de connexion RVB disponibles séparé - JVC DLA-QX1G | Instruction Manual - Page 94
Connexion de divers appareils (suite) Connexion d'appareils analogiques HD Si vous installez une carte VIC (carte d'entrée vidéo) analogique HDTV au projecteur, vous pouvez utiliser des appareils analogiques HD avec des prises Y, Pb et Pr. Avant la connexion, assurez-vous de mettre hors tension le - JVC DLA-QX1G | Instruction Manual - Page 95
Connexion de divers appareils (suite) Connexion d'appareils numériques HD Si vous installez une carte VIC (carte d'entrée vidéo) HD-SDI au projecteur, vous pouvez utiliser des appareils numériques HD munis d'une interface SDI. Avant la connexion, assurez-vous de mettre hors tension le projecteur et - JVC DLA-QX1G | Instruction Manual - Page 96
de connexion RS-232C disponible séparément. CONTROL REMOTE RS-232C OUT RS-232C IN Câble de connexion RS-232C (non fourni) • Quand un autre DLA-QX1G est connecté à ce projecteur à l'aide de la prise RS-232C OUT, vous pouvez utiliser l'ordinateur pour commander plusieurs - JVC DLA-QX1G | Instruction Manual - Page 97
alimentation du projecteur. Pour l'instant, ne mettez pas l'interrupteur MAIN POWER sur la position ON. • Ne mettez pas le projecteur sous tension de l'objectif (noir), installé initialement, à cause de la chaleur de la lampe source de lumière. s Préparation pour le Royaume-Uni uniquement Fixez au - JVC DLA-QX1G | Instruction Manual - Page 98
édure de base pour l'utilisation normale du projecteur. 1. Mise sous tension 1 Mettez l'interrupteur MAIN POWER du projecteur sur ON. ON [ ❙ ]: L'appareil est mis sous tension et l'indicateur STAND s'allume, il peut demander plus d'une minute à la lampe pour chauffer et fonctionner correctement. 32 - JVC DLA-QX1G | Instruction Manual - Page 99
FOCUS W ENTER CONTROL REMOTE RS-232C OUT RS-232C IN R G H/CS RGB Analog VIC BV Indicateur du projecteur STAND BY OPERATE 2 Interrupteur MAIN POWER Remarque • Vous ne pouvez pas annuler le processus de mise hors tension avant que "07" change en "06" ou "00" sur l'affichage de code - JVC DLA-QX1G | Instruction Manual - Page 100
VIC 1 Affichage de la ligne d'entrée s Télécommande ENTER UNLOCK EXIT MENU VIC 1 VIC 2 VIC 3 T ZOOM W SHIFT FOCUS ON KEYSTONE SHUTTER OFF T DIGITAL ZOOM W Touches VIC 1, 2, 3 * Quand "5sec" est choisi pour l'affichage de la ligne d'entrée dans les menus, l'affichage de la ligne d'entr - JVC DLA-QX1G | Instruction Manual - Page 101
LOCK UNLOCK OPERATE HIDE BACK LIGHT ENTER LOCK UNLOCK Touches ZOOM T/W EXIT MENU VIC 1 VIC 2 VIC 3 T ZOOM W SHIFT FOCUS ON KEYSTONE SHUTTER OFF T DIGITAL ZOOM W Touches FOCUS +/- 4. Ajustement de la mise au point Ajustez la mise au point avec les touches FOCUS +/- (sur le panneau de - JVC DLA-QX1G | Instruction Manual - Page 102
les autres fonctions s Mise hors service de l'image vidéo (HIDE) L'image vidéo peut être mise temporairement hors service. Appuyez une fois sur la 1 VIC 2 VIC 3 T ZOOM W SHIFT FOCUS ON KEYSTONE SHUTTER OFF T DIGITAL ZOOM W RM-MQX1G REMOTE CONTROL UNIT Remarque • Quand l'entrée de l'image - JVC DLA-QX1G | Instruction Manual - Page 103
LIGHT LOCK UNLOCK ENTER Touche EXIT Touches KEYSTONE EXIT MENU VIC 1 VIC 2 VIC 3 T ZOOM W SHIFT FOCUS ON KEYSTONE SHUTTER OFF T DIGITAL ZOOM W RM-MQX1G REMOTE CONTROL UNIT Télécommande KEYSTONE Projecteur KEY STONE Remarques • Avant d'ajuster la distorsion trapézoïdale, ajustez le - JVC DLA-QX1G | Instruction Manual - Page 104
Télécommande OPERATE HIDE BACK LIGHT ENTER LOCK UNLOCK Touches SHIFT +/- EXIT MENU VIC 1 VIC 2 VIC 3 T ZOOM W SHIFT FOCUS ON KEYSTONE SHUTTER OFF T DIGITAL ZOOM W RM-MQX1G REMOTE CONTROL UNIT s Réglage de la valeur de décalage de l'objectif (SHIFT) Si l'objectif (non fourni) possède la - JVC DLA-QX1G | Instruction Manual - Page 105
Réglas Menu VIC Options Language Informations VIC Slot 1 RGB Commutateur CH.0 Resolution 1024 x 768 Frequency H 48.5kHz Frequency V 80 Hz Temps lampe 123 h Menu principal: Informations Retour au "Menu principal: Options" Remarque • La langue d'affichage des menus est réglée sur "English - JVC DLA-QX1G | Instruction Manual - Page 106
Menu VIC Options Language Informations VIC Slot 1 RGB Commutateur CH.0 Résolution 1024 x 768 Fréquence H 48.5kHz Fréquence V 80 Hz Temps lampe 123 h Menu principal: Informations Retour au "Menu principal: Qlt image" Remarque • La langue d'affichage des menus est réglée sur "English" à l'exp - JVC DLA-QX1G | Instruction Manual - Page 107
BAS Menu Changement objectif Menu Qlt image Réglage Menu VIC Options Language Informations VIC Slot 1 RGB Commutateur CH.0 Source 1080/50i Temps lampe 123 h Menu principal: Informations Retour au "Menu principal: Qlt image." Remarque • La langue d'affichage des menus est réglée sur "English - JVC DLA-QX1G | Instruction Manual - Page 108
s Télécommande OPERATE HIDE BACK LIGHT ENTER LOCK UNLOCK EXIT MENU VIC 1 VIC 2 VIC 3 T ZOOM W SHIFT FOCUS ON KEYSTONE SHUTTER OFF T DIGITAL ZOOM W RM-MQX1G REMOTE CONTROL UNIT 42 • 5/∞ fonctionnent normalement pour choisir un élément. Quand le menu "Temp. couleur" ou "Changement - JVC DLA-QX1G | Instruction Manual - Page 109
LIGHT ENTER Commande et touches de commande des menus LOCK UNLOCK EXIT MENU VIC 1 VIC 2 VIC 3 T ZOOM W SHIFT FOCUS ON KEYSTONE SHUTTER OFF T DIGITAL ZOOM W 1 Appuyez sur la touche MENU. Le menu principal apparaît. • Quand l'image vidéo est projetée sur l'écran , le menu correspondant au - JVC DLA-QX1G | Instruction Manual - Page 110
, 1080/24p, 1080/25sF, 720/60p] Temps lampe : Indique le nombre d'heures d'utilisation accumulées de la lampe source de lumière. 44 s Menu Qlt image à celle du dispositif D-ILA-2048 x 1536, l'image vidéo est agrandie à une taille virtuelle plein écran du dispositif D-ILA et projetée. [Aspect] - JVC DLA-QX1G | Instruction Manual - Page 111
Utilisation des menus (suite) Contenu des menus (suite) Les valeurs entre crochets [ ] sont les réglages initiaux. s Menu VIC (Menu VIC 1/2) Dans ce menu, les réglages de la carte VIC installée peuvent être ajustés. Quand VIC RGB est choisi comme prise d'entrée actuelle, le "Menu VIC" est - JVC DLA-QX1G | Instruction Manual - Page 112
Utilisation des menus (suite) Contenu des menus (suite) Les valeurs entre crochets [ ] sont les réglages initiaux. s Menu Options Options 1 Position menu ENTER Affichage des menus 15sec ON Aff source 5sec OFF Keystone ENTER Options 2 ENTER Options 2 Invers D-G OFF RS-232C [bps] 9600 - JVC DLA-QX1G | Instruction Manual - Page 113
Utilisation des menus (suite) Contenu des menus (suite) Les valeurs entre crochets [ ] sont les réglages initiaux. s Menu Pos.affi. Pos.affi. Position digitalisation Position image ENTER s Menu Keystone Keystone 0 Keystone : Ajuste la distorsion trapézoïdale de l'image projetée dans une - JVC DLA-QX1G | Instruction Manual - Page 114
Mettez le projecteur en mode d'attente et mettez l'interrupteur MAIN POWER sur OFF. Mettez le projecteur en mode d'attente et assurez- un autre à l'avant (quatre vis) du projecteur. D-ILA SUPER PROJECTER D-ILA SUPER PROJECTER D-ILA SUPER PROJECTER 3 Retirez les filtres. Pincez la partie centrale - JVC DLA-QX1G | Instruction Manual - Page 115
4 Nettoyez les filtres. Lavez les filtres à l'eau en utilisant un détergent neutre et faites-le sécher à l'ombre. 5 Réinstallez les filtres. Inversez la procédure de retrait. Et n'oubliez pas de réinstaller les couvercles de filtre. Remarques • Installez les filtres correctement; sinon, le - JVC DLA-QX1G | Instruction Manual - Page 116
Laissez-la refroidir pendant au moins une heure avant de réaliser le remplacement. • Avant de commencer le remplacement de la lampe source de lumière, mettez l'interrupteur MAIN POWER sur OFF et déconnectez le cordon d'alimentation de la prise murale. Si vous réalisez le remplacement avec le cordon - JVC DLA-QX1G | Instruction Manual - Page 117
Guide de dépannage Les solutions aux problèmes communs relatifs à votre projecteur sont connecté? • L'interrupteur MAIN POWER est-il sur ON? • Une tension correcte est-elle utilisée? • Le disjoncteur est-il ouvert? • La fonction de protection de la lampe est-elle en service? (Cela peut se produire - JVC DLA-QX1G | Instruction Manual - Page 118
Guide de dépannage (suite) Symptôme Une couleur spécifique n'est pas affichée. La partie supérieure de l'image vidéo est courbée ou déformée. La position de projection sur l'écran a bougé. Cause probable • La durée de vie de la lampe est- elle proche de sa fin? • Lors de la connexion à un - JVC DLA-QX1G | Instruction Manual - Page 119
vidéo dont la fréquence est comprise dans la plage spécifiée du projecteur. SLOT1 RGB No image signal is shown for this type. Lamp replacement EXIT Warning Lamp replacement EXIT Le mot "Warning" clignote. • Bien que la fréquence du signal vidéo entré se trouve dans une plage acceptable, les autres - JVC DLA-QX1G | Instruction Manual - Page 120
. • Vérifiez la température de la pièce et ventilez-la. • La lampe s'éteint pendant la projection. • Il y a peut-être un problème avec la lampe source de lumière. Mettez l'interrupteur MAIN POWER sur OFF, débranchez le cordon d'alimentation et consultez votre revendeur. • Une erreur interne - JVC DLA-QX1G | Instruction Manual - Page 121
l'objectif (non fourni) que vous utilisez. • Les distances de projection et les tailles d'écran de projection données ici ne sont que des guides. Utilisez-les comme référence pour régler le projecteur. GL-MQ1010G Taille de l'écran de projection Pour le format d'image 4:3 (Longueur diagonale) 55 - JVC DLA-QX1G | Instruction Manual - Page 122
Appendice (suite) GL-MQ1015SG Taille de l'écran de projection Pour le format d'image 4:3 (Longueur diagonale) Largeur Distance de projection 55" (1,40) 60" (1,52) ---- 4,0 (1,22) ---- 5,6 (1,7) 70" (1,78) 80" (2,03) 90" (2,29) 4,7 (1,42) 5,3 (1,63) 6,0 (1,83) 6,6 (2,0) 7,9 (2,4) 8,9 (2,7) - JVC DLA-QX1G | Instruction Manual - Page 123
Appendice (suite) GL-MQ1020ZG unité: pouce (m) Taille de l'écran de projection Pour le format d'image 4:3 Pour le format de l'image 16:9 (Longueur diagonale) Largeur Distance de projection Largeur Distance de projection 73" (1,85) 80" (2,03) 87" (2,21) 90" (2,29) 100" (2,54) 106" (2,69) 110" - JVC DLA-QX1G | Instruction Manual - Page 124
Appendice (suite) GL-MQ1023SZG unité: pouce (m) Taille de l'écran de projection Pour le format d'image 4:3 Pour le format de l'image 16:9 (Longueur diagonale) Largeur Distance de projection Largeur Distance de projection 55" (1,40) 60" (1,52) 70" (1,78) 73" (1,85) 80" (2,03) 90" (2,29) 100" - JVC DLA-QX1G | Instruction Manual - Page 125
Méthode de projection Dispositif 3D-ILA, 1 objectif, 3 méthodes à obturation optique des couleurs primaires • Dispositif D-ILA 1,3 pouces (env. 3,3 cm mesurés en diagonale (*avec un format d'image de 4 : 3) • Lampe source de lumière Lampe au xénon de 2,0 kW Système électrique • Résolution 2 048 - JVC DLA-QX1G | Instruction Manual - Page 126
(203 livres) • Accessoires (Référez-vous à la page 7.) * La conception et les spécifications sont sujettes à changement sans notification. * Les dispositifs D-ILA sont fabriqués avec une technologie de haute précision, permettant à 99,99% des pixels d'être effectifs. Seulement 0,01% ou moins des - JVC DLA-QX1G | Instruction Manual - Page 127
Spécifications (suite) Dimensions extérieures s Dessus 30 (1-3/16) Unité: mm (pouces) 59 (2-3/8) 59 (2-3/8) 838 (33) s Avant 720 (28-3/8) 820 (32-5/16) 820 (32-5/16) 720 (28-3/8) φ 50 (φ 2) 660 (26) 368 (14-1/2) ~ 420 (16-9/16) 420 (16-9/16) ~ 472 (18-5/8) 30 (1-3/16) s Côté 42 (1-11/16) - JVC DLA-QX1G | Instruction Manual - Page 128
Spécifications (suite) Commande externe RS-232C En connectant un ordinateur à la prise RS-232C IN, vous pouvez commander le projecteur. Utilisez un câble de connexion inversé comme câble de connexion RS-232C. Les commandes du projecteur et les données de réponse des commandes sont expliquées ici. - JVC DLA-QX1G | Instruction Manual - Page 129
'un caractère de 4 chiffres (octets). Plage de désignation permise :"8000" à "7FFF" (2) ON/OFF Désigne l'état (ON/OFF) du projecteur, tel que POWER et HIDE. Caratère "0" "1" Hex. 30 31 Signification OFF ON (3) Paramètres spéciaux Paramètres de commutation de l'entrée: Caratère "1" "2" "3" Hex - JVC DLA-QX1G | Instruction Manual - Page 130
Memorandum - JVC DLA-QX1G | Instruction Manual - Page 131
- JVC DLA-QX1G | Instruction Manual - Page 132
VICTOR COMPANY OF JAPAN, LIMITED © 2002 VICTOR COMPANY OF JAPAN, LIMITED Printed in Japan 0302-Y-M-VP SUPER PROJECTOR DLA-QX1G
-
 1
1 -
 2
2 -
 3
3 -
 4
4 -
 5
5 -
 6
6 -
 7
7 -
8
-
9
-
10
-
11
-
12
-
13
-
14
-
15
-
16
-
17
-
18
-
19
-
20
-
21
-
22
-
23
-
24
-
25
-
26
-
27
-
28
-
29
-
30
-
31
-
32
-
33
-
34
-
35
-
36
-
37
-
38
-
39
-
40
-
41
-
42
-
43
-
44
-
45
-
46
-
47
-
48
-
49
-
50
-
51
-
52
-
53
-
54
-
55
-
56
-
57
-
58
-
59
-
60
-
61
-
62
-
63
-
64
-
65
-
66
-
67
-
68
-
69
-
70
-
71
-
72
-
73
-
74
-
75
-
76
-
77
-
78
-
79
-
80
-
81
-
82
-
83
-
84
-
85
-
86
-
87
-
88
-
89
-
90
-
91
-
92
-
93
-
94
-
95
-
96
-
97
-
98
-
99
-
100
-
101
-
102
-
103
-
104
-
105
-
106
-
107
-
108
-
109
-
110
-
111
-
112
-
113
-
114
-
115
-
116
-
117
-
118
-
119
-
120
-
121
-
122
-
123
-
124
-
125
-
126
-
127
-
128
-
129
-
130
-
131
-
132
 |
 |
DLA-QX1G
INSTRUCTIONS
SUPER PROJECTOR
MANUEL D’INSTRUCTIONS : SUPER PROJECTEUR
OPERATE
T
W
T
W
ON
OFF
(Lenses are not supplied.)
LCT0963-002A
For Customer Use:
Enter below the Serial No. which is located
on the side panel of the cabinet. Retain this
information for future reference.
Pour l
’
utilisateur:
Inscrivez ci-dessous le No de série situé sur
le panneau latéral du coffret de l’appareil.
Conservez cette information à titre
d’information.
Model No.
No de modèle
DLA-QX1G
Serial No.
No de série
ENGLISH
FRAN
Ç
AIS