JVC DLA-QX1G Instruction Manual - Page 17
Remote Control Unit Cont.
 |
View all JVC DLA-QX1G manuals
Add to My Manuals
Save this manual to your list of manuals |
Page 17 highlights
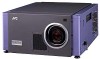
Controls and Features (Cont.) Remote Control Unit (Cont.) EN UNLOCK EX y t r e w q KEYSTON O RM-MQX1G REMOTE CONTROL UNIT LOCK UNLOCK LOCK OPERATE MODE BACK LIGHT ENTER EXIT MENU VIC 1 VIC 2 VIC 3 T ZOOM W SHIFT FOCUS ON KEYSTONE SHUTTER OFF T DIGITAL ZOOM W RM-MQX1G REMOTE CONTROL UNIT 1 2 3 4 5 6 7 8 9 p ENGLISH 9 SHUTTER ON/OFF buttons Use these buttons to control the internal shutter. ON : Closes the shutter to turn off the projection. OFF : Opens the shutter to turn on the projection. For details on the operation, refer to page 36. p Wired remote control terminal To use the remote control unit as a wired unit, connect the supplied remote control cable between this terminal and the REMOTE terminal on the connector panel of the projector. For details, refer to page 24. • The signal transmitter of the remote control unit will stop working when the cable is connected to this terminal. q KEYSTONE buttons Use these buttons to correct a trapezoidal distortion of the projected image. For details on the operation, refer to page 37. w ZOOM T/W buttons Use these buttons to adjust the projected screen size. (They work only when the lens unit attached to this projector has the zooming function.) T (Tele) : The projected screen size decreases. W (Wide) : The projected screen size increases. For details on the operations, refer to page 35. e SHIFT +/- buttons Use these buttons to adjust the height of the projection screen when projectors are used in a stack configuration*. (They work only when the lens unit attached to this projector has the lens shift function.) + : Moves the screen upwards. - : Moves the screen downwards. For details on the operation, refer to page 38. Memo * Stack configuration: Up to three projectors can be stacked and used together (stack configuration). This allows you to project sufficiently bright image in a fairly large auditorium or relatively bright place. For details, refer to page 20. r EXIT button Use this button to return to the previous screen when you are operating the menu. For details on the operation, refer to page 43. t LOCK Ô UNLOCK switch When this switch is set to "LOCK," the ZOOM T/W buttons, the SHIFT +/- buttons, and the FOCUS +/- buttons do not work. When the adjustment is needed, set the switch to "UNLOCK." y HIDE button Use this button to turn off the video image temporarily. Pressing it again makes the video image to resume. For details on the operation, refer to page 36. 15
-
 1
1 -
2
-
3
-
4
-
5
-
6
-
7
-
8
-
9
-
10
-
11
-
 12
12 -
 13
13 -
 14
14 -
 15
15 -
 16
16 -
 17
17 -
 18
18 -
 19
19 -
 20
20 -
 21
21 -
 22
22 -
23
-
24
-
25
-
26
-
27
-
28
-
29
-
30
-
31
-
32
-
33
-
34
-
35
-
36
-
37
-
38
-
39
-
40
-
41
-
42
-
43
-
44
-
45
-
46
-
47
-
48
-
49
-
50
-
51
-
52
-
53
-
54
-
55
-
56
-
57
-
58
-
59
-
60
-
61
-
62
-
63
-
64
-
65
-
66
-
67
-
68
-
69
-
70
-
71
-
72
-
73
-
74
-
75
-
76
-
77
-
78
-
79
-
80
-
81
-
82
-
83
-
84
-
85
-
86
-
87
-
88
-
89
-
90
-
91
-
92
-
93
-
94
-
95
-
96
-
97
-
98
-
99
-
100
-
101
-
102
-
103
-
104
-
105
-
106
-
107
-
108
-
109
-
110
-
111
-
112
-
113
-
114
-
115
-
116
-
117
-
118
-
119
-
120
-
121
-
122
-
123
-
124
-
125
-
126
-
127
-
128
-
129
-
130
-
131
-
132
 |
 |
