JVC DLA-QX1G Instruction Manual - Page 24
Lens Shift Function
 |
View all JVC DLA-QX1G manuals
Add to My Manuals
Save this manual to your list of manuals |
Page 24 highlights
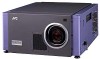
Installing the Projector (Cont.) Lens Shift Function Some of the separately sold lenses have a lens shift function. For the lens with the lens shift function: When the lens shift is set to 50%, install the projector so that the bottom edge of the projection screen is at the same height as the center of the lens. When the lens shift is set to -50%, install the projector so that the top edge of the projection screen is at the same height as the center of the lens . For the lens without the lens shift function or when the lens shift is set to 0%: Install the projector so that the center of the projection screen is at the same height as the center of the lens. 90° 90° 90° 90° For the lenses with the lens shift function When the lens shift is set to 50% 90° Center line of the lens STAND BY OPERATE HIDE VIC SELECT 1 KEY STONE 2 3 EXIT MENU T ZOOM FOCUS ENTER W CONTROL REMOTE RS-232C OUT RS-232C IN RGB Analog VIC R G B Y H/CS When the lens shift is set to -50% Center line of the lens STAND BY OPERATE HIDE VIC SELECT 1 KEY STONE 2 3 EXIT MENU T ZOOM FOCUS ENTER W CONTROL REMOTE RS-232C OUT RS-232C IN RGB Analog VIC R G B Y H/CS 90° 90° 90° For the lenses without the lens shift function or when the lens shift is set to 0% 90° Center line of the lens STAND BY OPERATE HIDE VIC SELECT 1 KEY STONE 2 3 EXIT MENU T ZOOM FOCUS ENTER W CONTROL REMOTE RS-232C OUT RS-232C IN RGB Analog VIC R G B Y H/CS • When using the lens with the shift function, you can adjust the projected image vertically using the setting menu or the SHIFT +/- buttons on the remote control unit. • When using the projectors in stack configuration (stacked one over another), make adjustment so that the picture of each projector overlaps exactly using the lens shift function. If the horizontal adjustment is needed, consult your dealer. • For detailed adjustment procedures, refer to pages 38 and 46. • For maximum amount of shift, refer to "Maximum amount of shift" on page 23. (When the lens needs to be adjusted in horizontal angles, consult your dealer.) 22
-
 1
1 -
2
-
3
-
4
-
5
-
6
-
7
-
8
-
9
-
10
-
11
-
12
-
13
-
14
-
15
-
16
-
17
-
18
-
 19
19 -
 20
20 -
 21
21 -
 22
22 -
 23
23 -
 24
24 -
 25
25 -
 26
26 -
 27
27 -
 28
28 -
 29
29 -
30
-
31
-
32
-
33
-
34
-
35
-
36
-
37
-
38
-
39
-
40
-
41
-
42
-
43
-
44
-
45
-
46
-
47
-
48
-
49
-
50
-
51
-
52
-
53
-
54
-
55
-
56
-
57
-
58
-
59
-
60
-
61
-
62
-
63
-
64
-
65
-
66
-
67
-
68
-
69
-
70
-
71
-
72
-
73
-
74
-
75
-
76
-
77
-
78
-
79
-
80
-
81
-
82
-
83
-
84
-
85
-
86
-
87
-
88
-
89
-
90
-
91
-
92
-
93
-
94
-
95
-
96
-
97
-
98
-
99
-
100
-
101
-
102
-
103
-
104
-
105
-
106
-
107
-
108
-
109
-
110
-
111
-
112
-
113
-
114
-
115
-
116
-
117
-
118
-
119
-
120
-
121
-
122
-
123
-
124
-
125
-
126
-
127
-
128
-
129
-
130
-
131
-
132
 |
 |
