Kenmore HE2t User Guide - Page 87
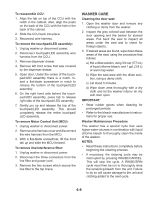
To remove Motor Control Unit MCU - washer door seal
 |
View all Kenmore HE2t manuals
Add to My Manuals
Save this manual to your list of manuals |
Page 87 highlights
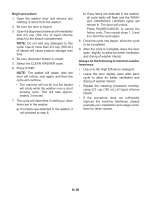
To reassemble CCU: 1. Align the tab on top of the CCU with the notch in the cabinet. Also, align the posts on the back of the CCU with the hole in the back of the cabinet. 2. Slide the CCU back into place. 3. Reconnect wire harness. To remove the touchpad/LED assembly: 1. Unplug washer or disconnect power. 2. Disconnect touchpad/LED assembly wire harness from the CCU. 3. Remove dispenser drawer. 4. Remove left front screw that was covered by the dispenser drawer. 5. Open door. Under the center of the touchpad/LED assembly there is a notch. Insert a flat-blade screwdriver in notch to release the bottom of the touchpad/LED assembly. 6. On the right hand side behind the touchpad/LED assembly, press tab to release right side of the touchpad/LED assembly. 7. Gently pry up and release the top of the touchpad/LED assembly. This should completely release the entire touchpad/ LED assembly. To remove Motor Control Unit (MCU): 1. Unplug washer or disconnect power. 2. Remove wire harness cover and disconnect the wire harness from the MCU. 3. With a flat-blade screwdriver, lift the front tab up and slide the MCU forward. To remove line/interference filter: 1. Unplug washer or disconnect power. 2. Disconnect the three connectors from the line filter and power cord. 3. Remove the two screws which secure the line filter to the top brace. WASHER CARE Cleaning the door seal: 1. Open the washer door and remove any clothing or items from the washer. 2. Inspect the gray colored seal between the door opening and the basket for stained areas. Pull back the seal to inspect all areas under the seal and to check for foreign objects. 3. If stained areas are found, wipe down these areas of the seal, using the procedure that follows: a) Mix a dilute solution, using 3/4 cup (177 mL) of liquid chlorine bleach, and 1 gal. (3.8 L) of warm tap water. b) Wipe the seal area with the dilute solution, using a damp cloth. c) Let stand 5 minutes. d) Wipe down area thoroughly with a dry cloth and let the washer interior air dry with door open. IMPORTANT: • Wear rubber gloves when cleaning for prolonged periods. • Refer to the bleach manufacturer's instructions for proper use. Washer Maintenance Procedure This washer has a special cycle that uses higher water volumes in combination with liquid chlorine bleach to thoroughly clean the inside of the washer. NOTES: • Read these instructions completely before beginning the cleaning process. • If necessary, the cleaning cycle may be interrupted by pressing PAUSE/CANCEL. This will stop the cycle. A RINSE/SPIN cycle must then be run to thoroughly rinse the remaining bleach from the unit. Failure to do so will cause damage to the unit and clothing added to the next cycle. 6-9
-
 1
1 -
2
-
3
-
4
-
5
-
6
-
7
-
8
-
9
-
10
-
11
-
12
-
13
-
14
-
15
-
16
-
17
-
18
-
19
-
20
-
21
-
22
-
23
-
24
-
25
-
26
-
27
-
28
-
29
-
30
-
31
-
32
-
33
-
34
-
35
-
36
-
37
-
38
-
39
-
40
-
41
-
42
-
43
-
44
-
45
-
46
-
47
-
48
-
49
-
50
-
51
-
52
-
53
-
54
-
55
-
56
-
57
-
58
-
59
-
60
-
61
-
62
-
63
-
64
-
65
-
66
-
67
-
68
-
69
-
70
-
71
-
72
-
73
-
74
-
75
-
76
-
77
-
78
-
79
-
80
-
81
-
 82
82 -
 83
83 -
 84
84 -
 85
85 -
 86
86 -
 87
87 -
 88
88 -
 89
89 -
 90
90 -
 91
91 -
 92
92 -
93
-
94
-
95
-
96
 |
 |
