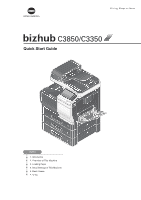
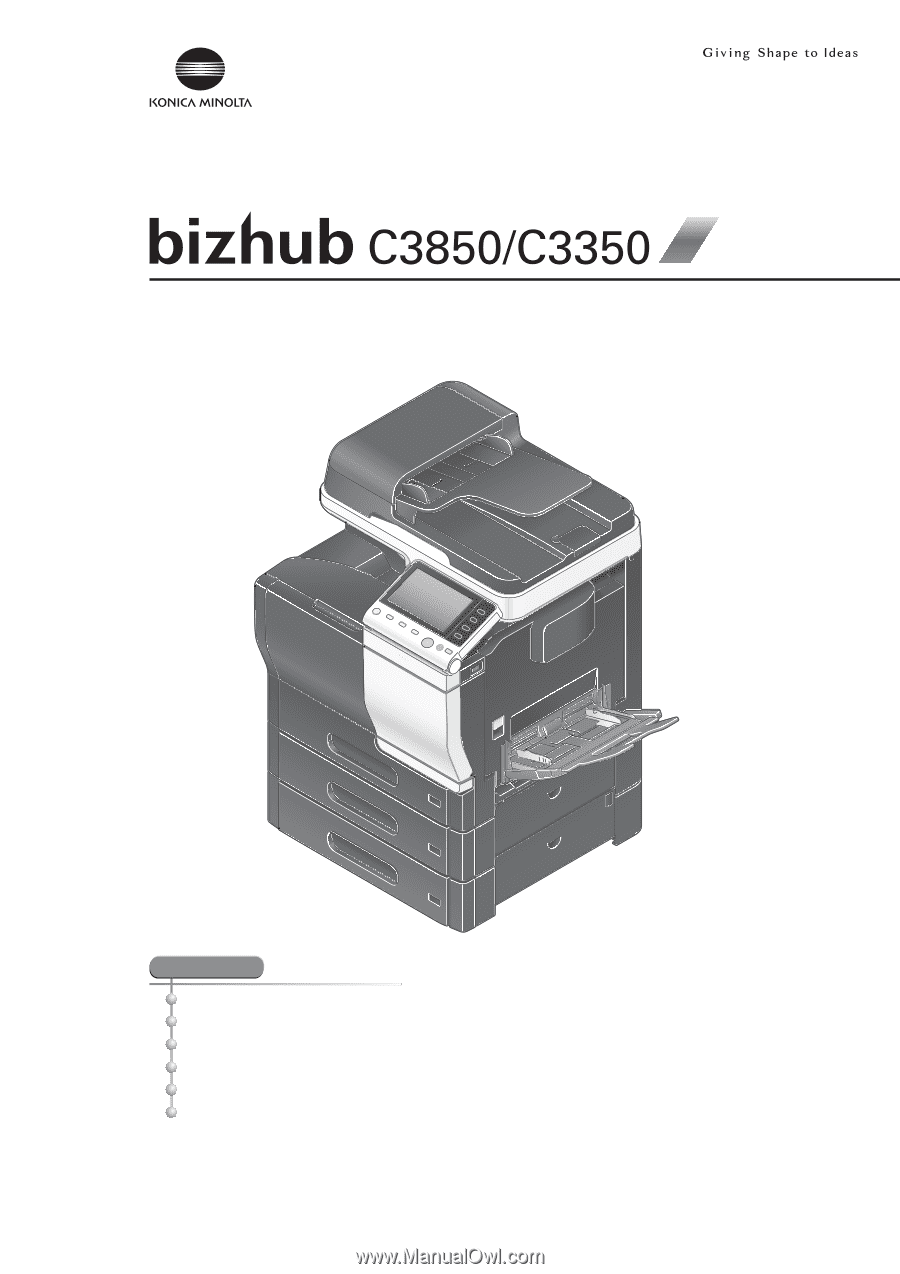
Konica Minolta bizhub C3350 bizhub C3850/C3350 Quick Start Guide
Konica Minolta bizhub C3350 Manual
 |
View all Konica Minolta bizhub C3350 manuals
Add to My Manuals
Save this manual to your list of manuals |
Konica Minolta bizhub C3350 manual content summary:
- Konica Minolta bizhub C3350 | bizhub C3850/C3350 Quick Start Guide - Page 1
Quick Start Guide INDEX 1. Introduction 2. Overview of This Machine 3. Loading Paper 4. Initial Settings of This Machine 5. Basic Usage 6. Index - Konica Minolta bizhub C3350 | bizhub C3850/C3350 Quick Start Guide - Page 2
...1-2 User's Guides ...1-3 Booklet manuals ...1-3 User's guides included in User's Guide CD-ROM 1-3 User's Guide CD-ROM...1-4 Operating environment ...1-4 Displaying the top page ...1-4 For Windows ...1-4 For Mac OS...1-4 Notations and symbols used in this manual 1-5 Procedural instruction - Konica Minolta bizhub C3350 | bizhub C3850/C3350 Quick Start Guide - Page 3
settings (Windows 7/8/Server 2008 R2/Server 2012 5-5 Installing the printer driver ...5-6 Initial settings of the printer driver ...5-8 How to print ...5-9 Using the scan function...5-10 Available operations in the scan function 5-10 How to send...5-11 Using the fax function...5-13 Fax function - Konica Minolta bizhub C3350 | bizhub C3850/C3350 Quick Start Guide - Page 4
Chapter 1 1 Introduction - Konica Minolta bizhub C3350 | bizhub C3850/C3350 Quick Start Guide - Page 5
basic procedures required to use this machine and how to configure initial settings. For information on the detailed functions and operation procedures, refer to the User's Guide included in the User's Guide CD-ROM. To use this product securely, be sure to read the [Safety Information - Konica Minolta bizhub C3350 | bizhub C3850/C3350 Quick Start Guide - Page 6
, and perform troubleshooting. This guide describes Utility settings such as [User Settings] and [Administrator Settings] for this machine. This guide describes the special usages of this machine such as how to use Web Connection, manually install the printer driver, configure print settings using - Konica Minolta bizhub C3350 | bizhub C3850/C3350 Quick Start Guide - Page 7
of the desired user's guide. The PDF file of the user's guide opens. 1.3.1 Operating environment Item Supported operating systems Supported browsers* Required application Display resolution Description Microsoft Windows XP (SP3) / Windows Vista (SP2) / Windows 7 (SP1)/ Windows 8 Apple Mac OS - Konica Minolta bizhub C3350 | bizhub C3850/C3350 Quick Start Guide - Page 8
symbol indicates a supplementary explanation of a procedural instruction. Symbols used in this manual NOTICE This symbol indicates a risk that may result user's guide. This presents a key name, part name, product name, or option name on the Control Panel. Notations of application names This manual - Konica Minolta bizhub C3350 | bizhub C3850/C3350 Quick Start Guide - Page 9
Introduction Chapter 1 1 Notations and symbols used in this manual 1.4 1-6 [Quick Start Guide] - Konica Minolta bizhub C3350 | bizhub C3850/C3350 Quick Start Guide - Page 10
Chapter 2 2 Overview of This Machine - Konica Minolta bizhub C3350 | bizhub C3850/C3350 Quick Start Guide - Page 11
2-b 2 2-a 2-c 2-d 1 6 5 No. Name 1 Control Panel 2 Automatic Document Feeder (ADF) 2-a ADF Feed Cover 2-b Document Guide 2-c Document Feed Tray 2-d Document Output Tray 2-e Document Stopper 3 USB Host Port 4 Manual Feed Tray 5 Tray 1 6 Data Indicator 2-e 3 4 2-2 [Quick Start - Konica Minolta bizhub C3350 | bizhub C3850/C3350 Quick Start Guide - Page 12
with the optional Fax Kit FK-512 and Mount Kit MK-738 installed. These are provided as standard on bizhub C3850 models sold in North America. 3 1 4 5 6 2 No. Name 1 Power Switch 2 Power Connection 3 USB Port (Type B) 4 Ethernet port (1000Base-T/100Base-TX/10Base-T) 5 TEL (telephone - Konica Minolta bizhub C3350 | bizhub C3850/C3350 Quick Start Guide - Page 13
FK-512 Used to operate this machine as a fax machine. This is provided as standard on bizhub C3850 models sold in North America. 8 Mount Kit MK-738 This unit is required to install the Fax Kit. This is provided as standard on bizhub C3850 models sold in North America. 9 i-Option LK-106 Used - Konica Minolta bizhub C3350 | bizhub C3850/C3350 Quick Start Guide - Page 14
2.1 About this machine 2 dReference For details on how to register i-Option license kits, refer to Chapter 2 "Registering License Kits" in [User's Guide Advanced Functions]. Overview of This Machine Chapter 2 [Quick Start Guide] 2-5 - Konica Minolta bizhub C3350 | bizhub C3850/C3350 Quick Start Guide - Page 15
function reduces power consumption and has more significant power saving effect. For details, refer to page 2-8. NOTICE While printing, do not turn the Power Switch off or press the Power key. Otherwise, it may lead to a paper or communicating data as well as queued jobs. 2-6 [Quick Start Guide] - Konica Minolta bizhub C3350 | bizhub C3850/C3350 Quick Start Guide - Page 16
the Power Switch off and on again after 10 or more seconds have elapsed. Not doing so may result in an operation failure. [Quick Start Guide] 2-7 - Konica Minolta bizhub C3350 | bizhub C3850/C3350 Quick Start Guide - Page 17
faxes or when the user operates the Touch Panel. Provides a greater power saving effect than Sleep mode. While the sub power is turned off, this machine can receive data or faxes, however, it cannot scan or print an original. If data or faxes Settings] (Default: [Low Power]) 2-8 [Quick Start Guide] - Konica Minolta bizhub C3350 | bizhub C3850/C3350 Quick Start Guide - Page 18
data or faxes, however, it cannot scan or print an original. If data or faxes are received while the sub power is turned off, they are printed when the Auto Power OFF mode, this machine cannot receive data or faxes, and also it cannot scan or print an original. To enable the machine to return to - Konica Minolta bizhub C3350 | bizhub C3850/C3350 Quick Start Guide - Page 19
perform authentication on the Login screen if user authentication or account track is installed on Guide This key is not available. 4 Reset Press this key to reset the settings you entered or changed on the Control Panel. 5 Stop Press this key to temporarily stop an active copy, scan, or print - Konica Minolta bizhub C3350 | bizhub C3850/C3350 Quick Start Guide - Page 20
start an operation such as copying, scanning, faxing, or printing. • Lights up blue: This ister Key 3 assigned to a Register key. • The default function assigned to the Register key varies depend- ing on to Chapter 7 "Control Panel" in [User's Guide Introduction]. 8 Power key Press this - Konica Minolta bizhub C3350 | bizhub C3850/C3350 Quick Start Guide - Page 21
on the screen. Displaying the Keypad Tap a number or input area on the screen to display the Keypad. Used to enter numerals. 2-12 [Quick Start Guide] - Konica Minolta bizhub C3350 | bizhub C3850/C3350 Quick Start Guide - Page 22
or using the Stylus Pen. - Note that the Touch Panel may not respond normally if the distance between the user and fluorescent light is 19-11/16 inches (500 mm) or less when you operate the Touch Panel. - a malfunction may be caused by an influence of electrical noises. [Quick Start Guide] 2-13 - Konica Minolta bizhub C3350 | bizhub C3850/C3350 Quick Start Guide - Page 23
To E-mail] [Scan To Folder] [Fax] [Document Print/Delete] [Utility] [APP] Description Tap this button to check active jobs or job logs. If necessary, you can perform job operations such as deleting a standby job. Note A job refers to an individual operation unit such as printing, sending, receiving - Konica Minolta bizhub C3350 | bizhub C3850/C3350 Quick Start Guide - Page 24
and the page returns to the previous screen. The character or value you entered is deleted. Define the entered character or numeric values. [Quick Start Guide] 2-15 - Konica Minolta bizhub C3350 | bizhub C3850/C3350 Quick Start Guide - Page 25
2 Entering characters 2.6 Overview of This Machine Chapter 2 2-16 [Quick Start Guide] - Konica Minolta bizhub C3350 | bizhub C3850/C3350 Quick Start Guide - Page 26
Chapter 3 3 Loading Paper - Konica Minolta bizhub C3350 | bizhub C3850/C3350 Quick Start Guide - Page 27
. *6 Tray 1 supports only Envelope #10 and End-opening envelope #3. NOTICE Paper other than plain paper is referred to as special paper. When loading special paper into the paper tray, specify the correct paper type. Otherwise, it may result in a paper jam or image error. 3-2 [Quick Start Guide] - Konica Minolta bizhub C3350 | bizhub C3850/C3350 Quick Start Guide - Page 28
Checking the available paper sizes Paper feed port Manual Feed Tray Tray 1 Allowable sizes A4, envelope types. - The page margin setting is determined depending on your application. If the default paper size or margin is selected, there may be some part of the paper that is not able to be printed - Konica Minolta bizhub C3350 | bizhub C3850/C3350 Quick Start Guide - Page 29
print quality, a paper jam, or machine damage. - Paper that has been printed on using a heat-transfer printer or an inkjet printer with labels attached - Paper with ribbons, hooks, buttons, etc., attached - Paper with different print to check the printing quality in advance. 3-4 [Quick Start Guide] - Konica Minolta bizhub C3350 | bizhub C3850/C3350 Quick Start Guide - Page 30
Feed Tray. To use the Manual Feed Tray, load paper and specify the paper type. 0 For details on the available paper types and sizes, refer to page 3-2. 1 Open the Manual Feed Tray. 2 Spread out the paper guide. 3 Push up the center of the flip-top plate until the lock latches (white) at the right - Konica Minolta bizhub C3350 | bizhub C3850/C3350 Quick Start Guide - Page 31
5 Align the paper guide to the paper size. 6 Change the paper type and paper size on the Control Panel. When loading custom sized paper, also specify the paper size. % To configure settings: [Utility] - [User Settings] - [Printer Settings] - [Paper Setting] - [Paper Tray] [Manual Feed] 3-6 [Quick - Konica Minolta bizhub C3350 | bizhub C3850/C3350 Quick Start Guide - Page 32
paper types and sizes, refer to page 3-2. 0 Tray 2/3 is available when the optional Paper Feed Unit is installed. For details on how to load paper into Tray 2/3, refer to Chapter 6 "Loading Paper" in [User's Guide Introduction]. 1 Pull out Tray 1. 2 Press the flip-top plate down until it is - Konica Minolta bizhub C3350 | bizhub C3850/C3350 Quick Start Guide - Page 33
into Tray 1 3.3 4 Load paper into the tray with the print side facing up. % Load a postcard or reply postal card, the paper guide to the paper size. 6 Close Tray 1. 7 Change the paper type and paper size on the Control Panel. % To configure settings: [Utility] - [User Settings] - [Printer Settings] - Konica Minolta bizhub C3350 | bizhub C3850/C3350 Quick Start Guide - Page 34
Chapter 4 4 Initial Settings of This Machine - Konica Minolta bizhub C3350 | bizhub C3850/C3350 Quick Start Guide - Page 35
has a fixed IP address, manually enter the IP address, subnet mask, and default gateway address. In the print out the Configuration Page. To print out the Configuration Page, select [Utility] - [User Settings] - [Printer Settings] - [Print Reports] - [Configuration Page]. 4-2 [Quick Start Guide - Konica Minolta bizhub C3350 | bizhub C3850/C3350 Quick Start Guide - Page 36
of receiving faxes include the following: This machine receives faxes automatically, and the user receives faxes manually. Set the this machine to have them printed on sent and received faxes. The date and time you set will be the reference time for the Timer TX that enables communication to take - Konica Minolta bizhub C3350 | bizhub C3850/C3350 Quick Start Guide - Page 37
, you need to configure an HDD encryption setting. For details on the enhanced security mode, refer to [Enhanced Security Mode] of Chapter 5 "Administrator Settings" in [User's Guide Description of Utility Keys]. Initial Settings of This Machine Chapter 4 4-4 [Quick Start - Konica Minolta bizhub C3350 | bizhub C3850/C3350 Quick Start Guide - Page 38
Chapter 5 5 Basic Usage - Konica Minolta bizhub C3350 | bizhub C3850/C3350 Quick Start Guide - Page 39
User's Guide Applied Functions]. 5.1.1 Printer driver Before using this machine as a printer, you need to install the printer driver on your computer. The following types of printer drivers are available. Select the printer driver that meets your printing aims. Printer driver PCL driver PS driver - Konica Minolta bizhub C3350 | bizhub C3850/C3350 Quick Start Guide - Page 40
method, you can select [Normal Printing], [Internet Printing] (IPP), or [Secure Printing] (IPPS). For details on the printing method, refer to Chapter 2 "Printing in the Windows Environment" in [User's Guide Print Functions]. % Among the connected printers, only the target model is automatically - Konica Minolta bizhub C3350 | bizhub C3850/C3350 Quick Start Guide - Page 41
driver is then completed. Settings [Review] [Rename Printer] [Property] [Print Setting] [Print Test page] Description Displays the installed components for checking. Changes this machine name, if necessary. Sets the optional operating environment of this machine. Changes the default print settings - Konica Minolta bizhub C3350 | bizhub C3850/C3350 Quick Start Guide - Page 42
the print function (Windows environment) 5 5.1.3 Preparation for printing (USB connection) Changing the installation settings (Windows 7/8/Server 2008 R2/Server 2012) If you are using Windows 7/8/Server 2008 R2/Server 2012, change the computer settings before installing the printer driver. 1 Open - Konica Minolta bizhub C3350 | bizhub C3850/C3350 Quick Start Guide - Page 43
to Step 3. % If the installer does not start, open the printer driver folder on the CD-ROM, double-click [Set- up.exe], then go to Step 4. % If the [User Account Control] window appears, click [Continue] or [Yes]. 3 Click [Printer/FAX]. 4 Read the license agreement, then click [AGREE]. 5 Check the - Konica Minolta bizhub C3350 | bizhub C3850/C3350 Quick Start Guide - Page 44
5.1 Using the print function (Windows environment) 5 10 Change the printer name or print a test page, if necessary, then click [Finish]. The installation process of the printer driver is then completed. Settings [Review] [Rename Printer] [Property] [Print Setting] [Print Test page] Description - Konica Minolta bizhub C3350 | bizhub C3850/C3350 Quick Start Guide - Page 45
print function (Windows environment) 5.1 Initial settings of the printer driver When you use this machine for the first time, configure the printer driver machine or you are using a USB connection in Windows XP or Server 2003 environment, manually configure a setting in [Device Option]. Select the - Konica Minolta bizhub C3350 | bizhub C3850/C3350 Quick Start Guide - Page 46
have changed here return to the default values when you exit the application software. % For details on the print settings of the printer driver, refer to Chapter 2 "Printing in the Windows Environment" in [User's Guide Print Functions]. 5 Click [Print]. Printing is executed. Basic Usage Chapter - Konica Minolta bizhub C3350 | bizhub C3850/C3350 Quick Start Guide - Page 47
scan instruction from a computer without configuring complicated system settings, or sends original data scanned by this machine to a computer. This function is supported by Windows to use the Scan Function. For details on how to use each function, refer to [User's Guide Scan Functions]. Basic Usage - Konica Minolta bizhub C3350 | bizhub C3850/C3350 Quick Start Guide - Page 48
[Scan To Folder]. 3 Specify the destination. % You can select the desired destination from the pre-registered destination list, or directly enter destination information. For details on how to register a destination, refer to page 5-23. % You can specify multiple destinations. [Quick Start Guide - Konica Minolta bizhub C3350 | bizhub C3850/C3350 Quick Start Guide - Page 49
scanned. Before scanning the original, select [Application] - [Basic] - [Scan Size], then specify the original size. If you fail to set the original size correctly, the image If you press the Stop key while scanning the original, scanning stops. To cancel scanning the orig- inal, delete inactive jobs - Konica Minolta bizhub C3350 | bizhub C3850/C3350 Quick Start Guide - Page 50
user to change scan settings according to the original and to save incoming faxes in memory. The following describes precautions that should be observed when using fax functions. - To use fax functions, optional units must be installed except in certain regions. - For bizhub C3850: The optional Fax - Konica Minolta bizhub C3350 | bizhub C3850/C3350 Quick Start Guide - Page 51
the desired destination from the pre-registered destination list, or directly enter destination information. For details on how to register a destination, refer to page 5-23. % Fax broadcasting can be performed by specifying multiple destinations. 5-14 [Quick Start Guide] - Konica Minolta bizhub C3350 | bizhub C3850/C3350 Quick Start Guide - Page 52
fax option settings. % Before scanning the original on this machine, you need to specify the size of the original to be scanned. Before scanning the original, select [Application] - [Basic] - [Scan Size], then specify the original size. If you fail to set the original size correctly, the image - Konica Minolta bizhub C3350 | bizhub C3850/C3350 Quick Start Guide - Page 53
RX User Box that requires the registration number and password. Closed Network RX restricts the peers by passwords. Polling RX receives a polling file saved in a sending machine as instructed from this machine. PC-Fax RX saves the received fax in memory. The saved fax can be printed or downloaded - Konica Minolta bizhub C3350 | bizhub C3850/C3350 Quick Start Guide - Page 54
is used to transmit faxes. Therefore, you can send and receive faxes to/from distant locations without having to worry about high communication costs or sending a large number of pages. For details on the Internet fax function, refer to [User's Guide Network Fax Functions]. Basic Usage Chapter - Konica Minolta bizhub C3350 | bizhub C3850/C3350 Quick Start Guide - Page 55
the original on this machine, you need to specify the size of the original to be scanned. Before scanning the original, specify the original size in [Original Size]. If you fail to set the original size correctly, the image may be cut off. % For details on various copy settings, refer to page 5-20 - Konica Minolta bizhub C3350 | bizhub C3850/C3350 Quick Start Guide - Page 56
, tap [C] (Clear). 5 Press the Start key. % If necessary, before starting a copy, tap [Check Settings] to check the settings. % If you press the Stop key while scanning the original, scanning stops. To cancel scanning the orig- inal, delete inactive jobs from the Job screen. The original is - Konica Minolta bizhub C3350 | bizhub C3850/C3350 Quick Start Guide - Page 57
on how to use each function, refer to [User's Guide Copy Functions]. Function [Interrupt] [Proof Copy] [ID Copy] [Color ] [Density] [Original Type] [Original Size] [Paper] [Zoom] [Duplex/Combine] [Finishing] [Separate Scan] [Background Removal] [Glossy] [Image Adjust] [Page Margin] Overview If you - Konica Minolta bizhub C3350 | bizhub C3850/C3350 Quick Start Guide - Page 58
Printing a file stored on USB memory Supported USB memory devices USB memory devices that have the following specifications can be connected to this machine. Item Supported media File system File Type Specifications USB memory device (USB 2.0 supported memory or printing a file in disk unit or - Konica Minolta bizhub C3350 | bizhub C3850/C3350 Quick Start Guide - Page 59
data on one side or both sides of sheets of paper. To print data on both sides, select the binding position. When printing data by multiple copies, select whether or not to feed out copies separately one by one like "12345", "12345", and "12345". Basic Usage Chapter 5 5-22 [Quick Start Guide] - Konica Minolta bizhub C3350 | bizhub C3850/C3350 Quick Start Guide - Page 60
destination on this machine will save you the trouble of having to enter it each time you in [User's Guide Applied Functions]. Registering one-touch destinations in the address book Fax, of errors. This prevents image blurring caused by telephone line noise. If you send a fax using a telephone line - Konica Minolta bizhub C3350 | bizhub C3850/C3350 Quick Start Guide - Page 61
] [Connection] [Host Name] [File Path] [User ID] [Password] [Browse] Description Destination registration number. The smallest scan" When specifying a folder in the shared folder, insert a symbol, "\", between folder names. • Entry example: "scan\document" Enter the name of a user [Quick Start Guide] - Konica Minolta bizhub C3350 | bizhub C3850/C3350 Quick Start Guide - Page 62
6 Index Chapter 6 - Konica Minolta bizhub C3350 | bizhub C3850/C3350 Quick Start Guide - Page 63
Key 2-8 Power Switch 2-7 Preparation Fax 4-3 Network Setting 4-2 Print (Network Connection 5-2 Print (USB Connection 5-5 Print Function 5-2 How to Print 5-9 Printer Driver 5-2 Initial Settings 5-8 Install (Network Connection 5-2 Install (USB Connection 5-5 S Scan Function 5-10 How to - Konica Minolta bizhub C3350 | bizhub C3850/C3350 Quick Start Guide - Page 64
http://konicaminolta.com A3GN-9612-00 © 2013 Printed in Thailand 2013. 8
-
 1
1 -
 2
2 -
 3
3 -
 4
4 -
 5
5 -
 6
6 -
 7
7 -
8
-
9
-
10
-
11
-
12
-
13
-
14
-
15
-
16
-
17
-
18
-
19
-
20
-
21
-
22
-
23
-
24
-
25
-
26
-
27
-
28
-
29
-
30
-
31
-
32
-
33
-
34
-
35
-
36
-
37
-
38
-
39
-
40
-
41
-
42
-
43
-
44
-
45
-
46
-
47
-
48
-
49
-
50
-
51
-
52
-
53
-
54
-
55
-
56
-
57
-
58
-
59
-
60
-
61
-
62
-
63
-
64
 |
 |
INDEX
1. Introduction
2. Overview of This Machine
3. Loading Paper
4. Initial Settings of This Machine
5. Basic Usage
6. Index
Quick Start Guide