Kyocera TASKalfa 180 KM-NET Viewer Operation Guide Rev-5.2-2010.10 - Page 71
Editing SNMP Trap Options, Default Account Polling Settings
 |
View all Kyocera TASKalfa 180 manuals
Add to My Manuals
Save this manual to your list of manuals |
Page 71 highlights
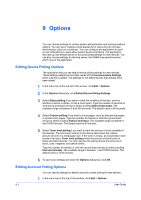
Options 2 In the Options dialog box, click Default Account Polling Settings. 3 Select the Default account counter polling for new devices check box. 4 For the Account counter polling interval, select Daily, Weekly or Monthly from the list. 5 In the Time text box, type a valid time that you want polling to occur, or use the up-and-down arrows to select a time. 6 If you selected Weekly for the Account counter polling interval, select the day of the week you want polling to occur from the Day list. 7 If you selected Monthly for the Account counter polling interval, select the numeric day of the month you want polling to occur from the Date list. 8 Select a Warning level. The polling action issues a warning when either 60% or more of available accounts are counted, or 80% or more of available accounts are counted. The default is 60%. 9 Click OK to save your account polling settings. If you do not want to save the settings you just made, click Cancel. Editing SNMP Trap Options The SNMP protocol is used for providing and transferring management information within the network environment. Should an error occur, such as Add paper, the device automatically generates a trap. The trap sends an error message to one or two predetermined trap recipients. The trap server is the SNMP trap packet receiver which runs in the application. To receive trap packets, the user has to start the trap server and then configure the SNMP trap on the device as described in the device documentation. TCP port 162 must be available and not blocked by a firewall. 1 In the menu bar at the top left of the screen, click Edit > Options. The Options dialog box opens. 2 In the Options list, click Trap. 3 Server status shows whether the trap server is running or not. If the trap server is not running, you can click Start. The server status will change to indicate it is running. A message will appear if the start of the trap server is not successful. See the log file under the log folder for an error message as to why the trap server failed to start. Correct the error, and try again to start the trap server. If the trap server is running, you can click Stop to halt it. The server status will change to indicate it is not running. 4 If you want to allow the receipt of SNMP trap packets that have the same community name as the trap community (which is stored in the application), KMnet Viewer 9-2
-
 1
1 -
2
-
3
-
4
-
5
-
6
-
7
-
8
-
9
-
10
-
11
-
12
-
13
-
14
-
15
-
16
-
17
-
18
-
19
-
20
-
21
-
22
-
23
-
24
-
25
-
26
-
27
-
28
-
29
-
30
-
31
-
32
-
33
-
34
-
35
-
36
-
37
-
38
-
39
-
40
-
41
-
42
-
43
-
44
-
45
-
46
-
47
-
48
-
49
-
50
-
51
-
52
-
53
-
54
-
55
-
56
-
57
-
58
-
59
-
60
-
61
-
62
-
63
-
64
-
65
-
 66
66 -
 67
67 -
 68
68 -
 69
69 -
 70
70 -
 71
71 -
 72
72 -
 73
73 -
 74
74 -
 75
75 -
 76
76 -
77
-
78
-
79
 |
 |