Kyocera TASKalfa 205c 205c/255c Operation Guide - Page 217
Functions for Document Box
 |
View all Kyocera TASKalfa 205c manuals
Add to My Manuals
Save this manual to your list of manuals |
Page 217 highlights
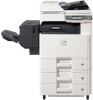
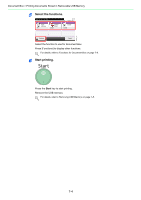
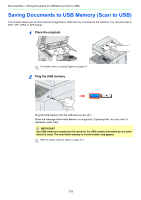
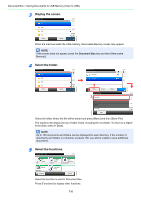
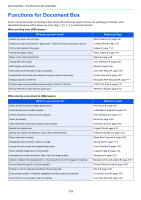
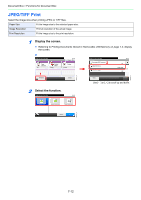
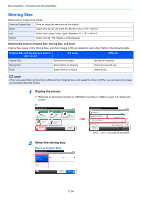
Document Box > Functions for Document Box Functions for Document Box Print or Store file screen in Document Box shows the commonly used functions. By pressing [Functions], other selectable functions will be shown as a list. Use [ ] or [ ] to select the function. When printing from USB memory What do you want to do? Reference Page Specify the paper size and type. Paper Selection page 3-41 Collate the output documents in page order. / Offset the output documents by set. Collate/Offset page 3-43 Print on both sides of the paper. Duplex page 7-10 Change the paper output. Paper Output page 3-42 Staple in the output documents. Staple page 3-48 Change the color mode. Color Selection page 3-59 Add margins (white space). Margin page 3-45 Send notice by e-mail when a job is complete. Job Finish Notice page 3-60 Suspend the current job and override it to give a new job top priority. Priority Override page 3-63 Password-protect a PDF file. Encrypted PDF Password page 7-11 Set the image size (resolution) when printing a JPEG or TIFF file. JPEG/TIFF Print page 7-12 Print an XPS file so that it fits the paper size. XPS Fit to Page page 7-13 When storing a document to USB memory What do you want to do? Select the file format for images being stored. Automatically scan 2-sided originals. Set the resolution at which to scan originals. Adjust the density. Add a file name to the job to easily check its status. Specify the original size. Specify the original orientation to scan in the correct direction. Scan mixed size originals. Change the size at which to store an image Change the color mode for images being stored. Select original image type for best results. Emphasize the outline of texts or lines. / Blur the image outline. Darken or lighten the background (i.e., the area with no text or images) of originals. Prevent bleed-through for 2-sided originals. Enlarge or shrink originals according to the storing size. Scan a large number of originals separately and then produce as one job. Send notice by e-mail when a job is complete. Reference Page File Format page 3-57 2-sided/Book Original page 3-37 Scan Resolution page 3-51 Density page 3-50 File Name Entry page 3-62 Original Size page 3-32 Original Orientation page 3-34 Mixed Size Originals page 3-35 Storing Size page 7-14 Color Selection page 3-59 Original Image page 3-52 Sharpness page 3-53 Background Density Adjust page 3-54 Prevent Bleed-through page 3-55 Zoom page 3-56 Continuous Scan page 3-39 Job Finish Notice page 3-60 7-9
-
 1
1 -
2
-
3
-
4
-
5
-
6
-
7
-
8
-
9
-
10
-
11
-
12
-
13
-
14
-
15
-
16
-
17
-
18
-
19
-
20
-
21
-
22
-
23
-
24
-
25
-
26
-
27
-
28
-
29
-
30
-
31
-
32
-
33
-
34
-
35
-
36
-
37
-
38
-
39
-
40
-
41
-
42
-
43
-
44
-
45
-
46
-
47
-
48
-
49
-
50
-
51
-
52
-
53
-
54
-
55
-
56
-
57
-
58
-
59
-
60
-
61
-
62
-
63
-
64
-
65
-
66
-
67
-
68
-
69
-
70
-
71
-
72
-
73
-
74
-
75
-
76
-
77
-
78
-
79
-
80
-
81
-
82
-
83
-
84
-
85
-
86
-
87
-
88
-
89
-
90
-
91
-
92
-
93
-
94
-
95
-
96
-
97
-
98
-
99
-
100
-
101
-
102
-
103
-
104
-
105
-
106
-
107
-
108
-
109
-
110
-
111
-
112
-
113
-
114
-
115
-
116
-
117
-
118
-
119
-
120
-
121
-
122
-
123
-
124
-
125
-
126
-
127
-
128
-
129
-
130
-
131
-
132
-
133
-
134
-
135
-
136
-
137
-
138
-
139
-
140
-
141
-
142
-
143
-
144
-
145
-
146
-
147
-
148
-
149
-
150
-
151
-
152
-
153
-
154
-
155
-
156
-
157
-
158
-
159
-
160
-
161
-
162
-
163
-
164
-
165
-
166
-
167
-
168
-
169
-
170
-
171
-
172
-
173
-
174
-
175
-
176
-
177
-
178
-
179
-
180
-
181
-
182
-
183
-
184
-
185
-
186
-
187
-
188
-
189
-
190
-
191
-
192
-
193
-
194
-
195
-
196
-
197
-
198
-
199
-
200
-
201
-
202
-
203
-
204
-
205
-
206
-
207
-
208
-
209
-
210
-
211
-
 212
212 -
 213
213 -
 214
214 -
 215
215 -
 216
216 -
 217
217 -
 218
218 -
 219
219 -
 220
220 -
 221
221 -
 222
222 -
223
-
224
-
225
-
226
-
227
-
228
-
229
-
230
-
231
-
232
-
233
-
234
-
235
-
236
-
237
-
238
-
239
-
240
-
241
-
242
-
243
-
244
-
245
-
246
-
247
-
248
-
249
-
250
-
251
-
252
-
253
-
254
-
255
-
256
-
257
-
258
-
259
-
260
-
261
-
262
-
263
-
264
-
265
-
266
-
267
-
268
-
269
-
270
-
271
-
272
-
273
-
274
-
275
-
276
-
277
-
278
-
279
-
280
-
281
-
282
-
283
-
284
-
285
-
286
-
287
-
288
-
289
-
290
-
291
-
292
-
293
-
294
-
295
-
296
-
297
-
298
-
299
-
300
-
301
-
302
-
303
-
304
-
305
-
306
-
307
-
308
-
309
-
310
-
311
-
312
-
313
-
314
-
315
-
316
-
317
-
318
-
319
-
320
-
321
-
322
-
323
-
324
-
325
-
326
-
327
-
328
-
329
-
330
-
331
-
332
-
333
-
334
-
335
-
336
-
337
-
338
-
339
-
340
-
341
-
342
-
343
-
344
-
345
-
346
-
347
-
348
-
349
-
350
-
351
-
352
-
353
-
354
-
355
-
356
-
357
-
358
-
359
-
360
-
361
-
362
-
363
-
364
-
365
-
366
-
367
-
368
-
369
-
370
-
371
-
372
-
373
-
374
-
375
-
376
-
377
-
378
-
379
-
380
 |
 |