Kyocera TASKalfa 205c 205c/255c Operation Guide - Page 325
Troubleshooting > Solving Malfunctions, System Menu/Counter
 |
View all Kyocera TASKalfa 205c manuals
Add to My Manuals
Save this manual to your list of manuals |
Page 325 highlights
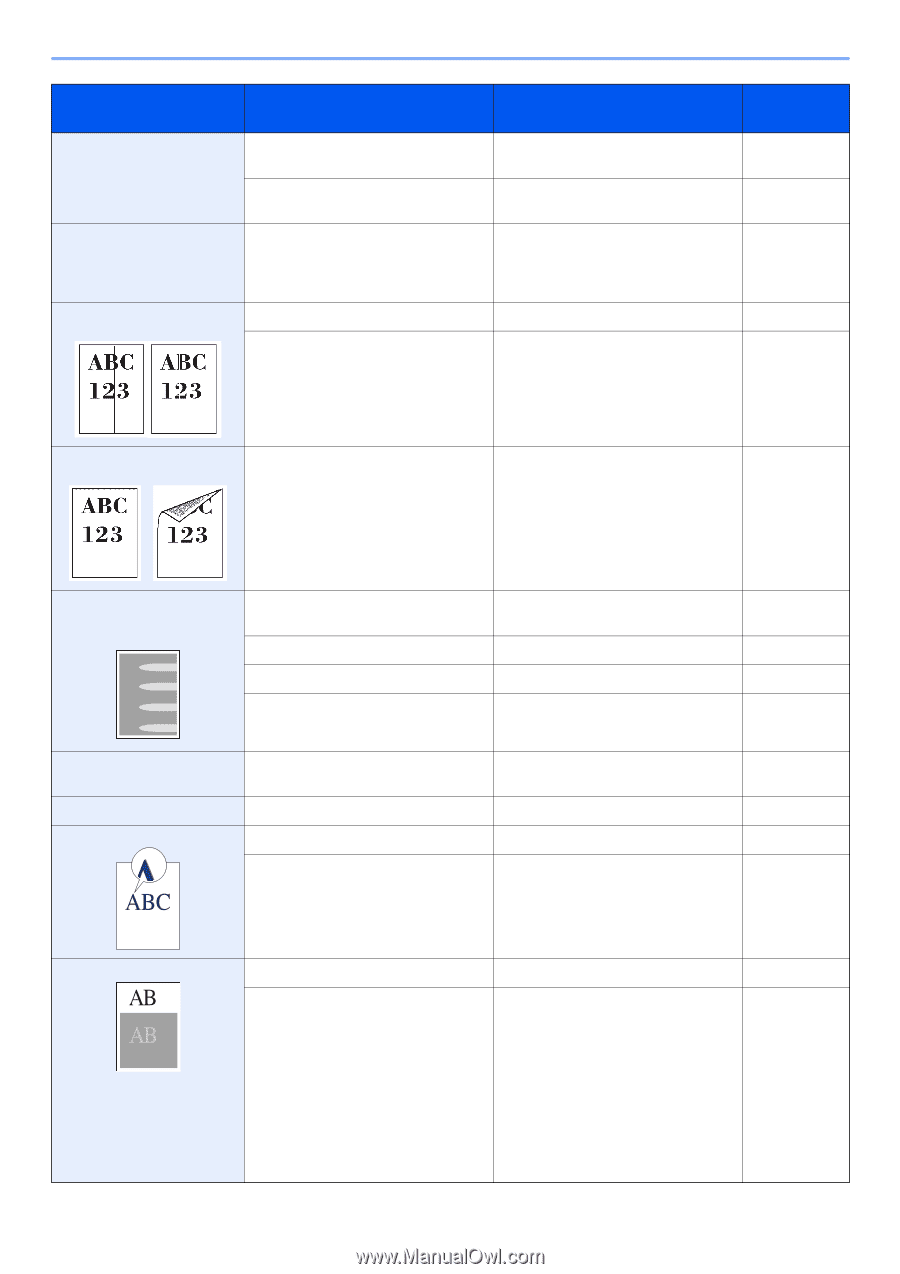
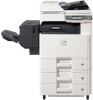
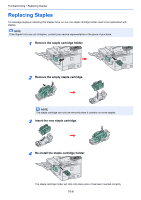
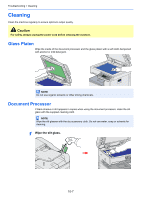
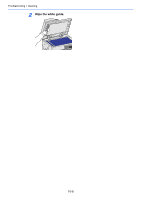
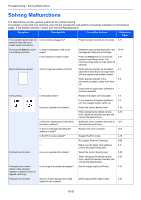
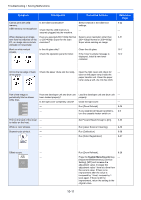
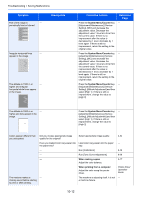
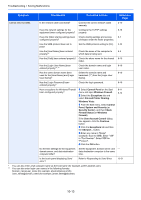
Troubleshooting > Solving Malfunctions Symptom Checkpoints Corrective Actions Cannot print with USB memory. USB memory not recognized. Is the USB host blocked? Check that the USB memory is securely plugged into the machine. Select Unblock in the USB host settings. - When displaying an image sent from the machine on the PC, an image size is shrunk vertically or horizontally. Have you selected 200×100dpi Normal or 200×400dpi Super for the scan resolution? Select a scan resolution other than 200×100dpi Normal or 200×400dpi Super when sending an image. Black or white vertical streaks. Is the slit glass dirty? Check the operation panel for toner. Clean the slit glass. If the Toner is empty message is displayed, install a new toner container. Reference Page 9-22 - 3-51 10-7 10-2 Dirt on the top edge or back Check the paper chute and the ramp. Open the right cover and check for - of the paper. toner on the paper ramp inside the paper transfer unit. Clean the paper ramp using a soft, dry, lint-free cloth. Part of the image is periodically faint or shows white lines. Have the developer unit and drum unit been loaded properly? Is the right cover completely closed? - - Load the developer unit and drum unit properly. Close the right cover. Run [Drum Refresh]. If you experience frequent problems, turn the cassette heater switch on. - - 9-26 2-4 Print on the back of the sheet - is visible on the front. White or color streaks. - Skewed-color printout. - - Set Prevent Bleed-through to [On]. Run [Laser Scanner Cleaning]. Run [Calibration]. Run [Color Registration]. 3-55 9-26 9-26 9-27 Offset occurs. - - Run [Drum Refresh]. 9-26 Press the System Menu/Counter key, - [Adjustment/Maintenance], [Service Setting], [MC] and increase the adjustment value. Increase the adjustment value 1 level at a time from the current value. If there is no improvement after the value is increased by 1 level, increase by 1 level again. If there is still no improvement, return the setting to the original value. 10-11
-
 1
1 -
2
-
3
-
4
-
5
-
6
-
7
-
8
-
9
-
10
-
11
-
12
-
13
-
14
-
15
-
16
-
17
-
18
-
19
-
20
-
21
-
22
-
23
-
24
-
25
-
26
-
27
-
28
-
29
-
30
-
31
-
32
-
33
-
34
-
35
-
36
-
37
-
38
-
39
-
40
-
41
-
42
-
43
-
44
-
45
-
46
-
47
-
48
-
49
-
50
-
51
-
52
-
53
-
54
-
55
-
56
-
57
-
58
-
59
-
60
-
61
-
62
-
63
-
64
-
65
-
66
-
67
-
68
-
69
-
70
-
71
-
72
-
73
-
74
-
75
-
76
-
77
-
78
-
79
-
80
-
81
-
82
-
83
-
84
-
85
-
86
-
87
-
88
-
89
-
90
-
91
-
92
-
93
-
94
-
95
-
96
-
97
-
98
-
99
-
100
-
101
-
102
-
103
-
104
-
105
-
106
-
107
-
108
-
109
-
110
-
111
-
112
-
113
-
114
-
115
-
116
-
117
-
118
-
119
-
120
-
121
-
122
-
123
-
124
-
125
-
126
-
127
-
128
-
129
-
130
-
131
-
132
-
133
-
134
-
135
-
136
-
137
-
138
-
139
-
140
-
141
-
142
-
143
-
144
-
145
-
146
-
147
-
148
-
149
-
150
-
151
-
152
-
153
-
154
-
155
-
156
-
157
-
158
-
159
-
160
-
161
-
162
-
163
-
164
-
165
-
166
-
167
-
168
-
169
-
170
-
171
-
172
-
173
-
174
-
175
-
176
-
177
-
178
-
179
-
180
-
181
-
182
-
183
-
184
-
185
-
186
-
187
-
188
-
189
-
190
-
191
-
192
-
193
-
194
-
195
-
196
-
197
-
198
-
199
-
200
-
201
-
202
-
203
-
204
-
205
-
206
-
207
-
208
-
209
-
210
-
211
-
212
-
213
-
214
-
215
-
216
-
217
-
218
-
219
-
220
-
221
-
222
-
223
-
224
-
225
-
226
-
227
-
228
-
229
-
230
-
231
-
232
-
233
-
234
-
235
-
236
-
237
-
238
-
239
-
240
-
241
-
242
-
243
-
244
-
245
-
246
-
247
-
248
-
249
-
250
-
251
-
252
-
253
-
254
-
255
-
256
-
257
-
258
-
259
-
260
-
261
-
262
-
263
-
264
-
265
-
266
-
267
-
268
-
269
-
270
-
271
-
272
-
273
-
274
-
275
-
276
-
277
-
278
-
279
-
280
-
281
-
282
-
283
-
284
-
285
-
286
-
287
-
288
-
289
-
290
-
291
-
292
-
293
-
294
-
295
-
296
-
297
-
298
-
299
-
300
-
301
-
302
-
303
-
304
-
305
-
306
-
307
-
308
-
309
-
310
-
311
-
312
-
313
-
314
-
315
-
316
-
317
-
318
-
319
-
 320
320 -
 321
321 -
 322
322 -
 323
323 -
 324
324 -
 325
325 -
 326
326 -
 327
327 -
 328
328 -
 329
329 -
 330
330 -
331
-
332
-
333
-
334
-
335
-
336
-
337
-
338
-
339
-
340
-
341
-
342
-
343
-
344
-
345
-
346
-
347
-
348
-
349
-
350
-
351
-
352
-
353
-
354
-
355
-
356
-
357
-
358
-
359
-
360
-
361
-
362
-
363
-
364
-
365
-
366
-
367
-
368
-
369
-
370
-
371
-
372
-
373
-
374
-
375
-
376
-
377
-
378
-
379
-
380
 |
 |