Lenovo 0768AFU User Manual - Page 25
Related, service, information, Service, Restoring, factory, contents, using, Product, Recovery,
 |
View all Lenovo 0768AFU manuals
Add to My Manuals
Save this manual to your list of manuals |
Page 25 highlights
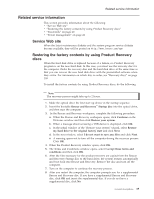
Related service information Related service information This section provides information about the following: v "Service Web site" v "Restoring the factory contents by using Product Recovery discs" v "Passwords" on page 20 v "Power management" on page 22 Service Web site When the latest maintenance diskette and the system program service diskette become available, they will be posted on http://www.lenovo.com/spm Restoring the factory contents by using Product Recovery discs When the hard disk drive is replaced because of a failure, no Product Recovery program is on the new hard disk. In this case, you must use the recovery disc for the computer. Order the recovery disc and the hard disk drive at the same time so that you can recover the new hard disk drive with the preinstalled software when they arrive. For information on which disc to order, see "Recovery discs" on page 138. To install the factory contents by using Product Recovery discs, do the following: Note The recovery process might take up to 2 hours. 1. Make the optical drive the first start up device in the startup sequence. 2. Insert the bootable Rescue and Recovery™ Startup disc into the optical drive, and then start the computer. 3. In the Rescue and Recovery workspace, complete the following procedure: a. When the Rescue and Recovery workspace opens, click Continue on the Welcome window and then click Restore your system. b. When a message about accessing a USB device is displayed, click OK. c. In the initial window of the ″Restore your system″ wizard, select Restore my hard drive to the original factory state and click Next. d. In the next window, select I do not want to save any files and click Next. e. A warning opens not to turn off the computer during the recovery process. Click OK. 4. When the Product Recovery window opens, click OK. 5. The Terms and Conditions window opens, select I accept these terms and conditions and then click OK. 6. After the files necessary for the product recovery are copied from the Rescue and Recovery Startup disc to the hard drive, the system restarts automatically and boot back into Rescue and Recovery. Remove the disc and turn off the computer. 7. Turn on the computer to continue the recovery process. 8. After you restart the computer, the computer prompts you for a supplemental Rescue and Recovery disc. If you have a supplemental Rescue and Recovery disc, click OK and insert the supplemental disc. If you do not have a supplemental disc, click No. General descriptions 19
-
 1
1 -
2
-
3
-
4
-
5
-
6
-
7
-
8
-
9
-
10
-
11
-
12
-
13
-
14
-
15
-
16
-
17
-
18
-
19
-
 20
20 -
 21
21 -
 22
22 -
 23
23 -
 24
24 -
 25
25 -
 26
26 -
 27
27 -
 28
28 -
 29
29 -
 30
30 -
31
-
32
-
33
-
34
-
35
-
36
-
37
-
38
-
39
-
40
-
41
-
42
-
43
-
44
-
45
-
46
-
47
-
48
-
49
-
50
-
51
-
52
-
53
-
54
-
55
-
56
-
57
-
58
-
59
-
60
-
61
-
62
-
63
-
64
-
65
-
66
-
67
-
68
-
69
-
70
-
71
-
72
-
73
-
74
-
75
-
76
-
77
-
78
-
79
-
80
-
81
-
82
-
83
-
84
-
85
-
86
-
87
-
88
-
89
-
90
-
91
-
92
-
93
-
94
-
95
-
96
-
97
-
98
-
99
-
100
-
101
-
102
-
103
-
104
-
105
-
106
-
107
-
108
-
109
-
110
-
111
-
112
-
113
-
114
-
115
-
116
-
117
-
118
-
119
-
120
-
121
-
122
-
123
-
124
-
125
-
126
-
127
-
128
-
129
-
130
-
131
-
132
-
133
-
134
-
135
-
136
-
137
-
138
-
139
-
140
-
141
-
142
-
143
-
144
-
145
-
146
-
147
-
148
-
149
-
150
-
151
-
152
-
153
-
154
-
155
-
156
-
157
-
158
-
159
-
160
-
161
-
162
-
163
-
164
-
165
 |
 |