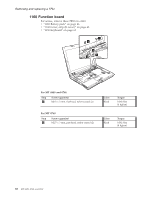
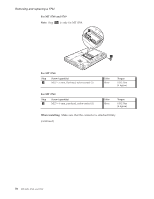
Lenovo 0768AFU User Manual - Page 73
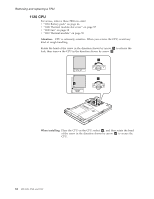
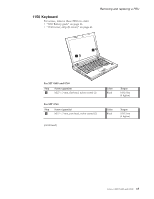
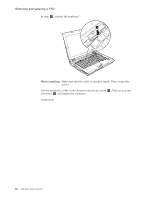
keyboard, connector, attached, firmly., connector., front, under, frame.
 |
View all Lenovo 0768AFU manuals
Add to My Manuals
Save this manual to your list of manuals |
Page 73 highlights
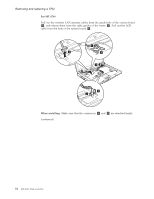
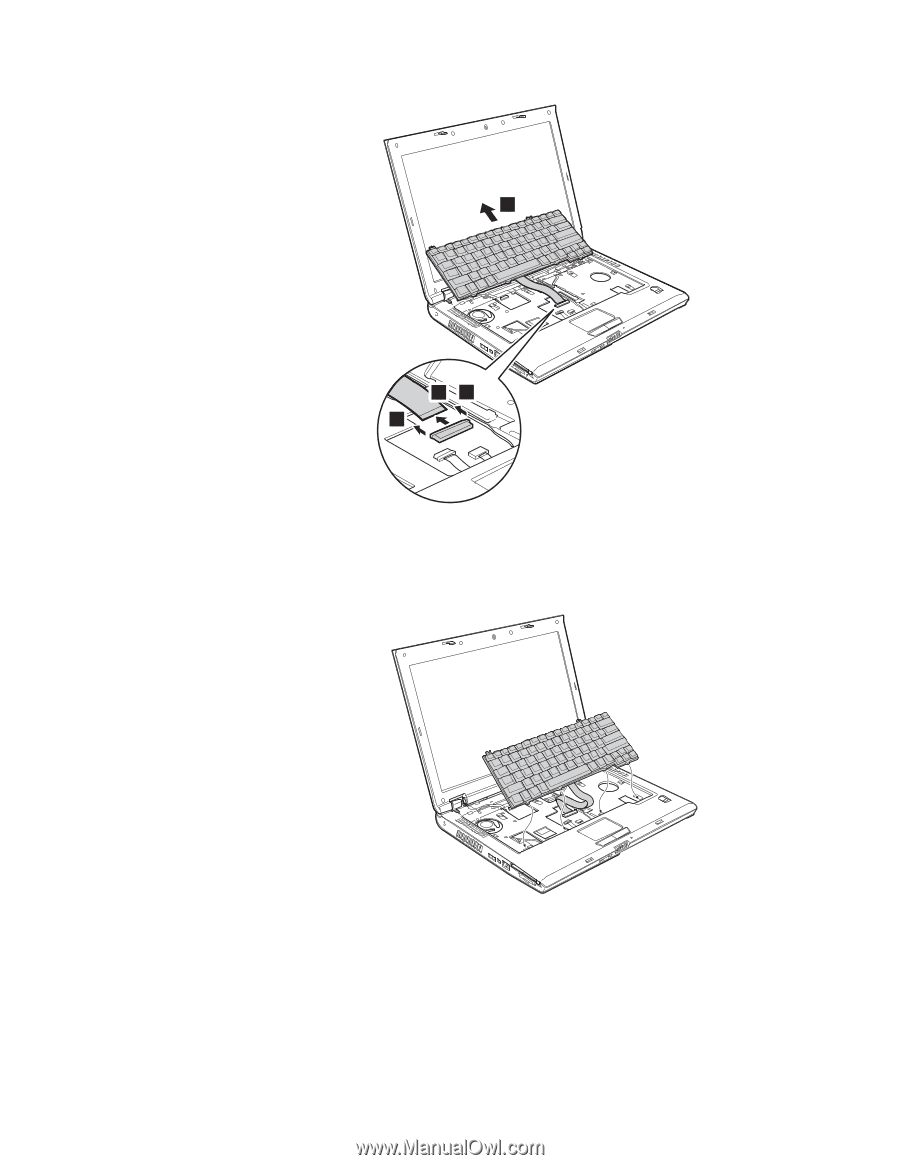
Removing and replacing a FRU 3 54 4 When installing: 1. Make sure that the keyboard connector is attached firmly. Then lock the connector. 2. Make sure that the front side of the keyboard is under the frame. Lenovo 3000 N100 and N200 67
-
 1
1 -
2
-
3
-
4
-
5
-
6
-
7
-
8
-
9
-
10
-
11
-
12
-
13
-
14
-
15
-
16
-
17
-
18
-
19
-
20
-
21
-
22
-
23
-
24
-
25
-
26
-
27
-
28
-
29
-
30
-
31
-
32
-
33
-
34
-
35
-
36
-
37
-
38
-
39
-
40
-
41
-
42
-
43
-
44
-
45
-
46
-
47
-
48
-
49
-
50
-
51
-
52
-
53
-
54
-
55
-
56
-
57
-
58
-
59
-
60
-
61
-
62
-
63
-
64
-
65
-
66
-
67
-
 68
68 -
 69
69 -
 70
70 -
 71
71 -
 72
72 -
 73
73 -
 74
74 -
 75
75 -
 76
76 -
 77
77 -
 78
78 -
79
-
80
-
81
-
82
-
83
-
84
-
85
-
86
-
87
-
88
-
89
-
90
-
91
-
92
-
93
-
94
-
95
-
96
-
97
-
98
-
99
-
100
-
101
-
102
-
103
-
104
-
105
-
106
-
107
-
108
-
109
-
110
-
111
-
112
-
113
-
114
-
115
-
116
-
117
-
118
-
119
-
120
-
121
-
122
-
123
-
124
-
125
-
126
-
127
-
128
-
129
-
130
-
131
-
132
-
133
-
134
-
135
-
136
-
137
-
138
-
139
-
140
-
141
-
142
-
143
-
144
-
145
-
146
-
147
-
148
-
149
-
150
-
151
-
152
-
153
-
154
-
155
-
156
-
157
-
158
-
159
-
160
-
161
-
162
-
163
-
164
-
165
 |
 |
3
4
4
5
When
installing:
1.
Make
sure
that
the
keyboard
connector
is
attached
firmly.
Then
lock
the
connector.
2.
Make
sure
that
the
front
side
of
the
keyboard
is
under
the
frame.
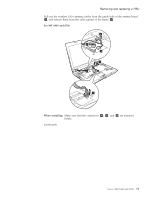
Removing
and
replacing
a
FRU
Lenovo
3000
N100
and
N200
67