Lenovo ThinkPad 380ED TP 380Z Hardware Maintenance Manual (August 1998) for us - Page 13
Fan Checkout, Keyboard or Auxiliary Input Device Checkout
 |
View all Lenovo ThinkPad 380ED manuals
Add to My Manuals
Save this manual to your list of manuals |
Page 13 highlights
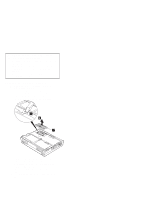
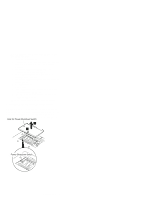
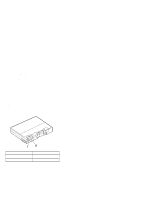
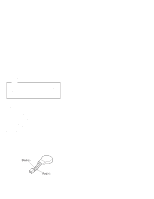
9. If no error occurs when you test the formatted diskette, suspect the diskette that the customer used when reporting the problem. Fan Checkout To check the fan, listen for the fan. If you cannot hear it running at power-on, replace the fan. If you can hear it running but not steadily, run the diagnostic test as follows: 1. Start Easy-Setup. 2. Click on Test. 3. Press Ctrl+A to enter the advanced diagnostic mode. The ThinkPad Connection windows appear. 4. Click on Exit. The keyboard layout appears on the screen. 5. Click on Exit again. 6. Click on System Board then press Enter to run the test. Follow the instructions that appear on the screen. If the test detects a fan problem, replace it. Keyboard or Auxiliary Input Device Checkout Remove any external keyboard before testing the built-in keyboard. If the keyboard does not work or an unexpected character appears, make sure that the flexible cable extending from the keyboard is correctly seated in the connector on the DC/DC card. If the keyboard cable connection is correct, check the DC/DC card. If the tests do not detect a keyboard problem, run the keyboard test by doing the following: 1. Go to the diagnostic menu by selecting Test in the Easy-Setup menu. 2. Press Ctrl+A to enter to the advanced diagnostic mode. The ThinkPad FRU Connections window appears. (If Ctrl+A does not work, triple-click on the icon on the right bottom corner of the basic diagnostic window.) 3. Make sure that the keyboard connection is Connected; then press Esc to exit the screen. A layout of the keyboard appears on the screen. 4. Check that when each key is pressed, the key's position on the keyboard layout on the screen changes to a black square. Note: When the Fn key is pressed, a black square appears briefly. 5. Press Ctrl+Pause to end the test. If the tests detect a keyboard problem, do the following one at a time: ThinkPad 380Z 11
-
 1
1 -
2
-
3
-
4
-
5
-
6
-
7
-
 8
8 -
 9
9 -
 10
10 -
 11
11 -
 12
12 -
 13
13 -
 14
14 -
 15
15 -
 16
16 -
 17
17 -
 18
18 -
19
-
20
-
21
-
22
-
23
-
24
-
25
-
26
-
27
-
28
-
29
-
30
-
31
-
32
-
33
-
34
-
35
-
36
-
37
-
38
-
39
-
40
-
41
-
42
-
43
-
44
-
45
-
46
-
47
-
48
-
49
-
50
-
51
-
52
-
53
-
54
-
55
-
56
-
57
-
58
-
59
-
60
-
61
-
62
-
63
-
64
-
65
-
66
-
67
-
68
-
69
-
70
-
71
-
72
-
73
-
74
-
75
-
76
-
77
-
78
-
79
-
80
-
81
-
82
-
83
-
84
-
85
-
86
-
87
-
88
-
89
-
90
-
91
-
92
-
93
-
94
-
95
-
96
-
97
-
98
-
99
-
100
-
101
-
102
-
103
-
104
 |
 |