Lenovo ThinkPad 380ED TP 380Z Hardware Maintenance Manual (August 1998) for us - Page 63
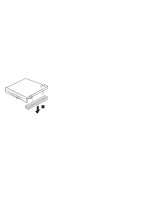
When reinstalling the LCD Unit, push the cable connector, straight into the socket., ThinkPad 380Z
 |
View all Lenovo ThinkPad 380ED manuals
Add to My Manuals
Save this manual to your list of manuals |
Page 63 highlights
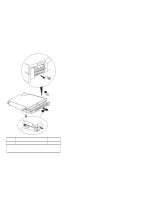
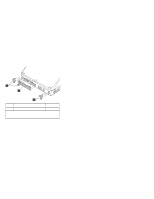
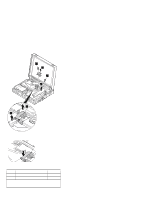
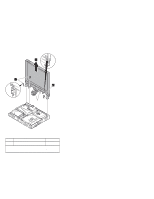
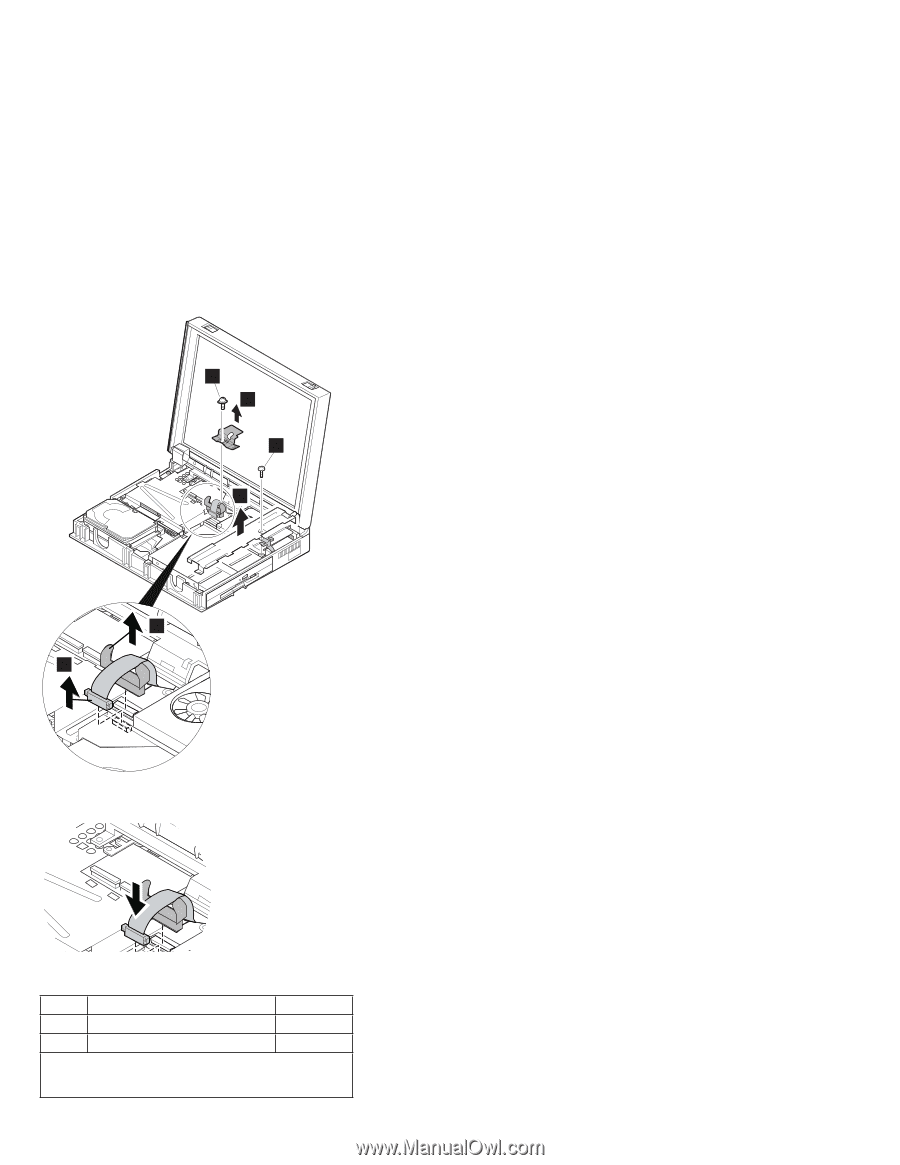
5 6 3 4 8 7 When reinstalling the LCD Unit, push the cable connector straight into the socket. Step Size (Quantity) Torque 3 M 2.5 x 6 mm, nylon-coated (1) 3-4 kgcm 5 M 2.5 x 6 mm, special-head (1) 3 kgcm Note: Make sure that you use correct screws and tighten all of them firmly to the torque shown in the table. Never reuse screws that have been removed. Use new ones instead. ThinkPad 380Z 61
-
 1
1 -
2
-
3
-
4
-
5
-
6
-
7
-
8
-
9
-
10
-
11
-
12
-
13
-
14
-
15
-
16
-
17
-
18
-
19
-
20
-
21
-
22
-
23
-
24
-
25
-
26
-
27
-
28
-
29
-
30
-
31
-
32
-
33
-
34
-
35
-
36
-
37
-
38
-
39
-
40
-
41
-
42
-
43
-
44
-
45
-
46
-
47
-
48
-
49
-
50
-
51
-
52
-
53
-
54
-
55
-
56
-
57
-
 58
58 -
 59
59 -
 60
60 -
 61
61 -
 62
62 -
 63
63 -
 64
64 -
 65
65 -
 66
66 -
 67
67 -
 68
68 -
69
-
70
-
71
-
72
-
73
-
74
-
75
-
76
-
77
-
78
-
79
-
80
-
81
-
82
-
83
-
84
-
85
-
86
-
87
-
88
-
89
-
90
-
91
-
92
-
93
-
94
-
95
-
96
-
97
-
98
-
99
-
100
-
101
-
102
-
103
-
104
 |
 |
5
6
3
4
7
8
When reinstalling the LCD Unit, push the cable connector
straight into the socket.
Step
Size (Quantity)
Torque
3
M 2.5 x 6 mm, nylon-coated (1)
3-4 kgcm
5
M 2.5 x 6 mm, special-head (1)
3 kgcm
Note:
Make sure that you use correct screws and tighten all
of them
firmly
to the torque shown in the table.
Never reuse
screws that have been removed.
Use new ones instead.
ThinkPad 380Z
61