Lenovo ThinkPad 380ED TP 380Z Hardware Maintenance Manual (August 1998) for us - Page 45
FRU Service Procedures, Replacing the System Board
 |
View all Lenovo ThinkPad 380ED manuals
Add to My Manuals
Save this manual to your list of manuals |
Page 45 highlights
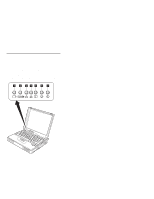
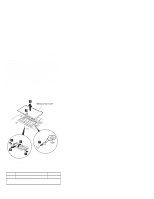
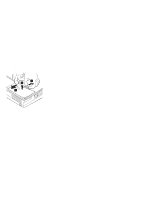
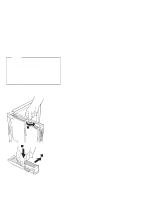
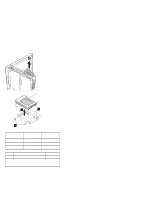
They should not be reused. Do the following when you service this machine: Keep the screw kit (P/N 12J0808) in your tool bag. Always use new screws. Use a torque screwdriver if you have one. FRU Service Procedures Review the following procedures before replacing any FRUs. Replacing the System Board Restoring the System Unit Serial Number The system unit serial number is written on the label attached to the bottom cover of the computer and is also stored as vital product data (VPD) in the EEPROM on the system board. When you replace the system board, you must set the system unit serial number on the new system board to its original number as follows: 1. Press and hold F1 and power on the computer. 2. Hold down F1 until the Easy-Setup menu appears. 3. Click on Config. 4. Press Ctrl + N. The System Unit Serial Number menu appears. 5. Follow the instructions on the menu. Notes: 1. Do not power-off the computer during the restoring process. Updating the Universally Unique IDentifier (UUID) The Universally Unique IDentifier (UUID) is a 128-bit number uniquely assigned to your computer at production and stored in the EEPROM of your system board. The algorithm that generates the unique number is designed to provide unique IDs until the year 3400 A.D. Consequently, no two computers in the world have the same number. When you replace the system board, you must set the UUID on the new system board as follows: 1. Press and hold F1 and power on the computer. 2. Hold down F1 until the Easy-Setup menu appears. 3. Click on Config. 4. Press Ctrl + G. The UUID menu appears. 5. Press F5 to generate a new UUID and press Enter to overwrite it to the EEPROM. ThinkPad 380Z 43
-
 1
1 -
2
-
3
-
4
-
5
-
6
-
7
-
8
-
9
-
10
-
11
-
12
-
13
-
14
-
15
-
16
-
17
-
18
-
19
-
20
-
21
-
22
-
23
-
24
-
25
-
26
-
27
-
28
-
29
-
30
-
31
-
32
-
33
-
34
-
35
-
36
-
37
-
38
-
39
-
 40
40 -
 41
41 -
 42
42 -
 43
43 -
 44
44 -
 45
45 -
 46
46 -
 47
47 -
 48
48 -
 49
49 -
 50
50 -
51
-
52
-
53
-
54
-
55
-
56
-
57
-
58
-
59
-
60
-
61
-
62
-
63
-
64
-
65
-
66
-
67
-
68
-
69
-
70
-
71
-
72
-
73
-
74
-
75
-
76
-
77
-
78
-
79
-
80
-
81
-
82
-
83
-
84
-
85
-
86
-
87
-
88
-
89
-
90
-
91
-
92
-
93
-
94
-
95
-
96
-
97
-
98
-
99
-
100
-
101
-
102
-
103
-
104
 |
 |