Lenovo ThinkPad X60s (English) Service and Troubleshooting Guide - Page 41
Access
 |
View all Lenovo ThinkPad X60s manuals
Add to My Manuals
Save this manual to your list of manuals |
Page 41 highlights
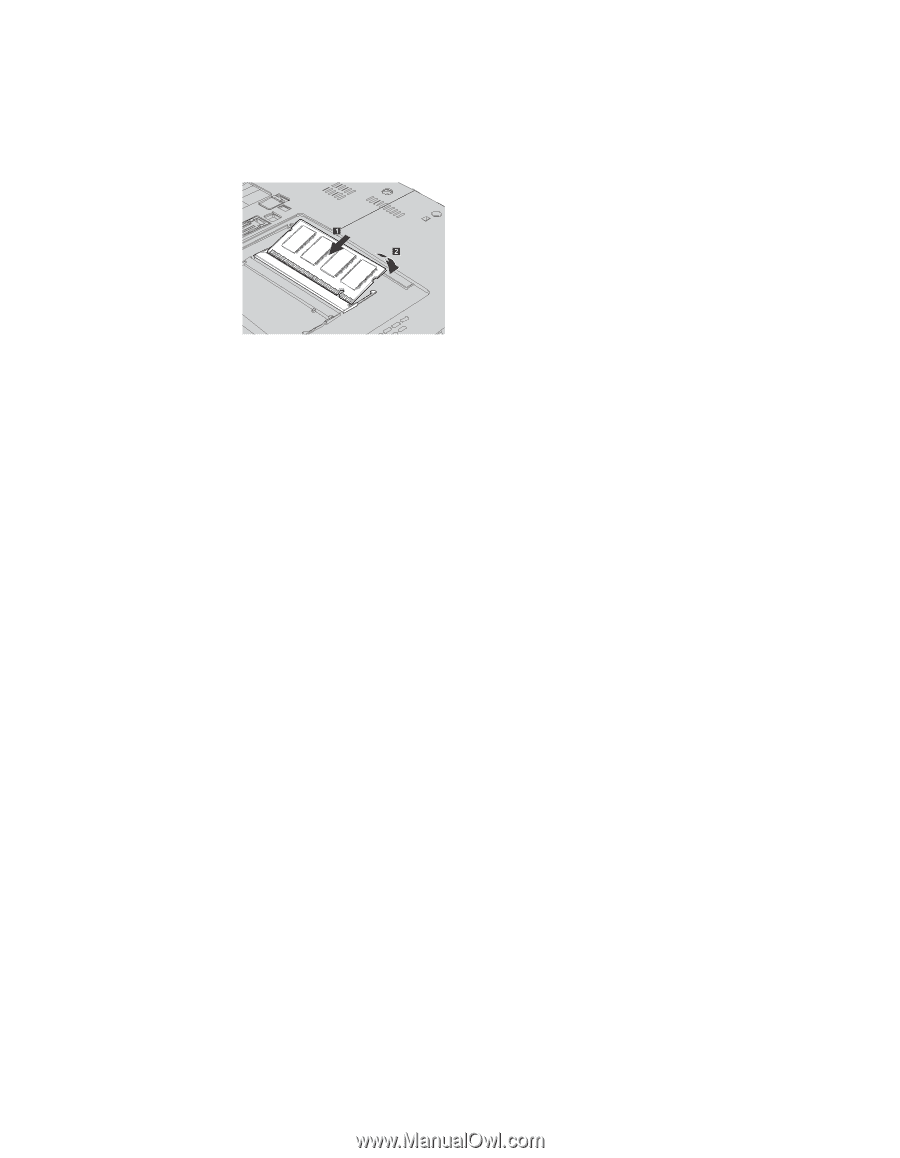
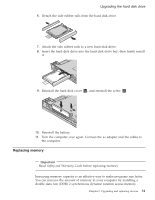
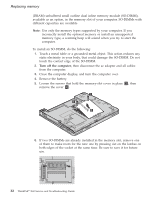
Replacing memory 7. With the notched end of the SO-DIMM toward the contact edge side of the socket, firmly insert the SO-DIMM into the socket at an angle of about 20 degrees 1 ; then pivot it downward until it snaps into place 2. 8. Reinstall the cover and tighten the screws. 9. Close the computer display, and turn the computer over. 10. Reinstall the battery. 11. Turn the computer over again, and re-connect the ac adapter and the cables to the computer. To make sure that the SO-DIMM is installed correctly, do as follows: 1. Turn the computer on. 2. While the "To interrupt normal startup, press the blue ThinkVantage button" message is displayed at the lower-left of the screen, press the ThinkVantage button. The Rescue and Recovery screen opens. 3. Click Access BIOS. The System Restart Required window is displayed. 4. Click Yes. The computer restarts, and the BIOS Setup Utility screen opens. The "Installed memory" item shows the total amount of memory installed in your computer. For example, if your computer has 256 MB of memory and you install a 256-MB SO-DIMM in it, the quantity shown in "Installed memory" should be 512 MB. Chapter 5. Upgrading and replacing devices 33
-
 1
1 -
2
-
3
-
4
-
5
-
6
-
7
-
8
-
9
-
10
-
11
-
12
-
13
-
14
-
15
-
16
-
17
-
18
-
19
-
20
-
21
-
22
-
23
-
24
-
25
-
26
-
27
-
28
-
29
-
30
-
31
-
32
-
33
-
34
-
35
-
 36
36 -
 37
37 -
 38
38 -
 39
39 -
 40
40 -
 41
41 -
 42
42 -
 43
43 -
 44
44 -
 45
45 -
 46
46 -
47
-
48
-
49
-
50
-
51
-
52
-
53
-
54
-
55
-
56
-
57
-
58
-
59
-
60
-
61
-
62
-
63
-
64
-
65
-
66
-
67
-
68
-
69
-
70
-
71
-
72
 |
 |