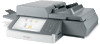
Lexmark MX6500e Quick Reference - Page 19
Copying, E-mailing - user guide
 |
View all Lexmark MX6500e manuals
Add to My Manuals
Save this manual to your list of manuals |
Page 19 highlights
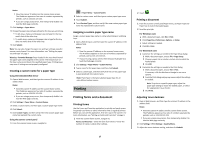
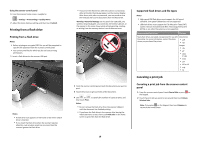
Canceling a print job from the computer For Windows users 1 Open the printers folder. a Click , or click Start and then click Run. b In the Start Search or Run dialog, type control printers. c Press Enter, or click OK. 2 Double‑click the printer icon. 3 Select the print job you want to cancel. 4 Click Delete. For Macintosh users 1 From the Apple Menu, navigate to either of the following: • System Preferences > Print & Scan > select a printer > Open Print Queue • System Preferences > Print & Fax > select a printer > Open Print Queue 2 From the printer window, select the print job you want to cancel, and then click Delete. Copying Making copies Making a quick copy 1 Load an original document facedown into the ADF or on the scanner glass. Note: Do not load postcards, photos, small items, transparencies, photo paper, or thin media (such as magazine clippings) into the ADF. Place these items on the scanner glass. 2 If you are loading a document into the ADF, then adjust the paper guides. 3 From the scanner control panel, touch Copy It. Copying using the ADF 1 Load an original document facedown into the ADF. Note: Do not load postcards, photos, small items, transparencies, photo paper, or thin media (such as magazine clippings) into the ADF. Place these items on the scanner glass. 2 Adjust the paper guides. 3 From the home screen, navigate to: Copy > change the copy settings > Copy It Copying using the scanner glass 1 Place an original document facedown on the scanner glass in the lower left corner. Note: Make sure the edge of the document is aligned with the edge of the scanner glass. 2 From the home screen, navigate to: Copy > specify the copy settings > Copy It 3 If you have more pages to scan, then place the next document on the scanner glass, and then touch Scan the Next Page. 4 Touch Finish the Job to return to the home screen. Canceling a copy job Canceling a copy job while the original document is in the ADF When the ADF begins processing a document, touch Cancel Job on the scanner control panel. Canceling a copy job while copying pages using the scanner glass From the home screen, touch Cancel Job. Canceling appears on the display. When the job is canceled, the Copy screen appears. Canceling a copy job while pages are being printed 1 From the scanner control panel, touch Cancel Job or press on the keypad. 2 Touch the job you want to cancel, and then touch Delete Selected Jobs. 19 Note: If you press on the keypad, then touch Resume to return to the home screen. E-mailing Getting ready to e-mail Setting up the e-mail function 1 Open a Web browser, and then type the scanner IP address in the address field. Notes: • View the scanner IP address on the scanner home screen. The IP address appears as four sets of numbers separated by periods, such as 123.123.123.123. • If you are using a proxy server, then temporarily disable it to load the Web page correctly. 2 Click Settings > E-mail/FTP Settings > E-mail Settings. 3 Enter the appropriate information, and then click Submit. Configuring e‑mail settings 1 Type the scanner IP address or host name in the address field of your Web browser. If you do not know the IP address or host name of the scanner, then you can: • View the information on the scanner control panel home screen or in the TCP/IP section under the Network/Ports menu. • Print a network setup page or menu settings page and locate the information in the TCP/IP section. 2 Click Settings > E-mail/FTP Settings > E-mail Settings. 3 Fill in the fields with the appropriate information. 4 Click Submit.
-
 1
1 -
2
-
3
-
4
-
5
-
6
-
7
-
8
-
9
-
10
-
11
-
12
-
13
-
 14
14 -
 15
15 -
 16
16 -
 17
17 -
 18
18 -
 19
19 -
 20
20 -
 21
21 -
 22
22 -
 23
23 -
 24
24 -
25
-
26
-
27
-
28
-
29
-
30
-
31
-
32
-
33
 |
 |
