Lexmark MX6500e Quick Reference - Page 21
Scanning
 |
View all Lexmark MX6500e manuals
Add to My Manuals
Save this manual to your list of manuals |
Page 21 highlights
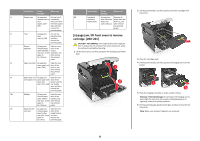
Sending a fax using shortcuts Fax shortcuts are just like the speed dial numbers on a telephone or fax machine. A shortcut number (1-99999) can contain a single recipient or multiple recipients. 1 Load an original document facedown into the ADF or on the scanner glass. Note: Do not place postcards, photos, small items, transparencies, photo paper, or thin media (such as magazine clippings) into the ADF. Place these items on the scanner glass. 2 If you are loading a document into the ADF, then adjust the paper guides. 3 Press , and then enter the shortcut number using the keypad. 4 Touch Fax It. Sending a fax using the address book The address book enables you to search for bookmarks and network directory servers. Note: If the address book feature is not enabled, then contact your system support person. 1 Load an original document facedown into the ADF or on the scanner glass. Note: Do not load postcards, photos, small items, transparencies, photo paper, or thin media (such as magazine clippings) into the ADF. Place these items on the scanner glass. 2 If you are loading a document into the ADF, then adjust the paper guides. 3 From the home screen, navigate to: Fax > > Search 4 Using the virtual keyboard, type the name or part of the name of the person whose fax number you want to find. Note: Do not attempt to search for multiple names at the same time. 5 Touch Done > Fax It. Creating shortcuts Creating a fax destination shortcut using the Embedded Web Server Instead of entering the entire phone number of a fax recipient on the scanner control panel each time you want to send a fax, you can create a permanent fax destination and assign a shortcut number. A shortcut can be created to a single fax number or a group of fax numbers. 1 Type the scanner IP address in the address field of your Web browser. If you do not know the IP address of the scanner, then you can: • View the IP address on the scanner control panel in the TCP/IP section under the Networks/Ports menu. • Print a network setup page or the menu settings pages and locate the IP address in the TCP/IP section. 2 Click Settings > Manage Shortcuts > Fax Shortcut Setup. Note: A password may be required. If you do not have an ID and password, then get one from your system support person. 3 Type a unique name for the shortcut, and then enter the fax number. To create a multiple‑number shortcut, enter the fax numbers for the group. Note: Separate each fax number in the group with a semicolon (;). 4 Assign a shortcut number. If you enter a number that is already in use, then you are prompted to select another number. 5 Click Add. Creating a fax destination shortcut using the touch screen 1 Load an original document facedown into the ADF or on the scanner glass. Note: Do not load postcards, photos, small items, transparencies, photo paper, or thin media (such as magazine clippings) into the ADF. Place these items on the scanner glass. 2 If you are loading a document into the ADF, then adjust the paper guides. 3 On the home screen, touch Fax, and then enter the fax number. To create a group of fax numbers, touch Next number, and then enter the next fax number. 4 Navigate to: > type a name for the shortcut > Done > OK > Fax It Scanning You can use the printer to send a scanned file. You can also use Scan to Network, Multi Send, and MyShortcut applications from the printer home screen. For more information, see the "Activating the home screen applications" section of the User's Guide. Using Scan to Network Scan to Network lets you scan your documents to network destinations specified by your system support person. After the destinations (shared network folders) have been established on the network, the setup process for the application involves installing and configuring the application on the appropriate printer using its Embedded Web Server. For more information, see "Setting up Scan to Network" on page 5. Scanning to an FTP address Scanning to an FTP address using the scanner control panel 1 Load an original document facedown, long edge first into the ADF tray or facedown on the scanner glass. Notes: • Do not load postcards, photos, small items, transparencies, photo paper, or thin media (such as magazine clippings) into the ADF tray. Place these items on the scanner glass. • The ADF indicator light comes on when the paper is loaded properly. 2 If you are loading a document into the ADF tray, then adjust the paper guides. 3 From the scanner control panel, navigate to: FTP > FTP > type the FTP address > Done > Send It 21
-
 1
1 -
2
-
3
-
4
-
5
-
6
-
7
-
8
-
9
-
10
-
11
-
12
-
13
-
14
-
15
-
 16
16 -
 17
17 -
 18
18 -
 19
19 -
 20
20 -
 21
21 -
 22
22 -
 23
23 -
 24
24 -
 25
25 -
 26
26 -
27
-
28
-
29
-
30
-
31
-
32
-
33
 |
 |