Lexmark Pro5500t Quick Reference - Page 29
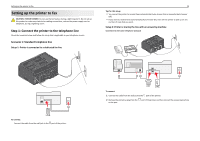
Setting up the printer to fax, Step 1: Connect the printer to the telephone line
 |
View all Lexmark Pro5500t manuals
Add to My Manuals
Save this manual to your list of manuals |
Page 29 highlights
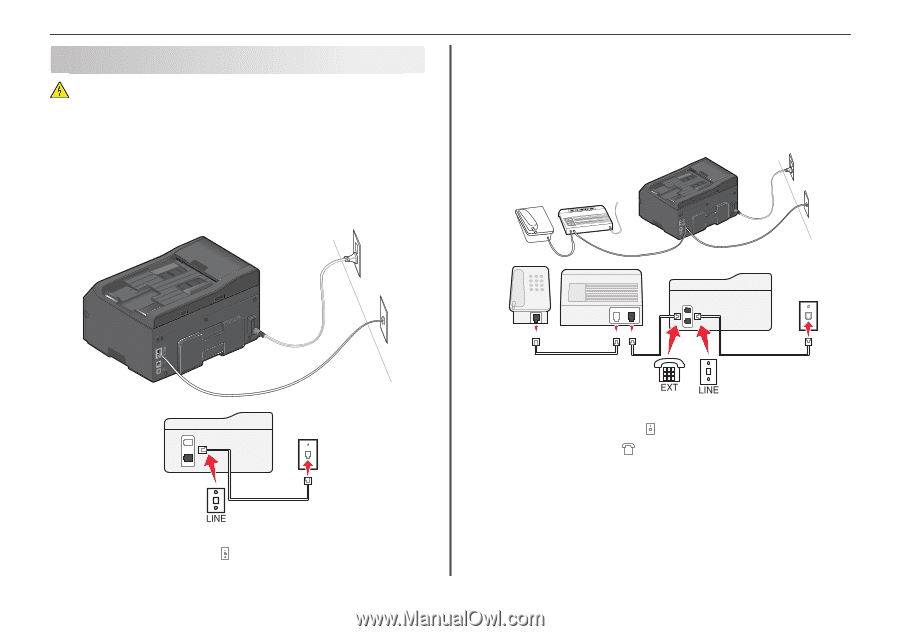
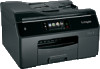
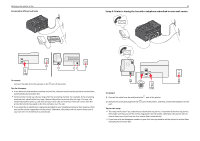
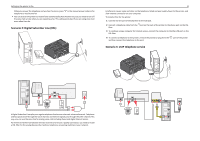
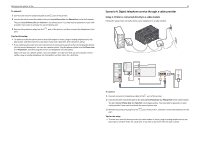
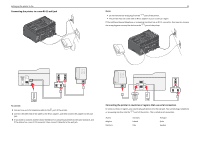
Setting up the printer to fax Setting up the printer to fax CAUTION-SHOCK HAZARD: Do not use the fax feature during a lightning storm. Do not set up this product or make any electrical or cabling connections, such as the power supply cord or telephone, during a lightning storm. Step 1: Connect the printer to the telephone line Check the scenarios below and follow the setup that is applicable to your telephone service. Scenario 1: Standard telephone line Setup 1: Printer is connected to a dedicated fax line 29 Tips for this setup: • You can set the printer to receive faxes automatically (Auto Answer On) or manually (Auto Answer Off). • If you want to receive faxes automatically (Auto Answer On), then set the printer to pick up on any number of rings that you want. Setup 2: Printer is sharing the line with an answering machine Connected to the same telephone wall jack PHONE LINE To connect: Connect the cable from the wall jack to the port of the printer. To connect: 1 Connect the cable from the wall jack to the port of the printer. 2 Remove the protective plug from the to the port. port of the printer, and then connect the answering machine
-
 1
1 -
2
-
3
-
4
-
5
-
6
-
7
-
8
-
9
-
10
-
11
-
12
-
13
-
14
-
15
-
16
-
17
-
18
-
19
-
20
-
21
-
22
-
23
-
 24
24 -
 25
25 -
 26
26 -
 27
27 -
 28
28 -
 29
29 -
 30
30 -
 31
31 -
 32
32 -
 33
33 -
 34
34 -
35
-
36
-
37
-
38
-
39
-
40
-
41
-
42
-
43
-
44
-
45
-
46
-
47
-
48
-
49
-
50
-
51
-
52
-
53
-
54
-
55
 |
 |