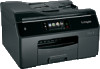
Lexmark Pro5500t Quick Reference - Page 45
Printer is busy or does not respond, Make sure the printer is not in Sleep mode
 |
View all Lexmark Pro5500t manuals
Add to My Manuals
Save this manual to your list of manuals |
Page 45 highlights
Troubleshooting 2 Load plain, unmarked paper. 3 From the home screen, touch > More Options > Deep Clean Printhead. 4 Select an option, and then wait until the printer is ready. 5 From the home screen, touch An alignment page prints. > More Options > Align Printer. Note: Do not remove the alignment page until printing is finished. Printer is busy or does not respond If the "Before you troubleshoot" checklist does not solve the problem, then try one or more of the following: MAKE SURE THE PRINTER IS NOT IN SLEEP MODE If the power light is blinking on and off slowly, then the printer is in Sleep mode. Press to wake up the printer. If the printer will not come out of Sleep mode, then reset the power: 1 Unplug the power cord from the wall outlet, and then wait 10 seconds. 2 Insert the power cord into the wall outlet, and then turn on the printer. If this problem persists, then check our Web site for updates for your printer software or firmware. RECONNECT THE PRINTER POWER SUPPLY 1 Turn off the printer. Note: Make sure the printer is not in Sleep mode. Press and hold for three seconds to turn off the printer. 2 Unplug the power cord from the wall outlet, and then pull out the power cord from the power supply. 3 After one minute, reconnect the power cord into the power supply, and then plug the power cord into the wall outlet. 4 Turn on the printer. Cannot delete documents from the print queue If you have jobs stuck in the print queue and cannot delete them to get other jobs to print, then the computer and printer may not be communicating. RESTART THE COMPUTER AND TRY AGAIN 45 REMOVE AND RECONNECT THE USB CABLE CONNECTED TO YOUR PRINTER Cannot print through USB If the "Before you troubleshoot" checklist does not solve the problem, then try one or more of the following: CHECK THE USB CONNECTION 1 Check the USB cable for any obvious damage. If the cable is damaged, then use a new one. 2 Firmly plug the square end of the USB cable into the back of the printer. 3 Firmly plug the rectangular end of the USB cable into the USB port of the computer. The USB port is marked with . Note: If you continue to have problems, then try another USB port on the computer. You may have connected to a defective port. MAKE SURE THE USB PORT IS ENABLED IN WINDOWS 1 Click , or click Start and then click Run. 2 In the Start Search or Run box, type devmgmt.msc. 3 Press Enter, or click OK. The Device Manager opens. 4 Click the plus sign (+) beside Universal Serial Bus controllers. If USB Host Controller and USB Root Hub are listed, then the USB port is enabled. For more information, see the computer documentation. REMOVE AND REINSTALL THE PRINTER SOFTWARE Fax troubleshooting • "Fax troubleshooting checklist" on page 46 • "Cannot send faxes" on page 46 • "Cannot receive faxes" on page 47 • "Cannot run the fax software" on page 47
-
 1
1 -
2
-
3
-
4
-
5
-
6
-
7
-
8
-
9
-
10
-
11
-
12
-
13
-
14
-
15
-
16
-
17
-
18
-
19
-
20
-
21
-
22
-
23
-
24
-
25
-
26
-
27
-
28
-
29
-
30
-
31
-
32
-
33
-
34
-
35
-
36
-
37
-
38
-
39
-
 40
40 -
 41
41 -
 42
42 -
 43
43 -
 44
44 -
 45
45 -
 46
46 -
 47
47 -
 48
48 -
 49
49 -
 50
50 -
51
-
52
-
53
-
54
-
55
 |
 |