Lexmark T652DTN Embedded Web Server Administrator's Guide - Page 17
Step 2: Create a security template, Step 3: Assign security templates to access controls
 |
UPC - 734646317368
View all Lexmark T652DTN manuals
Add to My Manuals
Save this manual to your list of manuals |
Page 17 highlights
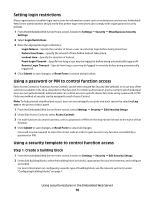
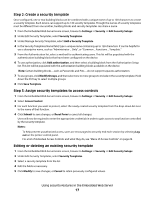
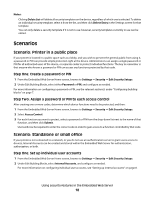
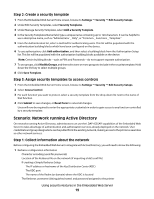
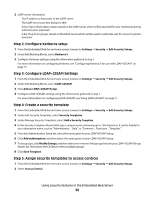
Step 2: Create a security template Once configured, one or two building blocks can be combined with a unique name of up to 128 characters to create a security template. Each device can support up to 140 security templates. Though the names of security templates must be different from one another, building blocks and security templates can share a name. 1 From the Embedded Web Server Home screen, browse to Settings ª Security ª Edit Security Setups. 2 Under Edit Security Templates, select Security Templates. 3 Under Manage Security Templates, select Add a Security Template. 4 In the Security Templates Name field, type a unique name containing up to 128 characters. It can be helpful to use a descriptive name, such as "Administrator _ Only", or "Common _ Functions _ Template." 5 From the Authentication list, select a method for authenticating users. This list will be populated with the authentication building blocks that have been configured on the device. 6 To use authorization, click Add authorization, and then select a building block from the Authorization Setup list. This list will be populated with the authorization building blocks available on the device. Note: Certain building blocks-such as Passwords and Pins-do not support separate authorization. 7 To use groups, click Modify Groups, and then select one or more groups to include in the security template. Hold down the Ctrl key to select multiple groups. 8 Click Save Template. Step 3: Assign security templates to access controls 1 From the Embedded Web Server Home screen, browse to Settings ª Security ª Edit Security Setups. 2 Select Access Control. 3 For each function you want to protect, select the newly created security template from the drop-down list next to the name of that function. 4 Click Submit to save changes, or Reset Form to cancel all changes. Users will now be required to enter the appropriate credentials in order to gain access to any function controlled by the security template. Notes: • To help prevent unauthorized access, users are encouraged to securely end each session by selecting Log out on the printer control panel. • For a list of individual Access Controls and what they do, see "Menu of Access Controls" on page 29. Editing or deleting an existing security template 1 From the Embedded Web Server Home screen, browse to Settings ª Security ª Edit Security Setups. 2 Under Edit Security Templates, select Security Templates. 3 Select a security template from the list. 4 Edit the fields as necessary. 5 Click Modify to save changes, or Cancel to retain previously configured values. Using security features in the Embedded Web Server 17
-
 1
1 -
2
-
3
-
4
-
5
-
6
-
7
-
8
-
9
-
10
-
11
-
 12
12 -
 13
13 -
 14
14 -
 15
15 -
 16
16 -
 17
17 -
 18
18 -
 19
19 -
 20
20 -
 21
21 -
 22
22 -
23
-
24
-
25
-
26
-
27
-
28
-
29
-
30
-
31
-
32
-
33
-
34
-
35
-
36
-
37
-
38
-
39
-
40
 |
 |