Lexmark T652DTN Embedded Web Server Administrator's Guide - Page 19
Scenario: Network running Active Directory, Step 2: Create a security template
 |
UPC - 734646317368
View all Lexmark T652DTN manuals
Add to My Manuals
Save this manual to your list of manuals |
Page 19 highlights
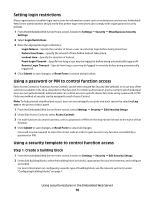
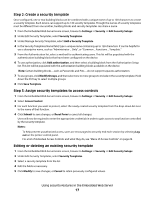
Step 2: Create a security template 1 From the Embedded Web Server Home screen, browse to Settings ª Security ª Edit Security Setups. 2 Under Edit Security Templates, select Security Templates. 3 Under Manage Security Templates, select Add a Security Template. 4 In the Security Templates Name field, type a unique name containing up to 128 characters. It can be helpful to use a descriptive name, such as "Administrator _ Only", or "Common _ Functions _ Template." 5 From the Authentication list, select a method for authenticating users. This list will be populated with the authentication building blocks which have been configured on the device. 6 To use authorization, click Add authorization, and then select a building block from the Authorization Setup list. This list will be populated with the authorization building blocks available on the device. Note: Certain building blocks-such as PINs and Passwords-do not support separate authorization. 7 To use groups, click Modify Groups, and then select one or more groups to include in the security template. Hold down the Ctrl key to select multiple groups. 8 Click Save Template. Step 3: Assign security templates to access controls 1 From the Embedded Web Server Home screen, browse to Settings ª Security ª Edit Security Setups. 2 Select Access Control. 3 For each function you want to protect, select a security template from the drop-down list next to the name of that function. 4 Click Submit to save changes, or Reset Form to cancel all changes. Users will now be required to enter the appropriate credentials in order to gain access to any function controlled by a security template. Scenario: Network running Active Directory On networks running Active Directory, administrators can use the LDAP+GSSAPI capabilities of the Embedded Web Server to take advantage of authentication and authorization services already deployed on the network. User credentials and group designations can be pulled from the existing network, making access to the printer as seamless as other network services. Step 1: Collect information about the network Before configuring the Embedded Web Server to integrate with Active Directory, you will need to know the following: 1 Kerberos configuration information • Character encoding (used for passwords) • Location of the Kerberos file on the network (if importing a krb5.conf file) • If creating a Simple Kerberos Setup: - The IP address or hostname of the Key Distribution Center (KDC) - The KDC port - The name of the Realm (or domain) where the KDC is located • The Kerberos username (distinguished name) and password assigned to the printer Using security features in the Embedded Web Server 19
-
 1
1 -
2
-
3
-
4
-
5
-
6
-
7
-
8
-
9
-
10
-
11
-
12
-
13
-
 14
14 -
 15
15 -
 16
16 -
 17
17 -
 18
18 -
 19
19 -
 20
20 -
 21
21 -
 22
22 -
 23
23 -
 24
24 -
25
-
26
-
27
-
28
-
29
-
30
-
31
-
32
-
33
-
34
-
35
-
36
-
37
-
38
-
39
-
40
 |
 |