Lexmark T652DTN Embedded Web Server Administrator's Guide - Page 20
Step 3: Con LDAP+GSSAPI Settings, Step 2: Con Kerberos setup
 |
UPC - 734646317368
View all Lexmark T652DTN manuals
Add to My Manuals
Save this manual to your list of manuals |
Page 20 highlights
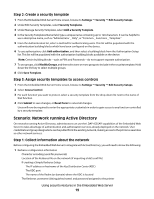
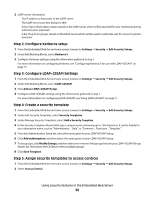
2 LDAP server information • The IP address or hostname of the LDAP server • The LDAP server port (the default is 389) • A list of up to three object classes stored on the LDAP server, which will be searched for user credentials during authentication (optional) • A list of up to 32 groups stored on the LDAP server which will be used to authorize user for access to printer functions Step 2: Configure Kerberos setup 1 From the Embedded Web Server Home screen, browse to Settings ª Security ª Edit Security Setups. 2 Under Edit Building Blocks, select Kerberos 5. 3 Configure Kerberos settings using the information gathered in step 1. For more information on configuring Kerberos, see "Configuring Kerberos 5 for use with LDAP+GSSAPI" on page 13. Step 3: Configure LDAP+GSSAPI Settings 1 From the Embedded Web Server Home screen, browse to Settings ª Security ª Edit Security Setups. 2 Under Edit Building Blocks, select LDAP+GSSAPI. 3 Click Add an LDAP+GSSAPI Setup. 4 Configure LDAP+GSSAPI settings using the information gathered in step 1. For more information on configuring LDAP+GSSAPI, see"Using LDAP+GSSAPI" on page 11 Step 4: Create a security template 1 From the Embedded Web Server Home screen, browse to Settings ª Security ª Edit Security Setups. 2 Under Edit Security Templates, select Security Templates. 3 Under Manage Security Templates, select Add a Security Template. 4 In the Security Templates Name field, type a unique name containing up to 128 characters. It can be helpful to use a descriptive name, such as "Administrator _ Only", or "Common _ Functions _ Template." 5 From the Authentication Setup list, select the name given to your LDAP+GSSAPI setup. 6 Click Add authorization, and then select the name given to your LDAP+GSSAPI setup. 7 To use groups, click Modify Groups, and then select one or more of the groups listed in your LDAP+GSSAPI Group Names list. Hold down the Ctrl key to select multiple groups. 8 Click Save Template. Step 5: Assign security templates to access controls 1 From the Embedded Web Server Home screen, browse to Settings ª Security ª Edit Security Setups. 2 Select Access Control. Using security features in the Embedded Web Server 20
-
 1
1 -
2
-
3
-
4
-
5
-
6
-
7
-
8
-
9
-
10
-
11
-
12
-
13
-
14
-
 15
15 -
 16
16 -
 17
17 -
 18
18 -
 19
19 -
 20
20 -
 21
21 -
 22
22 -
 23
23 -
 24
24 -
 25
25 -
26
-
27
-
28
-
29
-
30
-
31
-
32
-
33
-
34
-
35
-
36
-
37
-
38
-
39
-
40
 |
 |