Lexmark X925 Lexmark Document Producer - Page 31
Printer type, Description, Printer support, Relative, speed
 |
View all Lexmark X925 manuals
Add to My Manuals
Save this manual to your list of manuals |
Page 31 highlights
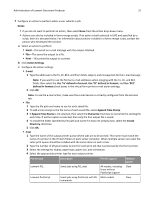
Administration of Lexmark Document Producer 31 7 Configure an action to perform when a user submits a job: Notes: • If you do not want to perform an action, then select None from the Action drop‑down menu. • Actions can also be included in forms merge scripts. If an action is both selected in LMC and specified by a script, then it is executed twice. For information about actions included in a forms merge script, contact the person who developed the solution. a Select an action to perform: • Email-This sends an e‑mail message with the output attached. • File-This saves the output to a file. • Print-This prints the output to a printer. b Click Action Settings. c Configure the action settings. • E‑mail 1 Type the addresses in the To, CC, BCC, and From fields, subject, and message text for the e‑mail message. Note: If you want to use the formset e‑mail addresses when merging with the To, CC, and BCC fields, then select the Use 'To' defined in formset, Use 'CC' defined in formset, and Use 'BCC' defined in formset check boxes in the virtual form printer e‑mail action settings. 2 Click OK. Note: To use the e‑mail action, make sure the e‑mail service is correctly configured from the Services tab. • File 1 Type the file path and name to use for each saved file. 2 To add a time stamp to the file name of each saved file, select Append Time Stamp. 3 If Append Time Stamp is not selected, then select the Overwrite check box to overwrite the existing file each time. If neither option is selected, then only the first output file is saved. 4 To create the folder specified by file path and name if it does not already exist, select the Create Directory check box. 5 Click OK. • Print 1 Type the name of the output printer queue where jobs are to be printed. This name must match the name of a printer in the Printers folder on each server computer. When multiple servers are used, the same print queue should be installed with the same name on each server. 2 Type the number of physical copies to print for each print job that is processed by the forms printer. 3 Select the settings for duplex, paper type, paper size, and orientation. 4 Select the appropriate printer type for your output printer: Printer type Description Printer support Relative speed Lexmark PCL Sends jobs using PCL data All models, including Slow those without PostScript support Lexmark PostScript Sends jobs using PostScript with PJL Most models Slow commands
-
 1
1 -
2
-
3
-
4
-
5
-
6
-
7
-
8
-
9
-
10
-
11
-
12
-
13
-
14
-
15
-
16
-
17
-
18
-
19
-
20
-
21
-
22
-
23
-
24
-
25
-
 26
26 -
 27
27 -
 28
28 -
 29
29 -
 30
30 -
 31
31 -
 32
32 -
 33
33 -
 34
34 -
 35
35 -
 36
36 -
37
-
38
-
39
-
40
-
41
-
42
-
43
-
44
-
45
-
46
-
47
-
48
-
49
-
50
-
51
-
52
-
53
-
54
-
55
-
56
-
57
-
58
-
59
-
60
-
61
-
62
-
63
-
64
 |
 |