Magnavox MDR513H User manual, English (US) - Page 27
Switching HDD / DVD Mode, How to Insert a Disc, Connections, Recording, Playback, Editing
 |
UPC - 609585189706
View all Magnavox MDR513H manuals
Add to My Manuals
Save this manual to your list of manuals |
Page 27 highlights
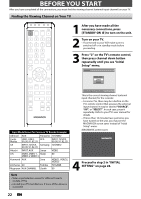
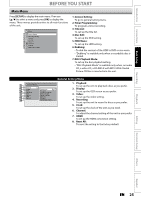
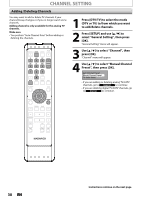
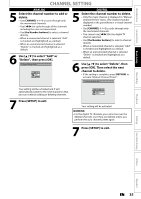
Introduction Connections BEFORE YOU START Switching HDD / DVD Mode Because this unit is a combination of HDD and DVD recorder, you must first select which component (output mode) you wish to operate. HDD mode Press [HDD] to activate the HDD component. DVD mode Press [DVD] to activate the DVD component. DVD button HDD button OPEN/ STANDBY-ON DTV/TV SOURCE CLOSE .@/: ABC DEF GHI JKL MNO CHANNEL PQRS TUV WXYZ SPACE CLEAR SETUP AUDIO REPEAT HDMI DISC MENU TITLE OK DISPLAY RETURN V.REPLAY V.SKIP RAPID PLAY D.DUBBING TIMER HDD DVD REC MODE REC HDD button DVD button Basic Setup Recording Playback Editing Function Setup How to Insert a Disc 1) Press [OPEN/CLOSE A] to open the disc tray. 2) Place the disc on the disc tray with its label side facing up. Align the disc to the disc tray guide. 3) Press [OPEN/CLOSE A] to close the disc tray. It may take a while to load the disc. To eject the disc: Press [OPEN/CLOSE A] to open the disc tray, then remove the disc before turning the unit to the standby mode. • When inserting a brand-new DVD+RW/DVD-RW, the unit automatically starts to format. • If titles have been recorded on the disc, the title list is displayed. Press [STOP C] to exit the title list. EN 27 Others Español
-
 1
1 -
2
-
3
-
4
-
5
-
6
-
7
-
8
-
9
-
10
-
11
-
12
-
13
-
14
-
15
-
16
-
17
-
18
-
19
-
20
-
21
-
 22
22 -
 23
23 -
 24
24 -
 25
25 -
 26
26 -
 27
27 -
 28
28 -
 29
29 -
 30
30 -
 31
31 -
 32
32 -
33
-
34
-
35
-
36
-
37
-
38
-
39
-
40
-
41
-
42
-
43
-
44
-
45
-
46
-
47
-
48
-
49
-
50
-
51
-
52
-
53
-
54
-
55
-
56
-
57
-
58
-
59
-
60
-
61
-
62
-
63
-
64
-
65
-
66
-
67
-
68
-
69
-
70
-
71
-
72
-
73
-
74
-
75
-
76
-
77
-
78
-
79
-
80
-
81
-
82
-
83
-
84
-
85
-
86
-
87
-
88
-
89
-
90
-
91
-
92
-
93
-
94
-
95
-
96
-
97
-
98
-
99
-
100
-
101
-
102
-
103
-
104
-
105
-
106
-
107
-
108
-
109
-
110
-
111
-
112
-
113
-
114
-
115
-
116
-
117
-
118
-
119
-
120
-
121
-
122
-
123
-
124
-
125
-
126
-
127
-
128
 |
 |
