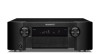
Marantz SR5005 SR5005 User Manual - English - Page 7
Install, Connect - setup
 |
View all Marantz SR5005 manuals
Add to My Manuals
Save this manual to your list of manuals |
Page 7 highlights
ENGLISH DEUTSCH FRANÇAIS ITALIANO ESPAÑOL NEDERLANDS SVENSKA 1 Install 2 1 2 3 4 5 Connect 1 2345 This unit can perform 2.0/2.1 to 7.1-channel surround playback. This page provides the speaker installation procedure for the 7.1-channel playback using surround back speakers as an example. The default setting is 7.1-channel. You can also perform 5.1-channel playback. To perform 5.1-channel playback, connect 5.1-channel speakers only. Use the Audyssey Auto Setup function of this unit to automatically detect the number of connected speakers and perform optimal settings for the speakers to be used. FL SW FR C 90 - 110˚ 22 - 30˚ 135 - 150˚ Speakers Carefully check the left (L) and right (R) channels and + (red) and - (black) polarities on the speakers being connected to the this unit, and be sure to interconnect the channels and polarities correctly. Connecting the speaker cables Peel off about 0.03 ft/10 mm of sheathing from the tip of the speaker cable, then either twist the core wire tightly or terminate it. NOTE • Connect so that the speaker cable core wires do not protrude from the speaker terminal. The protection circuit may be activated if the core wires touch the rear panel or if the + and - sides touch each other (vpage 79 "Protection Circuit"). • Never touch the speaker terminals while the power supply is connected. Doing so could result in electric shock. • Use speakers with the speaker impedances shown below. Speaker terminals FRONT A CENTER SURROUND SURR. BACK/AMP ASSIGN FRONT B/HEIGHT FRONT A + FRONT B Speaker impedance 6 − 8 Ω 8 Ω SL SR Listening position SBL SBR FL Front speaker (L) FR Front speaker (R) C Center speaker SW Subwoofer SL Surround speaker (L) SR Surround speaker (R) SBL Surround back speaker (L) SBR Surround back speaker (R) • Install the surround speakers in a position 2 to 3 ft (60 to 90 cm) higher than ear level. Surround Front speaker speaker 2 - 3 ft / 60 - 90 cm Surround back speaker • Point slightly downwards GViewed from the sideH 4 The "Simple version" section provides the speaker installation, connection, and setup methods for the 7.1-channel system with surround back speakers. For the installing, connecting, and setup methods of speakers other than the 7.1-channel system (with surround back speakers), see page 33.
-
 1
1 -
 2
2 -
 3
3 -
 4
4 -
 5
5 -
 6
6 -
 7
7 -
 8
8 -
 9
9 -
 10
10 -
 11
11 -
 12
12 -
13
-
14
-
15
-
16
-
17
-
18
-
19
-
20
-
21
-
22
-
23
-
24
-
25
-
26
-
27
-
28
-
29
-
30
-
31
-
32
-
33
-
34
-
35
-
36
-
37
-
38
-
39
-
40
-
41
-
42
-
43
-
44
-
45
-
46
-
47
-
48
-
49
-
50
-
51
-
52
-
53
-
54
-
55
-
56
-
57
-
58
-
59
-
60
-
61
-
62
-
63
-
64
-
65
-
66
-
67
-
68
-
69
-
70
-
71
-
72
-
73
-
74
-
75
-
76
-
77
-
78
-
79
-
80
-
81
-
82
-
83
-
84
-
85
-
86
-
87
-
88
-
89
-
90
-
91
 |
 |
