Maytag MER5875RAF Use and Care Guide
Maytag MER5875RAF - Frost 30 Inch Electric Range Manual
 |
View all Maytag MER5875RAF manuals
Add to My Manuals
Save this manual to your list of manuals |
Maytag MER5875RAF manual content summary:
- Maytag MER5875RAF | Use and Care Guide - Page 1
No. C/05/05 Pall No. 8113P494 60 Care & Cleaning 19-22 Self-Clean Oven Cleaning Procedures Maintenance 23-24 Oven Window Oven Light Troubleshooting 25=26 Warranty & Service 27 Guide d'utilisation et d'entretien 28 Guia de Use y Cuidado 56 ¢b2005 Maytag Appliances Sales Co. Litho U.S.A. - Maytag MER5875RAF | Use and Care Guide - Page 2
. Do not attempt to adjust, repair, service, or replace any part of your appliance unless it is specifically recommended in this guide. All other servicing should be referred to a qualified servicer. Always disconnect power to appliance before servicing. o ALL RANGES CAN TiP AND CAUSE INJURIES TO - Maytag MER5875RAF | Use and Care Guide - Page 3
electric shock, fire, or damage to the appliance. Use foil only as directed in this guide. should not be allowed to play with controls or other parts of the appliance. About Your Appliance NEVER use an PREPARED FOOD WARNUNG: Follow food manufacturer's instructions. If a plastic frozen food container - Maytag MER5875RAF | Use and Care Guide - Page 4
cooktop and create a risk of electric shock. Contact a qualified technician move pan. Ventimating Hoods Clean range hood and filters frequently to prevent if applied to a hot surface. Clean only parts listed in this guide. Se f-C ean Oven utensils, etc. in instructions for Future Reference 3 - Maytag MER5875RAF | Use and Care Guide - Page 5
cooking. o NEVER allow a pan to boil dry. This could damage the pan and th_ appliance. • NEVER touch cooktop until it has cooled. Expect some parts of the cooktop, especially around the surface units to become warm or hot during cooking. Use potholders _o protect hands. AFTER cnnKiN61 - Make sure - Maytag MER5875RAF | Use and Care Guide - Page 6
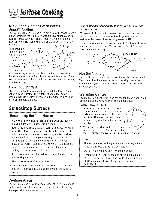
setting, even o+1Hi. For more information on cookware, refer to Cookware Recommendations on page 7 and "Cooking Made SimpHe"bookHet incHudedwith your range. ELEMENT DUAL ELEMENT WARMING CENTER FLEX+CHOIC£ _M ELEMENT TRIPLE ELEMENT Hot Surface Light The Hot Surface indicator Hightis Hocatedon the - Maytag MER5875RAF | Use and Care Guide - Page 7
, Do not use pHasticwrap to cover foods. Hastic may melt on to the surface and be very difficult to clean. Nex-Choice TM Deraents (select models) The Flex-ChoiceTM demenst are fully OFF functioning elements that provide an ,_t ,_h ultra low Melt heat setting for melting chocolate and butter - Maytag MER5875RAF | Use and Care Guide - Page 8
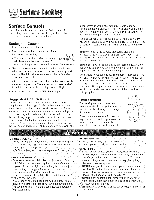
. Foil may melt onto the glass, if metal melts on the cooktop, do not use. Call an authorized Maytag Servicer. Cookware Recommendations Using the right cookware can prevent many problems, such as food taking longer to cook or achieving inconsistent results. Proper pans will reduce cooking times, use - Maytag MER5875RAF | Use and Care Guide - Page 9
set the time of day. , Colon flashes in the display. 3. Press the Clock pad again or wait four seconds. ° The colon wiil remain on. When electrical power is supplied or after a power interruption, the last clock time before power was interrupted wiii flash, cont. 8 - Maytag MER5875RAF | Use and Care Guide - Page 10
will be displayed in seconds. Fault Codes BAKE or LOCK may flash rapidly ill the display to alert you if there is an error or a problem. [f BAKE or LOCK flash in the display, press CANCEL pad. [f BAKE or LOCK continue to flash, disconnect power to the appliance. Wait a few minutes, and - Maytag MER5875RAF | Use and Care Guide - Page 11
To set Bake: ....... 1. Press the Bake pad. Bake8 , BAKE wiii flash. ° 000 will] flash in the dispiay. 2. SeHectthe oven temperature. Press the Autoset 0 pad for 350° F or the appropriate number pads. f_ U -_utosd ° Each addidonai press of the Autoset 0 pad wiii increase the temperature by 25 - Maytag MER5875RAF | Use and Care Guide - Page 12
3. Press Convect Bake pad again or wait four seconds. , BAKE will stop flashing. , 1O0° or the actual oven temperature if over 1O0° F will dispDy. It will rise in 5° increments untiHthe preset temperature is reached. , The fan icon will start to rotate. (_) 4. AHow the oven to preheat for 8-15 - Maytag MER5875RAF | Use and Care Guide - Page 13
@ Cook & Hold When ushg the Cook & HoHdoption, the oven beghs to heat immediateHyafter the controHhas been set. Then, the oven cooks for a specified Hengthof time. When that time has eHapsed,the oven wiHHkeep the food warm for up to an hour then automaticaHHyturn off. When the cooking time has - Maytag MER5875RAF | Use and Care Guide - Page 14
@ Delay Cook & Hold Keep Warm For safely keeping hot foods warm in the oven or for warming breads and plates. Do not USedelayed baking for highly perishable foods such as dairy products, pork, poultry, or seafood. When using Delay, the oven begins to cook later in the day. Set the amount of time - Maytag MER5875RAF | Use and Care Guide - Page 15
Broil 4 15 minutes Seafood Fish Steaks, buttered, 1" thick Lobster Tails, 3-4 oz. each 10 - 15 minutes 7 - 10 minutes Note: This chart is a suggested guide. The times may vary with the food being cooked. 14 7 - 12 minutes 8 - 14 minutes 6 - 9 minutes (no turning} 12 - 14 minutes 3 - 7 minutes - Maytag MER5875RAF | Use and Care Guide - Page 16
at the same time for three seconds. 3. A single beep will sound and the current setting will be displayed {°F or °C}. (If no change is made, the range will return to the existing setting after 30 seconds.[) 4. To change the setting, press the Autoset 0 pad. Press again to return to existing setting - Maytag MER5875RAF | Use and Care Guide - Page 17
5 Adjusting the Oven Temperature Oven temperatures are carefully tested for a_-curacyat the factory. It is normal to notice some baking or browning differences between a new oven and an oHdone. As ovens get oHder,the oven temperature can shift. You may adjust the oven temperature if you think the - Maytag MER5875RAF | Use and Care Guide - Page 18
opening. The oven vent is located below the backgaard vent shield on your range. OVEN VENT L OCA TION Do not place plastics near the vent opening of the rack and pull out. To replace: 1. Place rack on the rack supports in the oven 2. Tilt the front end up slightly. Slide rack back until it - Maytag MER5875RAF | Use and Care Guide - Page 19
}. Note: When Convect baking on two or three racks, check foods at the minimum suggested time to avoid overbrowning or over-cooking. Create-A-Space Select range models are /_ half rack. The left side of the rack can be removed to accommodate a large roaster on the lower rack. The right side of - Maytag MER5875RAF | Use and Care Guide - Page 20
Se f-Cmean Oven To set Self-Clean: o _t is normal for parts of the range to become hot during a - To prevent damage to oven door. do not attempt to open the door when LOCK is displaped. o Avoid touching cooktop, door. - Maytag MER5875RAF | Use and Care Guide - Page 21
and do not slide smoothly after a clean cycle, wipe racks and rack supports with a small amount of vegetable oil to make them easier to move. Fine in the oven. Sounds As the oven heats, you may hear sounds of metal parts expanding and contracting. This is normal and will not damage the oven. ° If - Maytag MER5875RAF | Use and Care Guide - Page 22
, abrasive or caustic cleaning agents on exterior finish of range. ° To activate "Control Lock" for cleaning, see with ammonia° Note: Call an authorized servicer if the glass=ceramic top should with a damp paper towel and Cooktop Cleaning Creme* {Part No. 20000000**= Then, buff with a clean dry' - Maytag MER5875RAF | Use and Care Guide - Page 23
-cHeaonperation. If this occurs, wipe the rack edge and rack support with a smaHHamount of vegetabHeoiHto restore ease of movement, then wipe Rinse and dry=To poHishand heHpprevent fingerprints, foHHowwith StainHessSteeHMagic Spray* (Part No= 20000008)**, ° _'loderateiHeavy Soil -- Wipe with one of - Maytag MER5875RAF | Use and Care Guide - Page 24
over, break the d00r, 0r !r_jurethe user, Note: The oven door on a new range may fed "spongy" when it is closed. This is normal and will decrease with use ,ER 3, RepHacewith a 40-watt appHiance buHb. 4. RepHacebuHbcover and secure with wire retainer. 5. Reconnect power to range. Reset chock. 23 - Maytag MER5875RAF | Use and Care Guide - Page 25
To replace: 1. Fit the ends of the drawer giides into the raib in the range. 2. Lift up the front of the drawer and gendy push in to the first drawer up again and push until drawer is closed. Convenience Out et (Canadian models only} The convenience outlet is located on the lower left side of the - Maytag MER5875RAF | Use and Care Guide - Page 26
PROBLEM For most concerns, try these first. , Check if oven controHshave been properHyset. , Check to be sure pHugis securdy inserted into receptacle. , Check or re-set circuit breaker. Check or repHacefuse. ° Check power suppHy. Part to make sure range is HeveL , 16 for instructions on adjusting - Maytag MER5875RAF | Use and Care Guide - Page 27
on. This is normal for a new range and wiii disappear after a few uses. you if there is an error or a problem, if BAKE or LOCK appear in the fault code reappears, contact an authorized servicer. Noises may be heard. There you may hear sounds of metal parts expanding and contracting. This is normal - Maytag MER5875RAF | Use and Care Guide - Page 28
b. Model number and serial number of your appliance. c. Name and address of your dealer and date appliance was purchased. d.A clear description of the problem you are having. e. Proof of purchase. Use and Care guides, service manuals and parts information are available from Maytag ServicessM,Maytag - Maytag MER5875RAF | Use and Care Guide - Page 29
four Netteyage 42-50 Four autonettoyant M_thodes de nettoyage Entretien 51-52 Hub[ot et tampe du _oul Recherche des pannes 53-54 Garantie et service apres-vente .,, 55 Guia de Use y Cuidade 56 - Maytag MER5875RAF | Use and Care Guide - Page 30
apparei! qui ne sam pas ment_onnees oans ce guide on_pu 6tre ntroduites. Repertez_veus a la page 55 pear plus d'i_lfermatietts cel_cemal_t le service apres-venteo Lire toutes les instructions avant d'utiliser cet appareii; observer toutes les instructions pour eliminer les risques d'incendie, choc - Maytag MER5875RAF | Use and Care Guide - Page 31
JAMAIS hisser des enfants seub ou sans supervision Iorsque I'appareil est en service ou encore chaud, Ne jamais laisser un enfant s'asseoir ou se tenir I'appareil, Utiliser de la feuilb d'aluminium uniquement selon bs instructions de ce guide, Cuisson et s curit NE JAMAmS faire chauffer un recipient - Maytag MER5875RAF | Use and Care Guide - Page 32
ou accessoire qui n'est pas sp@ifiquement recommande darts ce guide. Ne pas utiliser de systeme de convection additionnel. L'utilisation four sans risque de bris sous I'effet du choc thermique. Observer les instructions du fabricant Iors de I'utilisation d'un ustensile en verre. Orienter la poignee - Maytag MER5875RAF | Use and Care Guide - Page 33
, de meme que les fumees emises Iors du chauffage excessif de graisse, huile, margarine, et du chauffage excessif darts un ustensile a revetement antiadhesif, Conserver ces instructions pout consultation ult6tieute 32 - Maytag MER5875RAF | Use and Care Guide - Page 34
Boutons de commande Permettenti'utilisationdes 616meritschauffants de surface,avec une progress+oncontinue de la puissanceentre ies reglagesextrQmes Low (Basso)et High [Elevee)+On peat regler un beaten_ toute position entre ces deux extremes+ Reglage des commandos 1+ PlacerI'ustensilesur Velepaent+ - Maytag MER5875RAF | Use and Care Guide - Page 35
EI6ment Triple avec Option Power BOOSt mc La surfacede cuissoncomporteun 616mentriple avec option Power BoostMcsitu6 _ Favantdroit. Cet 616mentpeut servir pour de plus gros ustensiles (6Idmenttriple} ou pour de plus petits ustensiles o+_ {616menst imple ou double}. @ @ Pour ne faire - Maytag MER5875RAF | Use and Care Guide - Page 36
vitroc6ramique. Pour 6viter tes marques et [es rayures o Ne pas utiliser de casserolesen verre. Ellespourraientrayer [a surface. o Ne ]amais utiliser de support m6tai[iqueou anneaude wok entre un recipient et Iasurface de cuisson. Cesobjets peuvent marquer ou rayerIa surface. o Ne pas faire glisser - Maytag MER5875RAF | Use and Care Guide - Page 37
risque de fondre sur [e verre. Sile rn6taI fond sur [a table de cuisson, ne pas ['utiliser. Appeler un r6parateur agr66 Maytag. Recommandations sur los ustensiles L'utilisationdu bon ustensilepeut emp6cherde nombreux problemescomme Ia n@essit6de cuire plus Ionguement[a nourritureet Ia difficult6 - Maytag MER5875RAF | Use and Care Guide - Page 38
@ Tableau de commande A B C0 E F G H J 3 K LM N 0 Le tableau de commandeest congupour faciliter la programmation.La fen_t+ed'affichage indique Fheure,les fonctions avec minuterie et fonctions du four. Le tableau de commanderepr6sent6comprend la convectionet d'autres - Maytag MER5875RAF | Use and Care Guide - Page 39
R_gmagede m'hormoge: 1. Appuyer sur Hatouche Clock (Hodoge}. o L'heureclignote {_I'afficheur. 2. Appuyer sur Ies touchesnurneriquesapproprieespour programmerH'heuredu lout. o Deuxpoints clignotent _}I_'afficheur. 3. Appuyer _ nouveausur la touche Clock ou attendre quatre secondes. o Lesdeux points - Maytag MER5875RAF | Use and Care Guide - Page 40
Codes d'anomalie Les roots BAKE(Cuissoncourante] ou LOCK_errouiHage] peuvent clignoter rapidement _ I'afficheur pour pr6veniren cas d'erreur ou de probESmeS+i tel est le cas,appuyersur Iatouche CANCEL (Annule0+ Si les rootsBAKEou LOCKcontinuent _ clignoter,d6brancher I'appareil+Attendre - Maytag MER5875RAF | Use and Care Guide - Page 41
5 3. Appuyer_ nouveausur la touche Conveet Bake (Culsson avecconvection) ou attendre quatresecondes. , Le mot BAKE(Cuissoncourante] s'arrCtede clignoter. ,38 ° 000°[ ou Ia temperaturerCettedu four, si ta temperature est de plus de 38 °C (100 °F[,seraaffichCe.Etteaugmenterapar intervalIede 3 °C (5 - Maytag MER5875RAF | Use and Care Guide - Page 42
@ 5+ Placerla nourriture dans le four+ o La dur@ commencele compte_ reboursdSsque b four se met chauffer+ 4. Appuyer _ nouveausur la touche de fonction desireeOU attendre quatre secondes. • Le mot correspondant_ la fonction desireereste alhme. o Pourrappeier la temperatureprogrammeependant Ie - Maytag MER5875RAF | Use and Care Guide - Page 43
@ 3. Appuyersur Iatouche Cook & Hold (Cuisson at maintien). + Los rootsHOLD (Maintien) et DELAY(Diff6ree) clignotent _ Fafficheur. ........ Le mot WARM et Ia temp6ratureseront affich6s pendantque la fonction est active. + 00:00clignote _ Fafficheur. 4. Entrer /a dur#e d#sir#e de cuisse# _ [aide - Maytag MER5875RAF | Use and Care Guide - Page 44
- 14 minutes 3 - 7 minutes LO BroiJ GriJ_ temperature basse 15 - 25 minutes 10 - 15 minutes 7 - 10 minutes (sans retourner) (sans retourner) Remarq_e :Cetableau n'est qu'un guide de suggestions.LesdurSespeuvent varierselon I'aliment_ cuire. 43 - Maytag MER5875RAF | Use and Care Guide - Page 45
@ Ajuste ent du four de [a temperature La precision destemp@aturesdu four a 6t6 soigneusementvCrifiCe Fusine.]i est normal de remarquerqueiquesdifferences dartsla cuisson ou ia couleurdu rJssohgeobtenuentre un four neuf et un four ancien.Au fur et _ mesureque le four est moins neuf,sa - Maytag MER5875RAF | Use and Care Guide - Page 46
@ La touche Favorite(favor0 permet de sauvegarder[a dur6e et la temp6ratured'une fonction de cuissonet maintien. Pour programmerun cycte Favori,une fonction de cuissonet maintien doit 6tre active ou tout juste programm6e. Programmation d'un nouveau cycle favori ou sauvegarde d'un cycle en cours de - Maytag MER5875RAF | Use and Care Guide - Page 47
Positions des grilles Grille 7 : (position la plus haute: : Pour faire grilier du pain ou passerau grii des alimentsminceset non gras. Grille 6 : UtilisGepour [a maiorit6 des operationsde cubson au grik Grille 5 : Pour ]a cuissonsur phsieurs grilles= CuisSOn avec Convection sur trois grilles 3 - Maytag MER5875RAF | Use and Care Guide - Page 48
Four autonettoyant , IIes[ normaf que certaines pieces de la culsmi_re deviennent trea cha ides !ors d'un cycle de nettoyage. . Pour ewter que la porte du four ne subisse des dommages, ne pas [enter de I'ouvrir Iorsque le mot LOCK [Vermuillage} est vbible sur I'afficheur. , Eviter de toucher la - Maytag MER5875RAF | Use and Care Guide - Page 49
enlev6eau prochain cycled'autonettoyage. Si lea grilles ont 6t_ maiss6es_ m'intSrieudru four pendant mecynmed'autonettoyage et qu'emmegsmissentroamsur Ieurs supports,les enduire,ainsi que lessupports,d'une fine couche d'huiIe v6g6tale. De fines lignes peuventapparaitre darts la porceiaine parce qu - Maytag MER5875RAF | Use and Care Guide - Page 50
M6thodes de nettoyage Avant route manipumationou ep6ration de nettoyagel v6rifier que m,appareimest arr6t6 et que tous Jescemposantssent freids, afin d'6vitet des dommages eu des br_mures, ' Pour 6viter la formation de taches ou un changementde couleur, nettoyer I'appareilapr_s chaque u_iliSati0n, - Maytag MER5875RAF | Use and Care Guide - Page 51
ii i i PIEC£ NETTOYAGE Hubmeet t porte du four en verre • Eviterd'utilisertrop d'eau,qui risqueraitde s'infiltrersousou derrierele verreet de tacher. , Laver_ Feauet au savon.Rinceravecde I'eaupropreet s_cher.Un produitde nettoyagedu verrepeut_tre utilis6en le vaporisantd'abordsur un Iinge. , - Maytag MER5875RAF | Use and Care Guide - Page 52
Porte du four La pe du four Ne pas gdrnper sur la porte du four ouverte,ou lu[in]poser une chargeexcessive.Ceci pourrait pro_oquerun bascubment de la cuisiniSFe,le brb de [a porte oudes blessurespour la personne concernee. D@rancherla cuisini_reavant de rempJacer['ampoule. • St assurerque[e - Maytag MER5875RAF | Use and Care Guide - Page 53
doucementjusqu'_ la position de Ia premierebut@. 3. SouIeverde nouveaule tiroir et le pousserpour le fermer. Prise de courant au×iliaite (modeles canadiens seulement} La prisede courant auxiliaireest situ@ en bas/_ gauche du dosseret.Veil[er ce que [e cordon d'alimentationde ['appareilutilis6 - Maytag MER5875RAF | Use and Care Guide - Page 54
Pour la plupart des problemes observe.s,essayer d'abord rues somutionspossibmes_, droite. SOLUTION ° Verifier que Iescommandesdu four sont correctementregIees_ ° Verifier si Ie four est biersraccord6 au circuit 6tectrique. * InspectedrearmerIe disjoncteur. Inspectedremphcer - Maytag MER5875RAF | Use and Care Guide - Page 55
Ia sole. Proceder_ un autonettoyage. • Les rootsBAKE [cuissoncourante) ou LOCKpeuventclignoter rapidement8 I'afficheur pour prevenird'une erreur ou d'un probleme=Si le mot BAKEou LOCKparait 8 I'afficheur,appuyer sur Ia touche CANCEL CAnnule0=Si Ie mot BAKEou LOCKcontinue _ clignoter,debrancher - Maytag MER5875RAF | Use and Care Guide - Page 56
_ Fautred. 'uneprovinceb uneau[re. Ne sent pas couverts par ces garanties : 1= Lesdommagesou derangementsdus _: a=Mise en service,livraisonou entretieneffectu@incorrectement= b=Toute reparation,modification,alterationet tout regIagenon autorisespar le fabricantou par un prestatairede serviceaprSs - Maytag MER5875RAF | Use and Care Guide - Page 57
MAYI AG ® Estufa El6ctrica con Control a Precisi6n Sensible al Tacto 800 - // Cubbrtas Lbas Cocinando en el Homo 65=74 Homeado 'Cook & HoM' 'Cook & HoM' Diferido Asar a HaParriHa Mantener Cdbnte Cbrre Autom_tbo/Modo Sab_tico Parrillas dd Homo Horno Autoiimp Procedimientos de Limpieza - Maytag MER5875RAF | Use and Care Guide - Page 58
Customer Assistance 1-800-688@900 EE. UU. 1-800-688-2002 Canad_ (Lunes a Vienles. 8:00 a.m. a 8:00 o.m Hora del Este} Internet: http:/iwww.maytag.com En nuestro contmuo af_n de mejorar la calidad y rendimiento de nues[ros electrodomest_cos, puede que sea necesario rnodiflcar el eJectrodom6sttco sin - Maytag MER5875RAF | Use and Care Guide - Page 59
Muchopsi_stbosonafectadopsereIcaior.Mantenglaos pi_stbosabjadosdelaspbzasdeIebctrodom6stbqouese puedenentiNaor cabntar. Paraevitarincendiodsegrasan, opermitacumuhd6dne grasadecodnaro deotrosmateriabisnfiamabbesneIhomo o ensucercania. En Case de lncer|die Use un extinguidor con producto quimbo seco o - Maytag MER5875RAF | Use and Care Guide - Page 60
Use tomaoihs secos y gruesos, Los tomaoiBs hLimedos pueden causar quemaduras por vapor, No se deben usar todias de secar los piatos ni otros sustitutos en vez de los tomaoiias porque eiios pueden pasar sobre los ebmentos caibntes y prenderse fuego o pueden quedar atrapados en hs pbzas deI ebctrodom@ - Maytag MER5875RAF | Use and Care Guide - Page 61
de no frotar, da_ar ni mover la junta, No use limpiadores de homo ni forros de homo de ningun tipo alrededor ni en ninguna parte del homo autolimpiante, Antes del ciclo de autolimpieza del homo, retire la asadera, las parrillas del homo y otros utensilios y limpie cualquier derrame para evitar - Maytag MER5875RAF | Use and Care Guide - Page 62
@ Controles Superiotes Use estoscontrolespara encenderIos eIementossuperiores=Sedispone de una selecciOninfinita de aiustesde[ calor desde'Low' (halo) hasta 'High' (alto)=Las patinaspueden colocarseen cualquierade estosaiusteso entre enos= Programad6n de los Controles 1= Coloqueel utensilio sobre - Maytag MER5875RAF | Use and Care Guide - Page 63
Dementos dobJes La cubierta est_ equipadacon dos elementos doblessituadosen Ia parte delanteraderechay OFF dehntera izquierdade Iacubierta. Estole permite 2 cambiar el tamafio de estoselementos. Gire la periila a la izquierda para usarel elemento m_sgrande o a la derecha para usarei - Maytag MER5875RAF | Use and Care Guide - Page 64
Area Ca entadora Use el area calentadorapara mantenercalientes losalimentosya cocinados,tal como verduras,salsasy platos de servir resistentesal homo. Ajuste dem controm: 1. Optimay gire la peri%. Lastemperaturas de calentamientoson aproximadasy est_n indicadas en el controIcomo 'Min' (Min.} 2-8 y - Maytag MER5875RAF | Use and Care Guide - Page 65
sean pianos,de tamafio mayor o desniveladostal como Ia parte inferior redonda de Ioswoks, con fondos acanaladosy/o parrillasy se derrite en la cubierta, no use la estufa. Llamea un t6cnico autorizadode Maytag. Recomendaciones sobre La prueba de maburbuja: 1+ Coloqueuna pulgada de agua en ia olla - Maytag MER5875RAF | Use and Care Guide - Page 66
Panel de Control A B CD G H J J K LM N O El panel de control ha sido disefiado para su f_ci[ programaciOnE. l indicadorvisual en el panel de control muestra[a hora det dFa,el tempodzadory tasfuncionesde[ horno. El panel de control mostradoarriba inc[uyetas caracteffsticasde convecciOny - Maytag MER5875RAF | Use and Care Guide - Page 67
@ ProgramaciCn dei Reioj: 3. Oprhrlanuevamentela tecla 'Timer' o esperecuatro segundos. 1, Oprimatatecta 'Clock' [Rebj}, o Enet h_dicadordesteiIala hora del dfa. + Losdos puntos dejan de @stellar y el tiempo combnza la cuenta regresiva. 2. Oprimatastechs numerbas apropiadaspara programarJahera - Maytag MER5875RAF | Use and Care Guide - Page 68
@ Diferencias de[ homeado entre su homo Para programar 'Bake' (Hornear): antiguo y su homo rluevo 1. Oprima [atecJa'Bake'. Es normalobservaraIgunasdiferenciasen el tiempo de horneadode su homo antigua y su horno nuevo.Vea "Ajuste de la Temperatura , 'BAKE'y '00O'destei[ar_en el indicadorvisual - Maytag MER5875RAF | Use and Care Guide - Page 69
@ Asado pot Convecci6n Cuando est_ asando pot convecci6n,programe emtiempo y temperatara de asar normal El control Ie advertir_ autom_ticamentecuando hayatranscurrido 75%del tiempo de asado programadopara que verifique el grado de cocci6nde los alimentos+ • El [cono del ventihdor cornenzar4a girar - Maytag MER5875RAF | Use and Care Guide - Page 70
2+ Seleccione[acantidad de tiempo que usted deseacocinar usandolastechs num6ricas+ o 'HOLD'(Mantene0 contin0a desteihndo+ 'Delay Cook & Hold' (CocciOn y Mantener Caliente Difeddo} o Eltiempo se iluminar_en ei indicador visual+ o Eltiempo puede programarsede 10 minutes [00:ld) a 11 betas,59 - Maytag MER5875RAF | Use and Care Guide - Page 71
@ 'Broiming' (Asar a la Pardlla) 4. Paraun dorado Optimo,precaiienteel etementode asara Ia parrilla durante3 a 4 minutosantes de colocar el alimento+ Tonga CUUDADOcuando cocme con la func+0n*Broil'.La grasa pro_eniente de los alimen[osgrasos se puede encender.SI ocurre un Incena+oc. ierre la pue - Maytag MER5875RAF | Use and Care Guide - Page 72
@ Ajuste de temperatura • 'SAb' se despbgar4 y destellar_durante cinco segundos. deJ homo La exactltudde Iastemperaturasdel horno es cuidadosamente probada en Iaf_brica. Esnormalnotar alguna diferencia entre ta temperaturade horneadoo en et dorado,entre un homo nuevoy un horno antlguo. A medida - Maytag MER5875RAF | Use and Care Guide - Page 73
'Keep Warm' (Mantener Caliente) Para mantenercalientesen forma seguraalimentoscalienteso para calentar panesy plato& Para programar 'Keep Warm': 1. Oprimala teda 'Keep Warm' en el indicador visual. + 'WARM' (Caliente)desteilaen el indicador visual. • '000'destelh en et indicadorvisual 2. - Maytag MER5875RAF | Use and Care Guide - Page 74
porcelana esmaItada.Useel utensilio de tama_o correctoa fin de evitar derrames.No comoqueutecsimiosci papei de amumicio directamecte ec la parte icferior del homo° PARRI[.I_A7 (Ia posici6n m_s alta}: Paratostar pan o asara la parrilla alimentosdelgados, ['lO g rasosos. PARRJ_LLA6: Se - Maytag MER5875RAF | Use and Care Guide - Page 75
PARRm[LA1: Se usa para asartrozos grandesde came y came de ave+ Media ParriHa Panel Inferior demHomo: Cobque Ia parrilla del homo en bs IadosIevantados Los modeIosde estufasebctos del panel inferior del homo+Use para est_n equipadoscon una med+a disponerde espacioadicional cuando parri[[ - Maytag MER5875RAF | Use and Care Guide - Page 76
se[[arherm6ticamentee[ calor durante jeu[nctiac[soitduea[dima aplireezdae+dorde la puerta del _\ 5+ Limpiee[ excesode grasa o derrames de [a parte inferiorde[ homo+ Esto evita humoexcesivoo [[amaradasdurante e[ cic[o de [imp[eza+ 6+ Limpie losderramesazucaradoso _cidostales como papa duIce (camote - Maytag MER5875RAF | Use and Care Guide - Page 77
5. Oprimala tecla 'Autoset O'(ProgramaciOn A Automdtica) para desplegarIos ajustesde autotimpieza. U 'HVy'[Suciedad intensa,4 horas:) :\utoset 'MEd' (Suciedadmediana,3 horas:) 'LITE'[Suciedadleve,2 horas:) AI seieccionarel nivel de suciedadde! horno se programa autom_ticamenteel tiempo de - Maytag MER5875RAF | Use and Care Guide - Page 78
Procedi ientos de Limpieza o gseg_rese de qua el hQrao est6 apagade y que todas [as piezas est6a fffas sates de tocarle o limp!arle. De este modo se evitar_ da_e y * Losnombresde los productosson marcasregistradas ° %ra evitar manchaso decoloraciSn[irnpieel horno despu6Sde Cads_Jso. de sus - Maytag MER5875RAF | Use and Care Guide - Page 79
PJEZA I PROCED[M[ENTO DE LIMP_EZA • Eviteusarcantidadesexcesivasde aguapuespuedeescLmgsedebajoo detr_sdel vidriocausandomanchas. del Homo - Vidrio . LaveconaguayjabOn.Enjuagueconagualimpiay seque.E!limpiadordevidriopuedeusarsesiseroc{aen un pdio primero. ,. - Maytag MER5875RAF | Use and Care Guide - Page 80
Puerta del Homo Luz del Homo No Co[oquePesoexcesiVoni Separe en la puerta de[ horn0, Esto podda hacervo[car[a estufa; quebrar la puerta0 [esionara[ !JsHario. "esponjosa"cuando se cierra. Estoes normaly disminuir8 con el NUSoOr.a: La puerta de[ homo en una estufa nuevapuede sentirse Ventana dem - Maytag MER5875RAF | Use and Care Guide - Page 81
retirarla. Para vomvera comocar: 1. InserteIos extremosde las correderasde la gavetaen los rieles de Ia estufa. 2. Levantela parte delanterade la gavetay suavementeempOjelaa la primeraposiciOnde tope. 3. Levantela gaveta nuevamentey emp_iielahasta que quede completamentecerrada. Tomacorriente para - Maytag MER5875RAF | Use and Care Guide - Page 82
PROBLEMA SOLUCION Para mamayer_ade mosprobmemas, verifiqueprimero mesiguienteo , Revisesi los contraIesdel homoest_n debidamenteajustados. • Verifiquesi el enchufeest_firmementeinsertadoen el tomacorriente. • Verifiquea vuelvaa reponerel disyuntor. Verifiqueo reemplaceel fusible. • Verifiqueel - Maytag MER5875RAF | Use and Care Guide - Page 83
no se activao 'SAb' destellu y luego se despliega continuamenteo SOLUCION ® Abmsioneso rayaduraspequefias. - Aseg_imsede que Iacubiertay la parte inferiordel utensilioest6Iimpia.No desliceutensilios de vidrioo de metala trav6sde Iacubierta.Aseg0resede que la parteinferiordel utensiliono sea_spera - Maytag MER5875RAF | Use and Care Guide - Page 84
descripciOnclaradel problemaque est_ experimentando. e. Pruebade compra. Lasgu[asdel usuario,manualesde servicioe informaciOnsobre laspiezaspuedensolicitarsea MaytagSewices_MS, ewicioa losClientesMaytag. Form No. C/05/05 Pint No. 8113P494 60 @2005 Maytag Appliances Sales Co. Litho U.S.A.
-
 1
1 -
 2
2 -
 3
3 -
 4
4 -
 5
5 -
 6
6 -
 7
7 -
8
-
9
-
10
-
11
-
12
-
13
-
14
-
15
-
16
-
17
-
18
-
19
-
20
-
21
-
22
-
23
-
24
-
25
-
26
-
27
-
28
-
29
-
30
-
31
-
32
-
33
-
34
-
35
-
36
-
37
-
38
-
39
-
40
-
41
-
42
-
43
-
44
-
45
-
46
-
47
-
48
-
49
-
50
-
51
-
52
-
53
-
54
-
55
-
56
-
57
-
58
-
59
-
60
-
61
-
62
-
63
-
64
-
65
-
66
-
67
-
68
-
69
-
70
-
71
-
72
-
73
-
74
-
75
-
76
-
77
-
78
-
79
-
80
-
81
-
82
-
83
-
84
 |
 |

M_AYI?AG
Precision
Touch Controm
800
E_ectric
Smoothtop
important
Safety
Unstructions
...............................
1-3
Surface
Cooking
......................
4-7
Surface Controls
Smoothtop Surface
Oven
Cooking
.........................
8=18
Baking
Cook & Hold
Delay Cook & Hold
Keep Warm
Broiling
Sabbath Mode
Oven Racks
Care
& Cleaning
...................
19-22
Self-Clean Oven
Cleaning
Procedures
Maintenance
.........................
23-24
Oven Window
Oven Light
Troubleshooting
...................
25=26
Warranty
& Service
....................
27
Guide
d'utilisation
et
d'entretien
...................................
28
Guia
de Use y Cuidado
.............
56
Form
No.
C/05/05
Pall
No.
8113P494
60
¢b2005 Maytag
Appliances
Sales
Co.
Litho
U.S.A.