Maytag MFT2771WEW User Instructions - Page 12
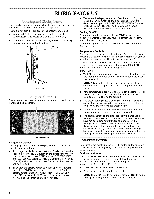
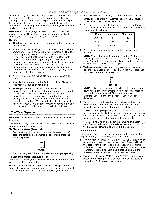
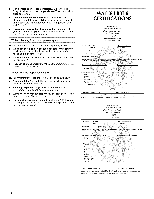
The ice maker and storage bin are located in the upper left-hand, side of the refrigerator
 |
UPC - 883049180038
View all Maytag MFT2771WEW manuals
Add to My Manuals
Save this manual to your list of manuals |
Page 12 highlights
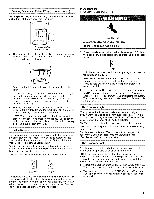
Power Outage Indicator (on some models) The power outage indicator lets you know if the power supply to your refrigerator is cut off for more than 1 hour. When power is restored, a power outage alert will appear on the display screen. The display shows how long the refrigerator was without power, using exact times if the clock has been set. When the indicator is on, all other dispenser functions are disabled. To use the dispenser, you must reset the power outage indicator. • Press RESET on the display screen, then press YES to confirm that you want to reset the indicator. From the Home screen, you can view the power outage history for the refrigerator. Press OPTIONS, then OUTAGE. The ice maker and storage bin are located in the upper left-hand side of the refrigerator compartment. Turning the Ice Maker On/Off Your ice maker has an automatic shutoff. When the ice maker is on, sensors will automatically stop ice production when the storage bin is full. The ice maker will remain set to ON, and ice production will resume when the bin is no longer full. To manually turn off the ice maker, press OPTIONS on the display screen, then ICE MAKER. On the next screen, press ICE MAKER again to toggle between ON and OFF. When the ice maker is set to OFF, it will stop producing ice. Removing and Replacing Ice Storage Bin To Remove the Ice Storage Bin: NOTE: It is not necessary to turn off the ice maker when removing the storage bin. 1. Pull the handle to unlock the ice storage bin. 2. Hold both sides of the ice storage bin, tilt the bin forward and lift slightly to remove. To Replace the Ice Storage Bin: IMPORTANT: The ice storage bin must be locked in place for proper ice dispensing. 1. Replace the ice storage bin on the door. 2. Pivot the bin so that it is firmly in place, and push back to assure that it is secure. Ice Production Rate • Allow 24 hours to produce the first batch of ice. Discard the first three batches of ice produced. • The ice maker should produce approximately 40 batches of ice in a 24-hour period. • To increase ice production, lower the freezer and refrigerator temperature. See "Using the Controls." Wait 24 hours between adjustments. Remember • The quality of your ice will be only as good as the quality of the water supplied to your ice maker. Avoid connecting the ice maker to a softened water supply. Water softener chemicals (such as salt) can damage parts of the ice maker and lead to poor quality ice. If a softened water supply cannot be avoided, make sure the water softener is operating properly and is well maintained. • Do not use anything sharp to break up the ice in the bin. This can cause damage to the ice bin and dispenser mechanism. • Do not store anything on top of the ice maker or in the ice storage bin. _ ..... The water filter status light will help you know when to change your water filter. When the water filter status display changes from "NORMAL" to "ORDER," this tells you that it is almost time to change the water filter cartridge. Replace the water filter cartridge when the water filter status display changes to "REPLACE." If water flow to your water dispenser or ice maker decreases noticeably, change the filter sooner. The filter should be replaced at least every 6 months depending on your water quality and usage. To change the filter, see "Water Filtration System." INDICATOR: STATUS: NORMAL (green) New filter installed ORDER (yellow) Order filter REPLACE (red) OR when water flow decreases Replace water filter After changing the water filter, reset the status light. On the display screen, press OPTIONS, then WATER FILTER, then RESET, then YES. The status light will change from REPLACE (red) to NORMAL (green) when the system is reset. 12
-
 1
1 -
2
-
3
-
4
-
5
-
6
-
 7
7 -
 8
8 -
 9
9 -
 10
10 -
 11
11 -
 12
12 -
 13
13 -
 14
14 -
 15
15 -
 16
16 -
 17
17 -
18
-
19
-
20
-
21
-
22
-
23
-
24
-
25
-
26
-
27
-
28
-
29
-
30
-
31
-
32
-
33
-
34
-
35
-
36
-
37
-
38
-
39
-
40
-
41
-
42
-
43
-
44
-
45
-
46
-
47
-
48
-
49
-
50
-
51
-
52
-
53
-
54
-
55
-
56
-
57
-
58
-
59
-
60
-
61
 |
 |
