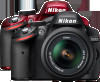
Nikon D3200 User Manual
Nikon D3200 Manual
 |
View all Nikon D3200 manuals
Add to My Manuals
Save this manual to your list of manuals |
Nikon D3200 manual content summary:
- Nikon D3200 | User Manual - Page 1
DIGITAL CAMERA Reference Manual En - Nikon D3200 | User Manual - Page 2
Thank you for your purchase of a Nikon single-lens reflex (SLR) digital camera. To get the most from your camera, please be sure to read all instructions thoroughly and keep them where they will be read by all who use the product. Symbols and Conventions To make it easier to find the - Nikon D3200 | User Manual - Page 3
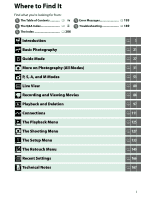
from: i The Table of Contents 0 iv i The Q&A Index 0 ii i The Index 0 206 i Error Messages 0 193 i Troubleshooting 0 189 X Introduction s Basic Photography ! Guide Mode z More on Photography (All Modes) t P, S, A, and M Modes x Live View y Recording and Viewing Movies I Playback and Deletion - Nikon D3200 | User Manual - Page 4
noise in quiet surroundings? (quiet shutter release) i Focus Can I choose how the camera focuses? Can I choose the focus point? i Image Quality and Size How do I take pictures for printing at large sizes? How can I get more pictures on the memory card? i Exposure Can I make photos brighter or - Nikon D3200 | User Manual - Page 5
? How do I print photos? Can I print the date of recording on my photos? Maintenance and Optional Accessories What memory cards can I use? What lenses can I use? What optional flash units (Speedlights) can I use? What other accessories are available for my camera? What software is available for my - Nikon D3200 | User Manual - Page 6
Camera Body ...1 The Mode Dial...3 The Viewfinder...4 The Information Display...5 The Command Dial ...7 Camera Menus...9 Using Camera Menus ...10 First Steps ...12 Charge the Battery ...12 Insert the Battery ...13 Attach a Lens...14 Basic Setup...16 Insert a Memory Card...18 Format the Memory Card - Nikon D3200 | User Manual - Page 7
More on Photography (All Modes) 31 Release Mode ...31 Self-Timer and Remote Control Modes 33 Focus ...35 Focus Mode...35 AF-Area Mode ...38 Focus Point Selection ...40 Focus Lock ...40 Manual Focus ...42 Image Quality and Size ...44 Image Quality ...44 Image Size...46 Using the Built-in Flash... - Nikon D3200 | User Manual - Page 8
105 Camera ...112 Printing Photographs...114 Connecting the Printer...114 Printing Pictures One at a Time 115 Printing Multiple Pictures 117 Creating a DPOF Print Order: Print Set 120 Viewing Photographs on TV 122 Standard Definition Devices 122 High-Definition Devices ...123 Menu Guide - Nikon D3200 | User Manual - Page 9
in AF-assist Illuminator 131 Flash Cntrl for Built-in Flash 132 B The Setup Menu: Camera Setup Auto Info Display ...136 Video Mode ...136 Flicker Reduction...136 Time Zone and Date...137 Language ...137 Release Lock 144 Print Date ...144 Storage Folder ...146 GPS...147 Eye-Fi Upload...148 Firmware - Nikon D3200 | User Manual - Page 10
167 Compatible Lenses...167 Compatible CPU Lenses ...167 Compatible Non-CPU Lenses 169 Optional Flash Units (Speedlights 172 The Nikon Creative Lighting System (CLS 173 Other Accessories...176 Approved Memory Cards 177 Attaching a Power Connector and AC Adapter 178 Caring for the Camera...179 - Nikon D3200 | User Manual - Page 11
the product to a Nikon-authorized service center for inspection. A Do not place the strap around the neck of an infant or child Placing the camera strap around the neck of an infant or child could result in strangulation. A Do not remain in contact with the camera, battery, or charger for extended - Nikon D3200 | User Manual - Page 12
an extended period. Before removing the battery turn the camera off and allow the battery to cool. • Discontinue use immediately should you notice any changes in the battery, such as discoloration or deformation. A Observe proper precautions when handling the charger • Keep dry. Failure to observe - Nikon D3200 | User Manual - Page 13
of the Nikon representative in your area (address provided separately). Notice for Customers in Canada CAUTION This Class B digital apparatus complies BATTERIES ACCORDING TO THE INSTRUCTIONS. This symbol indicates that this product is to be collected separately. The following apply only to users - Nikon D3200 | User Manual - Page 14
Notices for Customers in the U.S.A. The Battery Charger IMPORTANT SAFETY INSTRUCTIONS-SAVE THESE INSTRUCTIONS DANGER-TO REDUCE THE RISK OF FIRE OR ELECTRIC SHOCK, CAREFULLY FOLLOW THESE INSTRUCTIONS For connection to a supply not in the U.S.A., use an attachment plug adapter of the proper - Nikon D3200 | User Manual - Page 15
digitally copied or reproduced by means of a scanner, digital camera, images or formatting memory cards or other data data is the user's responsibility. any pictures selected for preset manual (0 72). Care should be VIDEO IN COMPLIANCE WITH THE AVC STANDARD ("AVC VIDEO") AND/OR (ii) DECODE AVC VIDEO - Nikon D3200 | User Manual - Page 16
highest standards and include complex electronic circuitry. Only Nikon brand electronic accessories (including chargers, batteries, AC adapters, and flash accessories) certified by Nikon specifically for use with this Nikon digital camera are engineered and proven to operate within the operational - Nikon D3200 | User Manual - Page 17
Mode dial 3 2 Eyelet for camera strap 3 R (information) button.... 6, 85 4 E/N button Exposure compensation...64 Adjusting aperture 57 Flash compensation..........66 5 Shutter-release button.........24 6 Power switch 2 7 Movie-record button 88 8 AF-assist illuminator 37 Self-timer lamp 33 Red - Nikon D3200 | User Manual - Page 18
Protecting photographs from deletion 105 13 Command dial 7 14 a button Live view 80 Movie 88 15 Multi selector 10 16 Memory card slot cover ....... 18 17 J (OK) button 10 18 I/E/# button Release mode 31 Self-timer 33 Remote control 33 19 Memory card access lamp 18, 23 20 Power connector - Nikon D3200 | User Manual - Page 19
with the help of an on-screen guide. P, S, A, and M Modes Select these modes for full control over camera settings. • P-Programmed auto (0 54) • S-Shutter-priority auto (0 55) X • A-Aperture-priority auto (0 56) • M-Manual (0 57) Auto Modes Select these modes for simple, point-and-shoot - Nikon D3200 | User Manual - Page 20
23, 42 3 Autoexposure (AE) lock indicator 61 4 Shutter speed 55, 57 5 Aperture (f-number) ......56, 57 6 Battery indicator 21 7 Number of exposures remaining 21 Number of shots remaining before memory buffer fills 32 White balance recording indicator 72 Exposure compensation value 63 Flash - Nikon D3200 | User Manual - Page 21
modes 25 Guide mode 27 P, S, A, and M modes...........53 2 Aperture (f-number) ...... 56, 57 3 Shutter speed 55, 57 4 Shutter-speed display 6 5 Aperture display 6 6 Auto-area AF indicator .........38 3D-tracking indicator............38 Focus point 40 7 Eye-Fi connection indicator 148 8 Manual - Nikon D3200 | User Manual - Page 22
the shutter-release button is camera orientation. Monitor off A The Shutter-Speed and Aperture Displays These displays provide visual indications of shutter speed and aperture. Fast shutter speed, large aperture (low f-number). Slow shutter speed, small aperture (high f-number). While the mode - Nikon D3200 | User Manual - Page 23
speed (mode S or M; 0 55, 57). Mode dial Command dial Mode P Command dial Information display Choose an aperture (mode A; 0 56). Mode S or M Command dial Information display Choose an aperture (mode M; 0 57). Mode A Command dial Information display + Mode M E (N) button Command dial - Nikon D3200 | User Manual - Page 24
mode P, S, or A; + 0 63). Mode P, S, or A X Choose a flash mode (0 49). E (N) button Command dial + Information display M (Y) button Command dial Adjust flash compensation (mode the Fn button and rotating the command dial: + Fn button Command dial Image quality/size (0 44) ISO sensitivity (0 - Nikon D3200 | User Manual - Page 25
Most shooting, playback, and setup options can be accessed from the camera menus. To view the menus, press the G button. G button X Tabs Choose from the following menus: • scroll through the display. W (Q) button A Guide Mode To display the on-screen guide, rotate the mode dial to g (0 27). 9 - Nikon D3200 | User Manual - Page 26
Menus The multi selector and J button are used to navigate the camera menus. Move cursor up J button: select highlighted item Cancel and return to Select highlighted item or X previous menu display sub-menu Move cursor down Follow - Nikon D3200 | User Manual - Page 27
same effect as pressing J, there are some cases in which selection can only be made by pressing J. • To exit the menus and return to shooting mode, press the shutter-release button halfway (0 24). 11 - Nikon D3200 | User Manual - Page 28
First Steps Charge the Battery The camera is powered by an EN-EL14 rechargeable Li-ion battery (supplied). To maximize shooting time, charge the battery in the supplied MH-24 battery charger before use. About 1 hour and 30 minutes are required to fully recharge the battery X when no charge remains. - Nikon D3200 | User Manual - Page 29
, confirm that the temperature is in the correct range and then unplug the charger and remove and reinsert the battery. If the problem persists, cease use immediately and take battery and charger to your retailer or a Nikon-authorized service representative. Do not attempt to charge a fully-charged - Nikon D3200 | User Manual - Page 30
to prevent dust from entering the camera when the lens is removed. The lens generally used in this manual for illustrative purposes is an AF-S DX NIKKOR 18-55mm f/3.5-5.6G VR. Focal length mark X Focal length scale Lens cap Mounting mark CPU contacts (0 168) Rear lens cap Focus ring (0 42, 87 - Nikon D3200 | User Manual - Page 31
(VR) AF-S DX NIKKOR 18-55mm f/3.5-5.6G VR lenses support vibration reduction (VR), which reduces blur caused by camera shake even when the camera is panned, allowing shutter speeds to be slowed by approximately 3 EV at a focal length of 55 mm (Nikon measurements; effects vary with the user and - Nikon D3200 | User Manual - Page 32
camera is turned on. Choose a language and set the time and date. Photographs can not be taken until you have set the time and date. 1 Turn the camera hours) and press J. 4 Choose a date format. Press 1 or 3 to choose the highlight On and press J. 6 Set the date and time. The dialog shown at right - Nikon D3200 | User Manual - Page 33
a message warning that the clock is not set is displayed when the camera is turned on, the clock battery is exhausted and the clock has been reset. Set the clock to the correct time and date. A The Camera Clock X The camera clock is less accurate than most watches and household clocks. Check the - Nikon D3200 | User Manual - Page 34
loss of data. When this switch is in the "lock" position, the memory card can not be formatted and photos can not be deleted or recorded (a beep will sound if you attempt to release the shutter). To unlock the memory card, slide the switch to the "write" position. 18 4GB Write-protect switch - Nikon D3200 | User Manual - Page 35
until formatting is complete. D Memory Cards • Memory cards may be hot after use. Observe due caution when removing memory cards from the camera. • Turn the power off before inserting or removing memory cards. Do not remove memory cards from the camera, turn the camera off, or remove or disconnect - Nikon D3200 | User Manual - Page 36
servo autofocus (AF-S; 0 35), single-point AF (c; 0 release button halfway to focus the camera. With the camera in focus, use the diopter adjustment control to bring the subject into clear focus in the viewfinder. If necessary, viewfinder focus can be further adjusted using optional corrective lenses - Nikon D3200 | User Manual - Page 37
Battery fully charged. Battery partially discharged. Low battery. Ready fully-charged spare battery or prepare to charge battery. Battery exhausted; shutter release disabled. Charge or exchange battery memory for additional photographs, insert another memory card (0 18) or delete some photos (0 106 - Nikon D3200 | User Manual - Page 38
Otherwise, rotate the dial to i (auto). Mode dial 3 Ready the camera. When framing photographs in the viewfinder, hold the handgrip in your right hand and cradle the camera body or lens with your left. Keep your elbows propped lightly against your torso for support and place one foot half a pace - Nikon D3200 | User Manual - Page 39
clear from the display when the shutter-release button is pressed halfway). Do not eject the memory card or remove or disconnect the power source until the lamp has gone out and recording is complete. Memory card access lamp A Image Sensor Cleaning The camera vibrates the low-pass filter covering - Nikon D3200 | User Manual - Page 40
is required for correct exposure in i mode, the built-in flash will pop up automatically when the shutter-release button is pressed halfway (0 47). is charging; remove your finger briefly from the shutter-release button and try again. To save battery power when the flash is not in use, return it - Nikon D3200 | User Manual - Page 41
on pages 22-24. The following scenes can be selected with the mode Mode dial dial: s k Portrait Use for portraits with soft, natural-looking skin tones. If the subject is far from the background or a telephoto lens is used, background details will be softened to lend the composition a sense - Nikon D3200 | User Manual - Page 42
for dynamic sports shots in which the main subject stands out clearly. The built-in flash and AF-assist illuminator turn off. Use for close-up shots of flowers, insects, and other small objects (a macro lens can be used to focus at very close ranges). Use of a tripod is recommended to prevent - Nikon D3200 | User Manual - Page 43
the mode dial is rotated to g. ! Battery indicator (0 21) Number of exposures remaining (0 21) Shooting mode: A guide mode indicator appears on the shooting mode icon. Choose from the following items: Shoot Take pictures. View/delete Set up View and/or delete pictures. Change camera settings - Nikon D3200 | User Manual - Page 44
Guide Mode Show water flowing Capture reds in sunsets * Adjust lenses. * Affects other Advanced operation items. To restore default settings, turn the camera mode • ISO sensitivity settings > • Flash settings > Flash Auto ISO sensitivity control compensation • Set Picture Control • Release mode - Nikon D3200 | User Manual - Page 45
when compatible Eye-Fi memory card is inserted (0 148). Changes to Image quality, Image size, Auto off timers, Print date, Playback folder, Playback display options, all Display and sound settings options, and all Movie settings options except Flicker reduction apply in guide mode only and are not - Nikon D3200 | User Manual - Page 46
Turn monitor on G button Highlight a ! menu Press G to turn the monitor on or return to the top level of the guide. Press 4 or 2 to highlight a menu. Press 1 or 3 to highlight options in the menus. Highlight options Press 1, 3, 4, or 2 to highlight options in displays like that shown - Nikon D3200 | User Manual - Page 47
that mirror does not click back into place J while shutter-release button is fully pressed, allowing user to control timing of click made by mirror, which is also quieter than in single frame mode. Also, beep does not sound when camera focuses, keeping noise to a minimum in quiet surroundings - Nikon D3200 | User Manual - Page 48
until all images in the buffer have been recorded. If the battery is exhausted while images remain in the buffer, the shutter release will be disabled and the images transferred to the memory card. A Continuous Release Mode Continuous release mode (I) can not be used with the built-in flash; rotate - Nikon D3200 | User Manual - Page 49
(0 177) allow the photographer to be at a distance from the camera when a photo is taken. 1 Mount the camera on a tripod. Mount the camera on a tripod or place the camera on a stable, level surface. 2 Select a release mode. Select E (self-timer), " (delayed remote), or # (quick-response remote - Nikon D3200 | User Manual - Page 50
will automatically pop up and fire when required. In flash modes that support red-eye reduction, the red-eye reduction lamp will light for about one second before the shutter is released in quick-response remote mode. In delayed remote mode, the self-timer lamp will light for two seconds, followed - Nikon D3200 | User Manual - Page 51
Shutter can only be released if camera is able to focus. z AF-C Continuousservo AF For moving subjects. Camera focuses continuously while shutterrelease button is pressed halfway. Shutter can only be released if camera is able to focus. MF Manual focus Focus manually (0 42). 1 Place the cursor - Nikon D3200 | User Manual - Page 52
unable to focus under these conditions, or the in-focus indicator (I) may be displayed and the camera may sound a beep, allowing the shutter to be released z even when the subject is not in focus. In these cases, focus manually (0 42) or use focus lock (0 40) to focus on another subject at the same - Nikon D3200 | User Manual - Page 53
- release button is pressed halfway. The AF-assist illuminator will not light: • In live view or during movie recording • During manual focus or if live view is off and continuous-servo autofocus is selected (AF-C selected for focus mode, or continuous-servo AF selected in AF-A focus mode - Nikon D3200 | User Manual - Page 54
AF-C focus modes, user selects focus point using multi selector (0 40). If subject moves after camera has focused, camera uses 3D- zf 3D-tracking (11 points) tracking to select new focus point and keep focus locked on original subject while shutter-release button is pressed halfway. If subject - Nikon D3200 | User Manual - Page 55
(0 127). AF-area mode selections made in shooting modes other than P, S, A, or M are reset when another shooting mode is selected. A 3D-tracking (11 Points) When the shutter-release button is pressed halfway, the colors in the area surrounding the focus point are stored in the camera. Consequently - Nikon D3200 | User Manual - Page 56
subject. Focus lock is most effective when an option other than e (Auto-area AF) is selected for AF-area mode (0 38). 1 Focus. Position the subject in the selected focus point and press the shutter-release button halfway to initiate focus. Check that the in-focus indicator (I) appears in the - Nikon D3200 | User Manual - Page 57
remove your finger from the shutter-release button. Shutter-release button A (L) button AF-S focus mode: Focus will lock automatically when camera and the subject while focus lock is in effect. If the subject moves, focus again at the new distance. A The A (L) Button The Buttons > Assign AE-L/AF - Nikon D3200 | User Manual - Page 58
using an AF-S or AF-I lens or when autofocus does not produce the desired results (0 36). 1 Set the lens focus-mode switch. If the lens is equipped with an A-M or M/A-M mode switch, slide the switch to M. A-M M/A-M mode switch mode switch 2 Focus. To focus manually, adjust the lens focus ring - Nikon D3200 | User Manual - Page 59
Focus with the Camera If the lens supports M/A (autofocus with manual override), manual focus can also be selected by setting the camera focus mode to MF (manual focus; 0 35). Focus can then be adjusted manually, regardless of the mode selected with the lens. A Focal Plane Position To determine - Nikon D3200 | User Manual - Page 60
memory card. Larger, higher quality images can be printed at larger sizes but also require more memory, meaning that fewer such images can be stored on the memory card (0 188). Image Quality display. 2 Display image quality options. Highlight the current image quality in the information display and - Nikon D3200 | User Manual - Page 61
date (0 144) is not available at image quality settings of NEF (RAW) or NEF (RAW)+JPEG. NEF (RAW) images can be viewed on the camera are viewed on the camera, only the JPEG quality can also be adjusted using the Image quality option in the shooting menu (0 127). z A The Fn Button Image quality - Nikon D3200 | User Manual - Page 62
information display and press J. P button Information display 3 Choose an image size. Highlight an option and press J. To return to shooting mode, press the shutter-release button halfway. A The Shooting Menu Image size can also be adjusted using the Image size option in the shooting menu (0 127 - Nikon D3200 | User Manual - Page 63
Built-in Flash The camera supports a variety of flash modes for photographing poorly lit or backlit subjects. ❚❚ Using the Built-in Flash: i, k, p, n, and o Modes 1 Choose a flash mode (0 48). 2 Take pictures. The flash will pop up as required when the shutter-release button is pressed halfway - Nikon D3200 | User Manual - Page 64
Flash Mode The flash modes available vary with shooting mode: No NYo j i, k, p, n Auto Auto +red-eye reduction Flash off NYr Nr j o Auto slow sync + red-eye Auto slow sync Flash off P, A S, M N Fill flash N Fill flash NY Red-eye reduction NY Red-eye reduction NYp Slow sync+red-eye Nq - Nikon D3200 | User Manual - Page 65
the flash before using the M (Y) button to choose the flash mode). + M (Y) button Command dial Information display A The Built-in Flash For information on the lenses that can be used with the built-in flash, see page 170. Remove lens hoods to prevent shadows. The flash has a minimum range of - Nikon D3200 | User Manual - Page 66
+ red-eye reduction modes. A Aperture, Sensitivity, and Flash Range Flash range varies with sensitivity (ISO equivalency) and aperture. Aperture at ISO equivalent of 100 200 400 800 1600 3200 6400 z 1.4 2 2.8 4 5.6 8 11 2 2.8 4 5.6 8 11 16 2.8 4 5.6 8 11 16 22 4 5.6 8 11 16 22 32 - Nikon D3200 | User Manual - Page 67
sensitivity" is the digital equivalent of film speed Choosing Auto allows the camera to set ISO sensitivity automatically in response to lighting conditions. Mode i, j P, S, A, M Other shooting modes ISO sensitivity Auto 100- return to shooting mode, press the shutter-release button halfway. 51 - Nikon D3200 | User Manual - Page 68
in another mode, the ISO sensitivity last selected in P, S, A, or M mode will be restored. Note that if the ISO sensitivity selected by the user is higher information on enabling auto ISO sensitivity control in P, S, A, or M modes, see page 129. For information on using the Noise reduction option in - Nikon D3200 | User Manual - Page 69
(0 55) User chooses shutter speed; camera selects aperture for best results. Use to freeze or blur motion. t A Aperture-priority auto (0 56) User chooses aperture; camera selects shutter speed for best results. Use to blur background or bring both foreground and background into focus. M Manual - Nikon D3200 | User Manual - Page 70
exposure. While flexible program is in effect, a U (R) indicator appears in the viewfinder and information display. To restore default shutter speed and aperture settings, rotate the command dial until the indicator is no longer displayed, choose another mode, or turn the camera off. 54 - Nikon D3200 | User Manual - Page 71
Mode S (Shutter-Priority Auto) In shutter-priority auto, you choose the shutter speed while the camera automatically selects the 1 Rotate the mode dial to S. Mode dial t 2 Choose a shutter speed. Shutter speed is shown in the viewfinder and information display. Rotate the command dial to choose - Nikon D3200 | User Manual - Page 72
dial to A. Small aperture (f/22) Mode dial 2 Choose an aperture. Aperture is shown in the viewfinder and information display. Rotate the command dial to choose the desired aperture from values between the minimum and maximum for the lens. Command dial 3 Frame a photograph, focus, and shoot. 56 - Nikon D3200 | User Manual - Page 73
aperture. To take photographs in manual exposure mode: 1 Rotate the mode dial to M. Mode dial 2 Choose aperture and shutter speed. Checking the exposure indicator (see below), adjust shutter speed and aperture. Shutter speed is selected by rotating the command dial: choose from values between - Nikon D3200 | User Manual - Page 74
exposure by pressing the ML-L3 shutter-release button. The shutter remains open for thirty 25 1 Ready the camera. t Mount the camera on a tripod or , use a fully charged EN-EL14 battery or an optional EH-5b AC adapter mode dial to M. Mode dial 3 Choose a shutter speed. Rotate the command - Nikon D3200 | User Manual - Page 75
4 Open the shutter. Bulb: After focusing, press the shutter-release button on the camera or optional remote cord all the way down. Keep the shutter-release button pressed until the exposure is complete. Time: Press the ML-L3 shutter-release button all the way down. 5 Close the shutter. Bulb: Take - Nikon D3200 | User Manual - Page 76
lenses (0 168), distance information (3D color matrix metering II; with other CPU lenses, the camera uses color matrix metering II, which does not include 3D distance information). Center- Camera area AF is selected for AF-area mode during viewfinder photography as described on page 38, camera will - Nikon D3200 | User Manual - Page 77
meter exposure; note that autoexposure lock is not available in i or j mode. 1 Meter exposure. Position the subject in the center of the frame ( see Buttons > Assign AE-L/AF-L button. While exposure lock is in effect, an AE-L indicator will appear in the viewfinder. Shutter-release button t A (L) - Nikon D3200 | User Manual - Page 78
and Aperture While exposure lock is in effect, the following settings can be adjusted without altering the metered value for exposure: Mode Programmed auto Shutter-priority auto Aperture-priority auto Setting Shutter speed and aperture (flexible program; 0 54) Shutter speed Aperture The metering - Nikon D3200 | User Manual - Page 79
compensation is used to alter exposure from the value suggested by the camera, making pictures brighter or darker. It is most effective when used . Highlight a value and press J. To return to shooting mode, press the shutter-release button halfway. Normal exposure can be restored by setting exposure - Nikon D3200 | User Manual - Page 80
can also be set by pressing the E (N) button and rotating the command dial. The selected value is shown in the viewfinder and information display. E (N) button Command dial -0.3 EV +2 EV A Mode M In mode M, exposure compensation affects only the exposure indicator; shutter speed and aperture do - Nikon D3200 | User Manual - Page 81
is used to alter flash output from the level suggested by the camera, changing the brightness of the main subject relative to the background. value. Highlight a value and press J. To return to shooting mode, press the shutter-release button halfway. Normal flash output can be restored by setting - Nikon D3200 | User Manual - Page 82
display. M (Y) button E (N) button Command dial -0.3 EV +1 EV A Optional Flash Units t Flash compensation is also available with optional flash units that support the Nikon Creative Lighting System (CLS; see page 173 flash unit is added to the flash compensation selected with the camera. 66 - Nikon D3200 | User Manual - Page 83
in Highlights and Shadows Active D-Lighting When On is selected, the camera automatically adjusts Active D-Lighting during shooting to preserve details in highlights and Choose an option. Highlight On or Off and press J. To return to shooting mode, press the shutter-release button halfway. 67 - Nikon D3200 | User Manual - Page 84
the D-Lighting option in the retouch menu (0 151) optimizes dynamic range in images after shooting. A See Also For information on using the Fn button and command dial to turn Active D-Lighting on and off, see page 143. t 68 - Nikon D3200 | User Manual - Page 85
daylight under overcast skies. M Shade Use in daylight with subjects in the shade. L Preset manual Measure white balance or copy white balance from existing photo (0 72). 1 Place the cursor Highlight an option and press J. To return to shooting mode, press the shutter-release button halfway. 69 - Nikon D3200 | User Manual - Page 86
appear slightly yellow or red. Light sources with a higher color temperature appear tinged with blue. The camera white balance options are adapted • M (shade): 8,000 K A The Fn Button For information on using the Fn button and the command dial to select a white balance option, see page 143. 70 - Nikon D3200 | User Manual - Page 87
in the shooting menu and press 2 to display white balance options. G button 2 Select a white balance option. Highlight an option other than Preset manual and press 2 (if Fluorescent is selected, highlight a lighting type and press 2). The fine-tuning options shown at right will be displayed. Fine - Nikon D3200 | User Manual - Page 88
measured by camera (see below). Use photo White balance is copied from photo on memory card (0 75 to display white balance options. Highlight Preset manual and press 2. G button 3 Select Measure be displayed before the camera enters preset measurement mode. When the camera is ready to measure - Nikon D3200 | User Manual - Page 89
a will flash in the viewfinder for about eight seconds before the camera returns to shooting mode. To return to shooting mode immediately, press the shutter-release button halfway. t If lighting is too dark or too bright, the camera may be unable to measure white balance. A message will appear - Nikon D3200 | User Manual - Page 90
has been assigned to the Fn button (0 143) and preset white balance selected by pressing the Fn button and rotating the command dial, the camera will also enter preset measurement mode if the Fn button is pressed for a few seconds. A Studio Settings t In studio settings, a standard gray panel can be - Nikon D3200 | User Manual - Page 91
❚❚ Copying White Balance from a Photograph Follow the steps below to copy a value for white balance from a photograph on the memory card. 1 Select Preset manual. To display the menus, press the G button. Highlight White balance in the shooting menu and press 2 to display white balance options. - Nikon D3200 | User Manual - Page 92
Controls Nikon's unique Picture Control system makes it possible to share image processing settings, including sharpening, contrast, brightness, saturation, and hue, among compatible devices and software. Selecting a Picture Control The camera offers six Picture Controls. In P, S, A, and M modes - Nikon D3200 | User Manual - Page 93
Modifying Picture Controls Picture Controls can be modified to suit the scene or the user's creative intent. Choose a balanced combination of settings using Quick adjust, or make manual adjustments to individual settings. 1 Display the Picture Control menu. To display the menus, press the G button. - Nikon D3200 | User Manual - Page 94
the tint used in monochrome photographs from B&W (black-andwhite), Sepia, Cyanotype (blue-tinted monochrome), Red, Yellow, Green, Blue Green, Blue, Purple Blue, Red Purple (0 79). Manual adjustments Manual adjustments (non-monochrome only) (monochrome only) D "A" (Auto) Results for auto sharpening - Nikon D3200 | User Manual - Page 95
Picture Controls (only contrast is displayed when Monochrome is selected). Release the X button to return to the Picture Control menu. The sky in O Orange landscape photographs. Orange produces more contrast than yellow, red R Red more contrast than orange. G Green Softens skin tones. Can be used - Nikon D3200 | User Manual - Page 96
not remove the battery or memory card or unplug the optional AC adapter until recording is complete. When shooting is Memory card access lamp complete, the photograph will be displayed in the monitor for a few seconds or until the shutter-release button is pressed halfway. The camera will then - Nikon D3200 | User Manual - Page 97
button is pressed halfway. For moving subjects. Camera focuses continuously until shutter- AF-F Full-time-servo AF release button is pressed. Focus locks when shutter-release button is pressed halfway. MF Manual focus Focus manually (0 42). 1 Place the cursor in the information display - Nikon D3200 | User Manual - Page 98
❚❚ Choosing an AF-Area Mode In modes other than i and j, the following AF-area modes can be selected in live view: Option Description 8 Face-priority AF The camera automatically detects and focuses on portrait subjects. Use for portraits. 9 Wide-area AF Use for hand-held shots of landscapes - Nikon D3200 | User Manual - Page 99
the Focus Point The method for selecting the focus point for autofocus varies with the option selected for AF-area mode (0 82). 8 (face-priority AF): A double yellow border will be displayed when the camera detects a portrait subject (if multiple faces, up to a maximum of 35, are detected, the - Nikon D3200 | User Manual - Page 100
Time remaining r Microphone sensitivity t Sound level y Focus mode u AF-area mode i Time remaining (movie mode) o Movie frame size Manual movie !0 settings indicator !1 Focus point !2 Exposure indicator Description The mode currently selected with the mode dial. Indicates that movies - Nikon D3200 | User Manual - Page 101
Scene Selection (Scene Auto Selector) x If live view is selected in i or j mode, the camera will automatically analyze the subject and select the appropriate shooting mode when autofocus is enabled. The selected mode is shown in the monitor (0 84). t Portrait Human portrait subjects u Landscape - Nikon D3200 | User Manual - Page 102
monitor will remain on and the video device will display the view through the lens as shown at right. If the device supports HDMI-CEC, select Off for the HDMI > Device control option in the setup menu (0 124) before shooting in live view. D Shooting in Live View Mode To prevent light entering via - Nikon D3200 | User Manual - Page 103
a skyscraper) • The subject is moving Note that the focus point may sometimes be displayed in green when the camera is unable to focus. A Manual Focus To focus in manual focus mode (0 42), rotate the lens focus ring until the subject is in focus. x To magnify the view in the monitor up to about - Nikon D3200 | User Manual - Page 104
view mode. 1 Press the a button. The mirror is raised and the view through the lens is displayed AF drops during movie recording. 3 Start recording. Press the movie-record button to start recording. A recording indicator and the time available are displayed in the monitor. Except in i and j modes - Nikon D3200 | User Manual - Page 105
when the maximum length is reached, the memory card is full, another mode is selected, or the lens is removed. A Taking Photographs During Movie Recording are adjusted automatically unless On is selected for Manual movie settings (0 91) and the camera is in mode M. A See Also For information on the - Nikon D3200 | User Manual - Page 106
for Video mode. • Microphone: Turn the built-in or optional ME-1 stereo microphones (0 91, 177) on or off or adjust microphone sensitivity. Choose Auto sensitivity to adjust y sensitivity automatically, Microphone off to turn sound recording off; to select microphone sensitivity manually, select - Nikon D3200 | User Manual - Page 107
manual adjustments to shutter speed and ISO sensitivity when the camera is in mode supported values, and remain at these values when live view ends. Note that ISO sensitivity is fixed at the value selected; the camera to record sound in stereo or to reduce noise caused by lens vibration being - Nikon D3200 | User Manual - Page 108
Description Pause Pause playback. Guide Play y Advance/ hold for continuous rewind or advance. Skip 10 s Rotate the command dial to skip ahead or back 10 s. Adjust volume X/W (Q) to full-frame playback. Exit to shooting mode Press shutter-release button halfway. Monitor will turn off; - Nikon D3200 | User Manual - Page 109
Editing Movies Trim footage to create edited copies of movies or save selected frames as JPEG stills. Option f Choose start/end point g Save selected frame Description Create a copy from which the opening or closing footage has been removed. Save a selected frame as a JPEG still. Trimming Movies - Nikon D3200 | User Manual - Page 110
frames. If the desired frame is not currently displayed, press 4 or 2 to advance or rewind (to skip to 10 s ahead or back, rotate the command dial). To switch the current selection from start point (w) to end point (x) A (L) button or vice versa, press A (L). y Once you have selected the start - Nikon D3200 | User Manual - Page 111
at the current playback position, the current position will be displayed in red in Step 5 and no copy will be created. The copy will not be saved if there is insufficient space available on the memory card. Copies have the same time and date of creation as the original. A The Retouch Menu Movies can - Nikon D3200 | User Manual - Page 112
Saving Selected Frames To save a copy of a selected frame as a JPEG still: 1 View the movie and choose a frame. Play the movie back as described on page 92; your approximate position in the movie can be ascertained from the movie progress bar. Pause the movie at the frame you intend to copy. 2 - Nikon D3200 | User Manual - Page 113
delete photo. Change protect status A (L) To protect image, or to remove protection from protected image, press A (L) button (0 105). Return to shooting mode Press shutter-release button halfway. Monitor will turn off; photographs can be taken immediately. Retouch photo or play movie Create - Nikon D3200 | User Manual - Page 114
MTR, SPD, AP. EXP. MODE, I SO FOCAL LENGTH LENS AF / VR FLASH TYPE SYNC MODE , : , 1/ 250 ,F11 : , 100 : -1. 3 : 35mm : 18-55 / 3. 5-5. 6 : A / VR-On : Bu i l t - i n : : TTL-BL, +1. 0 N I KON D3200 1/12 Shooting data 3 1/12 NORMAL 6016x4000 6 1 Protect status 105 2 Retouch indicator 150 - Nikon D3200 | User Manual - Page 115
I KON D3200 5 1 Retouch indicator 150 2 Protect status 105 6 3 White balance 69 White balance fine-tuning 71 7 Preset manual 72 4 Camera name 8 updated to show only the data for the I portion of the image visible in the monitor. A Histograms Camera histograms are intended as a guide - Nikon D3200 | User Manual - Page 116
171 13 7 Lens data 8 Focus mode 35, 81 Lens VR (vibration reduction) 2 15 9 Flash type 132 Commander mode 3 10 Flash mode 48 11 Flash control 132 Flash compensation 65 12 Camera name 13 Frame number/total number of images 14 White balance 69 White balance fine-tuning 71 Preset manual 72 15 - Nikon D3200 | User Manual - Page 117
balance 69 10 Date of recording 16, 137 White balance fine-tuning 71 11 Folder name 146 Preset manual 72 12 Metering 60 25 Flash compensation 65 13 Shooting mode 22, 25, 27, 53 Commander mode 3 26 Exposure compensation 63 I 14 Shutter speed 55, 57 1 Displayed in red if photo was - Nikon D3200 | User Manual - Page 118
Return to shooting mode Use W command dial to highlight images for full-frame playback, playback zoom (0 104), deletion (0 106), or protection (0 105 ). Press J to display the highlighted image full frame. See page 106 for more information. See page 105 for more information. Press shutter-release - Nikon D3200 | User Manual - Page 119
to shooting mode O A (L) • Date list: View pictures taken on selected date. • Thumbnail list: View highlighted picture. • Date list: Delete all pictures taken on selected date. • Thumbnail list: Delete highlighted picture (0 106). See page 105 for more information. Press shutter-release button - Nikon D3200 | User Manual - Page 120
and 4 or 2 to view other faces. View other images I Cancel zoom Rotate command dial to view same location in other images at current zoom ratio. Playback zoom is protect status Return to shooting mode A (L) See page 105 for more information. Press shutter-release button halfway. Monitor will - Nikon D3200 | User Manual - Page 121
the O button or the Delete option in the playback menu. Note that protected images will be deleted when the memory card is formatted (0 19). To protect a photograph: 1 Select an image. Display the image in full-frame press the A (L) and O buttons together for about two seconds during playback. 105 - Nikon D3200 | User Manual - Page 122
playback or the photograph highlighted in the thumbnail list, press the O button. To delete multiple selected photographs, all photographs taken on a selected date, or all photographs in the current playback folder, use the Delete option in the playback menu. Once deleted, photographs can not be - Nikon D3200 | User Manual - Page 123
of images, some time may be required for deletion. Option Description Q Selected Delete selected pictures. n Select date Delete all pictures taken on a selected date. R All Delete all pictures in the folder currently selected for playback (0 125). ❚❚ Selected: Deleting Selected Photographs - Nikon D3200 | User Manual - Page 124
press and hold X to view the current picture full screen. Press W (Q) to return to the date list. W (Q) button 3 Select the highlighted date. Press 2 to select all pictures taken on the I highlighted date. Selected dates are marked with a M icon. Repeat steps 2 and 3 to select additional - Nikon D3200 | User Manual - Page 125
Slide Shows The Slide show option in the playback menu is used to display a slide show of the pictures in the current playback folder (0 125). 1 Select Slide show. To display the slide show menu, press the G button and select Slide show in the playback menu. G button 2 Adjust slide show settings. To - Nikon D3200 | User Manual - Page 126
X / W (Q) Press X during movie playback to increase volume, W (Q) to decrease. K End show and return to playback mode. Press shutter-release button halfway. Monitor will turn off; photographs can be taken immediately. I The dialog shown at right is displayed when the show ends. Select Restart - Nikon D3200 | User Manual - Page 127
is fully charged. If in doubt, charge the battery before use or use an EH-5b AC adapter and EP-5A power connector (available separately). ❚❚ Supplied Software ViewNX 2 includes a "Nikon Transfer 2" function for copying pictures from the camera to the computer, where ViewNX 2 can be used to view - Nikon D3200 | User Manual - Page 128
to start up. 3 Connect the USB cable. Connect the USB cable as shown. D USB Hubs Connect the camera directly to the computer; do not connect the cable via a USB hub or keyboard. 4 Turn the camera on. 5 Q Start Nikon Transfer 2. If a message is displayed prompting you to choose a program, select - Nikon D3200 | User Manual - Page 129
. At default settings, all the pictures on the memory card will be copied to the computer (for more information on using Nikon Transfer 2, start ViewNX 2 or Nikon Transfer 2 and select ViewNX 2 Help from the Help menu). Start Transfer 7 Turn the camera off and disconnect the USB cable when transfer - Nikon D3200 | User Manual - Page 130
Printing Photographs Selected JPEG images can be printed on a PictBridge printer (0 204) connected directly to the camera. Connecting the Printer Connect the camera using the supplied UC-E17 USB cable. 1 Turn the camera off. 2 Connect the USB cable. Turn the printer on and connect the USB cable as - Nikon D3200 | User Manual - Page 131
) images can be created using the NEF (RAW) processing option in the retouch menu (0 157). A Printing Via Direct USB Connection Be sure the EN-EL14 battery is fully charged or use an optional EH-5b AC adapter and EP-5A power connector. When taking photographs to be printed via direct USB - Nikon D3200 | User Manual - Page 132
settings), Print time stamp (print times and dates of recording on photos), or No time stamp previous menu. This option is available only if supported by the printer. To exit without cropping, the multi selector and press J. Note that print quality may drop if small crops are printed at large - Nikon D3200 | User Manual - Page 133
taken on a selected date. • Print (DPOF): Print an existing print order created with the DPOF print order option in the playback menu (0 120). The current print order will be displayed in Step 3. • Index print: To create an index print of all JPEG pictures on the memory card, proceed to Step - Nikon D3200 | User Manual - Page 134
3 Select pictures or choose a date. If you chose Print select or Print (DPOF) in Step 2, use the multi selector to scroll through the pictures on the memory card. To display the current picture full screen, press and hold the X button. To select the current picture for printing, press the W - Nikon D3200 | User Manual - Page 135
4 Display printing options. Press J to display PictBridge printing options. 5 Adjust printing options. Choose page size, border, and time stamp options as described on page 116 (a warning will be displayed if the selected page size is too small for an index print). 6 Start printing. Select Start - Nikon D3200 | User Manual - Page 136
the playback menu is used to create digital "print orders" for PictBridge-compatible printers and devices that support DPOF. 1 Choose Select/set for the . Use the multi selector to scroll through the pictures on the memory card. To display the current picture in full screen, press and hold - Nikon D3200 | User Manual - Page 137
data options are not supported when printing via direct USB connection; to print the date of recording on photographs in the current print order, use the PictBridge Time stamp option. The DPOF print order option can not be used if there is not enough space on the memory card to store the print - Nikon D3200 | User Manual - Page 138
the television screen. Note that the edges of images may not be displayed. A Video Mode If no image is displayed, check that camera is correctly connected and that the option selected for Video mode (0 136) matches the video standard used in the TV. A Television Playback Use of an EH-5b AC adapter - Nikon D3200 | User Manual - Page 139
interfere with data transfer. A Audio When a movie with sound recorded in stereo using an optional ME-1 stereo microphone (0 91, 177) is viewed on a television connected to the camera via an A/V cable, the audio output is monaural. HDMI connections support stereo output. Volume can be adjusted using - Nikon D3200 | User Manual - Page 140
in the setup menu when the camera is connected to a television that supports HDMI-CEC and both the camera and television are on, the camera is connected to an HDMI-CEC device, ) will appear in the viewfinder in place of the number of exposures remaining. A Device Control See the television manual - Nikon D3200 | User Manual - Page 141
MMenu Guide D The Playback 126 Frame interval Transition effects Slide in Transition effects Image review On 126 DPOF print order Default 0 On 126 - selected automatically when Current a photo is taken. If a memory card is inserted and this option selected before photos have been taken - Nikon D3200 | User Manual - Page 142
appropriate orientation during shooting, o images are not rotated automatically during image review. Option On Off Description "Tall" (portrait-orientation) pictures are automatically rotated for display in the camera monitor. Pictures taken with Off selected for Auto image rotation (0 138) will - Nikon D3200 | User Manual - Page 143
fluorescent 100 Auto Off On Off sRGB On 46 Other modes 69 k, l, p, o 70 Live view/ movie m, P, S, A, M n Built-in AF-assist illuminator 51 Metering Movie settings 129 Frame size/frame rate* 67 Movie quality 130 Microphone 130 Manual movie settings 131 Flash cntrl for built-in flash - Nikon D3200 | User Manual - Page 144
Picture Control settings to their default values (0 77) and resets the following: Option Release mode i, j, k, l, p, n, o, P, S, A, M m Focus point * Flexible program A (L) button hold Focus mode Viewfinder Live view/movie Default Single frame Continuous Center Off Off 0 Option Default 0 Flash - Nikon D3200 | User Manual - Page 145
2000-1 s, or Auto; in modes S and M, sensitivity will be adjusted for optimal exposure at the shutter speed selected by the user). If Auto (available only with CPU lenses) is selected, the camera will choose the minimum shutter speed based on the focal length of the lens. Slower shutter speeds will - Nikon D3200 | User Manual - Page 146
leaving the camera. A Color Space Color spaces define the correspondence between colors and the numeric values that represent them in a digital image support DCF, select the appropriate color space manually. For more information, see the documentation provided with the application or device. A Nikon - Nikon D3200 | User Manual - Page 147
. The camera may not be able to focus using autofocus when lighting is poor. A See Also See page 37 for information on using the AF-assist illuminator. Information on the shooting modes in which AF-assist is available may be found on page 187. See page 171 for restrictions on the lenses that can - Nikon D3200 | User Manual - Page 148
flash control mode for the SB-400 to be selected from TTL and Manual. A Flash Control The following types of flash control are supported when a CPU lens is used in combination with the built-in flash (0 47) or optional flash units (0 172). i • i-TTL Balanced Fill-Flash for Digital SLR: Information - Nikon D3200 | User Manual - Page 149
3 - 139 Firmware version Auto off timers Normal 140 Default 10 s 1 1 min Low Off Off ISO sensitivity AE/AF lock Off Release locked Off - Enable Yes Enable - 1 Not available when battery is low. 2 Default varies with country of purchase. 3 Only available when compatible Eye-Fi memory card is - Nikon D3200 | User Manual - Page 150
Reset Setup Options G button ➜ B setup menu Select Yes to reset setup menu all settings except Video mode, Time zone and date, Language, and Storage folder to the defaults listed above. Monitor Brightness G button ➜ B setup menu Press 1 or 3 to choose monitor brightness. Choose higher values - Nikon D3200 | User Manual - Page 151
7 Image size 46 8 White balance 69 9 ISO sensitivity 51 10 Release mode 31 11 Focus mode 35, 81 12 AF-area mode 38, 82 13 Metering 60 14 Auto ISO sensitivity indicator 129 15 Print date indicator 144 16 Manual flash indicator .......132 Flash compensation indicator for optional flash units - Nikon D3200 | User Manual - Page 152
-release button is pressed halfway; if image review camera to automatically choose the correct frequency, or manually test both options and choose the one that produces the best results. Flicker reduction may not produce the desired results with some subjects, in which case you should select mode - Nikon D3200 | User Manual - Page 153
set to the time in the new time zone. Set the camera clock (0 16). Date and time Choose the order in which the day, month, and year are displayed. Date format Daylight saving time Turn daylight saving time on or off. The camera clock will automatically be advanced or set back one hour. The - Nikon D3200 | User Manual - Page 154
rotated 90° clockwise Camera rotated 90° counterclockwise Camera orientation is not recorded when Off is selected. Choose this option when panning or taking photographs with the lens pointing up or down. g A Rotate Tall To automatically rotate "tall" (portrait-orientation) photographs for display - Nikon D3200 | User Manual - Page 155
reference data for the Image Dust Off option in Capture NX 2 (available separately; for more information, see the Capture NX 2 manual). Image Dust off ref photo is available only when a CPU lens is mounted on the camera. A lens with a focal length of at least 50 mm is recommended. When using a zoom - Nikon D3200 | User Manual - Page 156
data can be used for photographs taken with different lenses or at different apertures. Reference images can not be viewed using computer imaging software. A grid pattern is displayed when reference images are viewed on the camera. Auto off Timers G button ➜ B setup menu This option determines - Nikon D3200 | User Manual - Page 157
release mode and restoring the previously selected release mode (0 31). Choose shorter times for longer battery life. Beep G button ➜ B setup menu Choose the pitch (High or Low) of the beep that sounds when the camera focuses using single-servo AF (AF-S or when single-servo AF is selected for AF - Nikon D3200 | User Manual - Page 158
number used when a new folder is created, the memory card is formatted, or a new memory card is inserted in the camera. Option Description When a new folder is created, the memory card formatted, or a new memory card inserted in the camera, file numbering continues from the last number used or - Nikon D3200 | User Manual - Page 159
current memory card or insert a new memory card. Buttons G button ➜ B setup menu Choose the roles played by the Fn and A (L) buttons. ❚❚ Assign Fn button Choose the role played by the Fn button (0 8). Option Description v Image quality/size * Press the Fn button and rotate the command dial - Nikon D3200 | User Manual - Page 160
is only enabled when a memory card is inserted in the camera. Selecting Enable release allows the shutter to be released when no memory card is inserted, although no pictures will be recorded (they will however be displayed in the monitor in demo mode). Print Date G button ➜ B setup menu Choose - Nikon D3200 | User Manual - Page 161
3. The first time you use the date counter, you will be prompted to select a date for slot 1; enter a date using the multi selector and press J. To change the date or store additional dates, highlight a slot, press 2, and enter the date. To use the stored date, highlight the slot and press J. To - Nikon D3200 | User Manual - Page 162
will be stored. D3200 (default folder) memory card. ❚❚ Naming and Renaming Folders Folder names can be up to five characters long. To move the cursor in the name area, rotate the command memory card, folder names are preceded by a three-digit folder number assigned automatically by the camera - Nikon D3200 | User Manual - Page 163
be connected to the camera's accessory terminal (0 177) using the cable supplied with the GP-1, allowing information on the camera's current position to be recorded when photographs are taken (turn the camera off before connecting the GP-1; for more information, see the GP-1 manual). The GPS menu - Nikon D3200 | User Manual - Page 164
an Eye-Fi memory card (available separately from third-party suppliers) is inserted in the camera. Choose Enable to card firmware has been updated to the latest version. A Using Eye-Fi Cards in Ad Hoc Mode Additional time may be required when connecting using Eye-Fi cards that support ad hoc mode - Nikon D3200 | User Manual - Page 165
retouched copies of the photographs on the memory card, and is only available when a memory card containing photographs is inserted in the camera. Option 0 Option 0 Option 0 i D-Lighting 151 % NEF (RAW) processing 157 g Color sketch 160 j Red-eye correction 151 0 Resize 158 r Perspective - Nikon D3200 | User Manual - Page 166
2. 2 Select a picture. Highlight a picture and press J. A Retouch The camera may not be able to display or retouch images created with other devices. If the image was recorded at an image quality setting of NEF (RAW) + JPEG fine (0 44), retouch options apply - Nikon D3200 | User Manual - Page 167
selector is pressed; Cancel zoom u area currently visible in monitor is indicated by yellow border. Press J to cancel zoom. Create copy If the camera detects red-eye in the selected photograph, a copy will be created that has been processed to reduce its effects. No copy will be created if the - Nikon D3200 | User Manual - Page 168
Press the W (Q) button to reduce the size of the crop. Change crop aspect ratio Rotate the command dial to switch between aspect ratios of 3 : 2, 4 : 3, 5 : 4, 1 : file. A Trim: Image Quality and Size Copies created from NEF (RAW) or NEF (RAW) + JPEG photos have an image quality of JPEG fine (0 44 - Nikon D3200 | User Manual - Page 169
as shown at right. Creates a copy with warm tone filter effects, giving the copy a "warm" red cast. The effect can be previewed in the monitor. Red intensifier Intensify reds (Red intensifier), greens (Green Green intensifier intensifier), or blues (Blue intensifier). Press 1 to increase the effect - Nikon D3200 | User Manual - Page 170
as shown below. The effect is displayed in the monitor together with red, green, and blue histograms (0 99) giving the distribution of tones the image displayed in the monitor, press the X button. The histogram will be updated to show data only for the portion of the image displayed in the monitor. - Nikon D3200 | User Manual - Page 171
are available). To create an NEF (RAW) copy, choose an image quality of NEF (RAW). + 1 Select Image overlay. Highlight Image overlay in J to display a list of the NEF (RAW) pictures created with this camera. 2 Select the first image. Use the multi selector to highlight the first photograph - Nikon D3200 | User Manual - Page 172
be displayed full-frame in the monitor. D Image Overlay The overlay has the same photo info (including date of recording, metering, shutter speed, aperture, shooting mode, exposure compensation, focal length, and image orientation) and values for white balance and Picture Control as the photograph - Nikon D3200 | User Manual - Page 173
picture selection dialog listing only NEF (RAW) images created with this camera. 2 Select a photograph. Use the multi selector to highlight a exposure compensation can only be set to values between -2 and +2 EV. Image quality (0 44) Image size (0 46) White balance (0 69) Exposure compensation (0 - Nikon D3200 | User Manual - Page 174
Resize G button ➜ N retouch menu Create small copies of selected photographs. 1 Select Resize. To resize selected images, press G to display the menus and select Resize in the retouch menu. 2 Choose a size. Highlight Choose size and press 2. The options shown at right will be displayed; - Nikon D3200 | User Manual - Page 175
let the camera correct distortion automatically and then make fine adjustments using the multi selector, or select Manual to reduce distortion manually (note use only with pictures taken with type G and D lenses (PC, fisheye, and certain other lenses excluded). Results are not guaranteed with other - Nikon D3200 | User Manual - Page 176
Fisheye G button ➜ N retouch menu Create copies that appear to have been taken with a fisheye lens. Press 2 to increase the effect (this also increases the amount that will be cropped out at the edges of the image), 4 to reduce it. The - Nikon D3200 | User Manual - Page 177
Perspective Control G button ➜ N retouch menu Create copies that reduce the effects of perspective taken from the base of a tall object. Use the multi selector to adjust perspective (note that greater amounts of perspective control result in more of the edges being cropped out). The results can be - Nikon D3200 | User Manual - Page 178
Miniature Effect G button ➜ N retouch menu Create a copy that appears to be a photo of a diorama. Works best with photos taken from a high vantage point. The area that will be in focus in the copy is indicated by a yellow frame. To Press Description - Nikon D3200 | User Manual - Page 179
color of the object as one that will remain in the final copy (the camera may have difficulty detecting unsaturated colors; choose a saturated color). To zoom in on zoom out. 4 Highlight the color range. Rotate the command dial to highlight the color range for the selected color. Color range u - Nikon D3200 | User Manual - Page 180
may include hues from other colors. The effect can be previewed in the edit display. 6 Select additional colors. To select additional colors, rotate the command dial to highlight another of the three color boxes at the top of the display and repeat Steps 3-5 to select another color. Repeat for - Nikon D3200 | User Manual - Page 181
view the other source image. If multiple copies exist for the current source image, press 1 or 3 to view the other copies. To exit to playback mode, press the K button, or press J to return to playback with the highlighted image displayed. D Side-by-side comparison The source image will not be - Nikon D3200 | User Manual - Page 182
m Recent Settings To display the recent settings menu, press G and select the m (recent settings) tab. G button The recent settings menu lists the twenty most recently used settings. Press 1 or 3 to highlight an option and press 2 to select. A Removing Items from the Recent Settings Menu To remove - Nikon D3200 | User Manual - Page 183
. AF-S lenses have names beginning with AF-S, AF-I lenses names beginning with AF-I. Autofocus is not supported with other autofocus (AF) lenses. The following table lists the features available with compatible lenses in viewfinder photography: Camera setting Focus Mode Metering Lens/accessory - Nikon D3200 | User Manual - Page 184
A Identifying CPU and Type G and D Lenses CPU lenses can be identified by the presence of CPU contacts, type G and D lenses by a letter on the lens barrel. Type G lenses are not equipped with a lens aperture ring. CPU contacts Aperture ring CPU lens Type G lens Type D lens n 168 - Nikon D3200 | User Manual - Page 185
a CPU lens can not be used. Some non-CPU lenses can not be used; see "Incompatible Accessories and Non-CPU Lenses," below. Camera setting Focus Mode Metering MF (with electronic Lens/accessory AF rangefinder) MF M Other modes L, M, N AI-, AI-modified NIKKOR or Nikon Series E lenses - z1 - Nikon D3200 | User Manual - Page 186
lenses at ranges less than those given below: Lens AF-S DX NIKKOR 10-24mm f/3.5-4.5G ED AF-S DX Zoom-Nikkor 12-24mm f/4G IF-ED AF-S NIKKOR 16-35mm f/4G ED VR AF-S DX NIKKOR 16-85mm f/3.5-5.6G ED VR AF-S Zoom-Nikkor 17-35mm f/2.8D IF-ED AF-S DX Zoom-Nikkor 17-55mm f/2.8G IF-ED AF Zoom-Nikkor 18 - Nikon D3200 | User Manual - Page 187
4G • AF-S DX NIKKOR 18-200mm f/3.5-5.6G ED VR II • AF-S NIKKOR 85mm f/1.4G • AF-S NIKKOR 24-70mm f/2.8G ED • AF-S VR Micro-Nikkor 105mm f/2.8G IF-ED A Calculating Angle of View The size of the area exposed by a 35mm camera is 36 × 24 mm. The size of the area exposed by the D3200, in contrast - Nikon D3200 | User Manual - Page 188
Optional Flash Units (Speedlights) The camera supports the Nikon Creative Lighting System (CLS) and can be used with CLS-compatible flash units. Optional flash units can be attached directly to the camera accessory shoe as described below. The accessory shoe is equipped with a safety lock for flash - Nikon D3200 | User Manual - Page 189
mounted on a CLS-compatible camera, the SU-800 can be used as a commander for remote SB-910, SB-900, SB-800, SB-700, SB-600, or SB-R200 flash units in up to three groups. The SU-800 itself is not equipped with a flash. A Guide Number To calculate the range of the flash - Nikon D3200 | User Manual - Page 190
flash unit only. 2 Flash mode is automatically set to TTL and shutter-release is disabled. Set flash unit to A (non-TTL auto flash). 3 Autofocus is available with AF-S VR Micro-Nikkor 105mm f/2.8G IF-ED and AF-S Micro NIKKOR 60mm f/2.8G ED lenses only. 4 Available when camera is used to select - Nikon D3200 | User Manual - Page 191
for detailed instructions. If the flash unit supports CLS, refer to the section on CLS-compatible digital SLR cameras. The D3200 is not included in the "digital SLR" category in the SB-80DX, SB-28DX, and SB-50DX manuals. If an optional flash unit is attached in shooting modes other than j, the - Nikon D3200 | User Manual - Page 192
12-13): Additional EN-EL14 batteries are available from local retailers and Nikon-authorized service representatives. • Battery Charger MH-24 (0 12): Recharge EN-EL14 batteries. • Power Connector EP-5A, AC Adapter EH-5b: These accessories can be used to power the camera for extended periods (EH-5a - Nikon D3200 | User Manual - Page 193
• Wireless Mobile Adapter WU-1a: Supports two-way communication between the accessories camera and smart devices running the Wireless Mobile Adapter Utility. Approved Memory Cards The following SD memory cards have been tested and approved for use in the D3200. Cards with class 6 or faster write - Nikon D3200 | User Manual - Page 194
Attaching a Power Connector and AC Adapter Turn the camera off before attaching an optional power connector and AC adapter. 1 Ready the camera. Open the battery-chamber (q) and power connector (w) covers. 2 Insert the EP-5A power connector. Be sure to insert the connector in the orientation shown, - Nikon D3200 | User Manual - Page 195
use alcohol, thinner, or other volatile chemicals. D Servicing the Camera and Accessories The camera is a precision device and requires regular servicing. Nikon recommends that the n camera be inspected by the original retailer or Nikon-authorized service representative once every one to two years - Nikon D3200 | User Manual - Page 196
display the menus. Highlight Clean image sensor in the setup menu (0 133) and press 2. G button 3 Select Clean now. Highlight Clean now and press J. The camera will check the image sensor and then begin cleaning. 1 flashes in the viewfinder and other operations can not be performed. Do not remove or - Nikon D3200 | User Manual - Page 197
Highlight an option and press J. D Image Sensor Cleaning Using camera controls during startup interrupts image sensor cleaning. Image sensor cleaning may image sensor menu, clean the image sensor manually (0 182) or consult a Nikon-authorized service representative. n If image sensor cleaning is - Nikon D3200 | User Manual - Page 198
setup menu (0 180), the filter can be cleaned manually as described below. Note, however, that the filter is extremely delicate and easily damaged. Nikon recommends that the filter be cleaned only by Nikon-authorized service personnel. 1 Charge the battery or connect an AC adapter. A reliable power - Nikon D3200 | User Manual - Page 199
with a blower can only be removed by Nikon-authorized service personnel. Under no circumstances should you touch or wipe the filter. 8 Turn the camera off. The mirror will return to the down position and the shutter curtain will close. Replace the lens or body cap. A Use a Reliable Power Source The - Nikon D3200 | User Manual - Page 200
on the memory card, or affect the product's internal circuitry. Do not leave the lens pointed at the sun: Do not leave the lens pointed at When cleaning the camera body, use a blower to gently remove dust and lint, then wipe gently with a soft, dry cloth. After using the camera at the beach or - Nikon D3200 | User Manual - Page 201
approved for use in this equipment. • Do not expose the battery to flame or excessive heat. • Keep the battery terminals clean. • Turn the product off before replacing the battery. • Remove the battery from the camera or charger when not in use and replace the terminal cover. These devices draw - Nikon D3200 | User Manual - Page 202
when used at room temperature indicates that it requires replacement. Purchase a new EN-EL14 battery. • Charge the battery before use. When taking photographs on important occasions, ready a spare EN-EL14 battery and keep it fully charged. Depending on your location, it may be difficult to purchase - Nikon D3200 | User Manual - Page 203
z z z Movie settings zzzzzzzzzzzz Flash cntrl for built-in flash/Optional flash z z z z Release mode z* z* z* z* z* z* z* z* z z z z AE-L/AF-L button hold - - z* z* z* z* z* z* z z z z Focus mode zzzzzzzzzzzz Flexible program z* - - - Exposure compensation --------z z z z Flash - Nikon D3200 | User Manual - Page 204
Large 3.0 MB 1900 100 JPEG basic Medium 1.9 MB 3200 100 Small 1.0 MB 6300 100 1 All figures are approximate. Results will vary with card type, camera settings, and scene recorded. 2 Maximum number of exposures that can be stored in memory buffer at ISO 100. Drops when noise reduction - Nikon D3200 | User Manual - Page 205
and turn the camera on again. If the problem persists after removing the battery from the camera, contact your retailer or Nikon-authorized service representative. Shooting (All Modes) Camera takes time to turn on: Delete files or folders. Shutter-release disabled: • Memory card is locked, full - Nikon D3200 | User Manual - Page 206
not sound: • Off is selected for Beep (0 141). • Camera is in quiet shutter-release mode (0 31), or movie is being recorded (0 88). • MF or AF-C is selected as the focus mode or subject moves when AF-A is selected (0 35). Smudges appear in photographs: Clean front and rear lens elements. If problem - Nikon D3200 | User Manual - Page 207
Auto image rotation (0 138). • Photo is displayed in image review (0 126). • Camera was pointed up or down when photo was taken (0 138). Can not delete picture: • Picture is protected: remove protection (0 105). • Memory card is locked (0 18). Can not retouch picture: Photo can not be further edited - Nikon D3200 | User Manual - Page 208
taken before image sensor cleaning is performed (0 139). Miscellaneous Date of recording is not correct: Set camera clock (0 16, 137). Menu item can not be selected: Some options are not available at certain combinations of settings or when no memory card is inserted (0 18, 149, 187). n 192 - Nikon D3200 | User Manual - Page 209
card. If problem persists, card may 19 be damaged. Contact Nikon-authorized service representative. This memory card cannot be used. Card may be damaged. Insert another card. (/k (flashes) • Error creating new folder. Delete files or insert new memory card. • Insert new memory card. 106 18 - Nikon D3200 | User Manual - Page 210
Reduce quality or size. 44 • Delete photographs. 106 • Insert new memory card. 18 Camera can not focus using autofocus. 23, Change composition or focus manually. 36, 42 • Use a lower ISO sensitivity. 51 • Use commercial ND filter. 176 • In mode: S Increase shutter speed 55 A Choose - Nikon D3200 | User Manual - Page 211
, 89 Folder contains no images. - Folder selected for playback contains no images. Insert another memory card or select a different folder. 18, 125 Cannot display this file. - File can not be played back on camera. - Cannot select this file. - Images created with other devices can not be - Nikon D3200 | User Manual - Page 212
Specifications ❚❚ Nikon D3200 Digital Camera Type Type Single-lens reflex digital camera Lens mount Nikon F mount (with AF contacts) Effective angle of view Approx. 1.5 × lens focal length (35 mm format equivalent); Nikon DX format Effective pixels Effective pixels 24.2 million Image - Nikon D3200 | User Manual - Page 213
Lens Compatible lenses Autofocus is available with AF-S and AF-I lenses. Autofocus is not available with other type G and D lenses, AF lenses (IX NIKKOR and lenses for the F3AF are not supported), and AI-P lenses. Non-CPU lenses can be used in mode M, but the camera exposure meter will not function - Nikon D3200 | User Manual - Page 214
and center-weighted metering, standard i-TTL flash for digital SLR with spot metering Flash mode Auto, auto with red-eye reduction, auto slow sync, auto slow sync with red-eye reduction, fill-flash, red-eye reduction, slow sync, slow sync with red-eye reduction, rear-curtain with slow sync, rear - Nikon D3200 | User Manual - Page 215
Lens servo AF-area mode Autofocus Automatic scene selection • Autofocus (AF): Single-servo AF (AF-S); full-time servo AF (AF-F) • Manual focus (MF) Face-priority AF, wide-area AF, normal-area AF, subject-tracking AF Contrast-detect AF anywhere in frame (camera USB Video output HDMI output Accessory - Nikon D3200 | User Manual - Page 216
125 × 96 × 76.5 mm (5.0 × 3.8 × 3.1 in.) Weight Approx. 505 g (1 lb 1.8 oz) with battery and memory card but without body cap; approx. 455 g/1 lb (camera body only) Operating environment Temperature 0-40 °C (+32-104 °F) Humidity Less than 85% (no condensation) • Unless otherwise stated, all - Nikon D3200 | User Manual - Page 217
g (1.7 oz), excluding terminal cover ❚❚ AF-S DX NIKKOR 18-55mm f/3.5-5.6G VR lens Type Type G AF-S DX NIKKOR zoom lens with built-in CPU and F mount for use exclusively with Nikon DX-format digital SLR cameras Focal length 18-55 mm Maximum aperture f/3.5-5.6 Lens construction 11 elements in - Nikon D3200 | User Manual - Page 218
❚❚ The AF-S DX NIKKOR 18-55mm f/3.5-5.6G VR The AF-S DX NIKKOR 18-55mm f/3.5-5.6G VR is for use exclusively with Nikon DX format digital cameras. In the case of the AF-S DX NIKKOR 18-55 mm f/3.5-5.6G VR, changes to zoom can alter maximum aperture by up to 1 1/3 EV. The camera however automatically - Nikon D3200 | User Manual - Page 219
• 52 mm Snap-on Front Lens Cap LC-52 A Optional Accessories • 52 mm screw-on filters • LF-1 and LF-4 rear lens caps • Flexible Lens Pouch CL-0815 • Lens Hood HB-45 (attaches as shown at right) q w q A A Note on Wide-Angle Lenses Autofocus may not provide the desired results with wide- and - Nikon D3200 | User Manual - Page 220
orders stored on the memory card. • Exif version 2.3: The D3200 supports Exif (Exchangeable Image File Format for Digital Still Cameras) version 2.3, a All other trade names mentioned in this manual or the other documentation provided with your Nikon product are trademarks or registered trademarks - Nikon D3200 | User Manual - Page 221
) batteries are given below. • Single-frame release mode (CIPA standard 1): Approximately 540 shots • Continuous release mode (Nikon standard 2): Approximately 1800 shots 1 Measured at 23 °C/73.4 °F (±2 °C/3.6 °F) with an AF-S DX NIKKOR 18-55mm f/3.5-5.6G VR lens under the following test conditions - Nikon D3200 | User Manual - Page 222
a (live view 80, 88 t (Memory buffer) .........23, 32, 188 Numerics n 3D color matrix metering II......... 60 3D-tracking 38, 39 3D-tracking (11 points) (AF-area mode 38, 39 420-pixel RGB sensor 60 A A/V cable 122 AC adapter 176, 178 Access lamp 23 Accessories 176 Active D-Lighting 67, 143 - Nikon D3200 | User Manual - Page 223
Lens vibration reduction switch .... 14, 15 Live view 80, 88 Lock mirror up for cleaning...... 182 M Manual 42, 57 Manual focus 42, 81, 87 Manual movie settings 91 Matrix metering 60 Maximum aperture 42, 167 Maximum sensitivity 129 Medium (Image size 46 Memory buffer 23, 32 Memory card 18 - Nikon D3200 | User Manual - Page 224
14 Rear-curtain sync 49 Recent settings 166 Red intensifier (Filter effects) ...153 Red-eye correction 151 Red-eye reduction 49 Release mode 31 Remote control 33, 141, 177 Remote cord 58, 177 Remote on duration 141 Removing the lens from the camera 15 Reset setup options 134 Reset shooting - Nikon D3200 | User Manual - Page 225
209 - Nikon D3200 | User Manual - Page 226
210 - Nikon D3200 | User Manual - Page 227
- Nikon D3200 | User Manual - Page 228
No reproduction in any form of this manual, in whole or in part (except for brief quotation in critical articles or reviews), may be made without written authorization from NIKON CORPORATION. SB2C01(11) 6MB14011-01
-
 1
1 -
 2
2 -
 3
3 -
 4
4 -
 5
5 -
 6
6 -
 7
7 -
8
-
9
-
10
-
11
-
12
-
13
-
14
-
15
-
16
-
17
-
18
-
19
-
20
-
21
-
22
-
23
-
24
-
25
-
26
-
27
-
28
-
29
-
30
-
31
-
32
-
33
-
34
-
35
-
36
-
37
-
38
-
39
-
40
-
41
-
42
-
43
-
44
-
45
-
46
-
47
-
48
-
49
-
50
-
51
-
52
-
53
-
54
-
55
-
56
-
57
-
58
-
59
-
60
-
61
-
62
-
63
-
64
-
65
-
66
-
67
-
68
-
69
-
70
-
71
-
72
-
73
-
74
-
75
-
76
-
77
-
78
-
79
-
80
-
81
-
82
-
83
-
84
-
85
-
86
-
87
-
88
-
89
-
90
-
91
-
92
-
93
-
94
-
95
-
96
-
97
-
98
-
99
-
100
-
101
-
102
-
103
-
104
-
105
-
106
-
107
-
108
-
109
-
110
-
111
-
112
-
113
-
114
-
115
-
116
-
117
-
118
-
119
-
120
-
121
-
122
-
123
-
124
-
125
-
126
-
127
-
128
-
129
-
130
-
131
-
132
-
133
-
134
-
135
-
136
-
137
-
138
-
139
-
140
-
141
-
142
-
143
-
144
-
145
-
146
-
147
-
148
-
149
-
150
-
151
-
152
-
153
-
154
-
155
-
156
-
157
-
158
-
159
-
160
-
161
-
162
-
163
-
164
-
165
-
166
-
167
-
168
-
169
-
170
-
171
-
172
-
173
-
174
-
175
-
176
-
177
-
178
-
179
-
180
-
181
-
182
-
183
-
184
-
185
-
186
-
187
-
188
-
189
-
190
-
191
-
192
-
193
-
194
-
195
-
196
-
197
-
198
-
199
-
200
-
201
-
202
-
203
-
204
-
205
-
206
-
207
-
208
-
209
-
210
-
211
-
212
-
213
-
214
-
215
-
216
-
217
-
218
-
219
-
220
-
221
-
222
-
223
-
224
-
225
-
226
-
227
-
228
 |
 |
DIGITAL CAMERA
Reference Manual
En