Nikon D3200 User Manual - Page 152
Auto Info Display, Video Mode, Flicker Reduction, Movie settings, Manual movie settings
 |
View all Nikon D3200 manuals
Add to My Manuals
Save this manual to your list of manuals |
Page 152 highlights
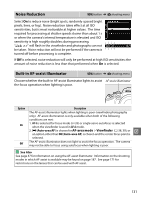
Auto Info Display G button ➜ B setup menu If On is selected, the information display will appear after the shutter-release button is pressed halfway; if image review (0 126) is off, it will also be displayed immediately after shooting. Choose On if you find yourself frequently referring to the information display during shooting. If Off is selected, the information display can be viewed by pressing the P button. Video Mode G button ➜ B setup menu When connecting the camera to a television or VCR, be sure the camera video mode matches the device video standard (NTSC or PAL). Flicker Reduction G button ➜ B setup menu Reduce flicker and banding when shooting under fluorescent or mercury-vapor lighting during live view (0 80) or movie recording (0 88). Choose Auto to allow the camera to automatically choose the correct frequency, or manually match the frequency to that of the local AC power supply. A Flicker Reduction If Auto fails to produce the desired results and If you are unsure as to the frequency of the local power supply, test both options and choose the one that produces the best results. Flicker reduction may not produce the desired results with some subjects, in which case you should select mode A or M and choose a smaller aperture (higher f-number) before starting live view. Note that flicker reduction is not available when On is selected for Movie settings > Manual movie settings (0 91) in mode M. g 136
-
 1
1 -
2
-
3
-
4
-
5
-
6
-
7
-
8
-
9
-
10
-
11
-
12
-
13
-
14
-
15
-
16
-
17
-
18
-
19
-
20
-
21
-
22
-
23
-
24
-
25
-
26
-
27
-
28
-
29
-
30
-
31
-
32
-
33
-
34
-
35
-
36
-
37
-
38
-
39
-
40
-
41
-
42
-
43
-
44
-
45
-
46
-
47
-
48
-
49
-
50
-
51
-
52
-
53
-
54
-
55
-
56
-
57
-
58
-
59
-
60
-
61
-
62
-
63
-
64
-
65
-
66
-
67
-
68
-
69
-
70
-
71
-
72
-
73
-
74
-
75
-
76
-
77
-
78
-
79
-
80
-
81
-
82
-
83
-
84
-
85
-
86
-
87
-
88
-
89
-
90
-
91
-
92
-
93
-
94
-
95
-
96
-
97
-
98
-
99
-
100
-
101
-
102
-
103
-
104
-
105
-
106
-
107
-
108
-
109
-
110
-
111
-
112
-
113
-
114
-
115
-
116
-
117
-
118
-
119
-
120
-
121
-
122
-
123
-
124
-
125
-
126
-
127
-
128
-
129
-
130
-
131
-
132
-
133
-
134
-
135
-
136
-
137
-
138
-
139
-
140
-
141
-
142
-
143
-
144
-
145
-
146
-
 147
147 -
 148
148 -
 149
149 -
 150
150 -
 151
151 -
 152
152 -
 153
153 -
 154
154 -
 155
155 -
 156
156 -
 157
157 -
158
-
159
-
160
-
161
-
162
-
163
-
164
-
165
-
166
-
167
-
168
-
169
-
170
-
171
-
172
-
173
-
174
-
175
-
176
-
177
-
178
-
179
-
180
-
181
-
182
-
183
-
184
-
185
-
186
-
187
-
188
-
189
-
190
-
191
-
192
-
193
-
194
-
195
-
196
-
197
-
198
-
199
-
200
-
201
-
202
-
203
-
204
-
205
-
206
-
207
-
208
-
209
-
210
-
211
-
212
-
213
-
214
-
215
-
216
-
217
-
218
-
219
-
220
-
221
-
222
-
223
-
224
-
225
-
226
-
227
-
228
 |
 |
