Nokia 8801 Nokia 8801 User Guide in English - Page 41
Settings, Groups, Add contacts, Unsubcribe
 |
View all Nokia 8801 manuals
Add to My Manuals
Save this manual to your list of manuals |
Page 41 highlights
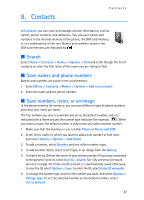
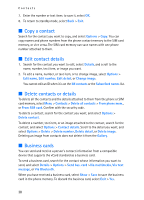
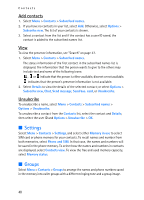
Contacts Add contacts 1. Select Menu > Contacts > Subscribed names. 2. If you have no contacts in your list, select Add. Otherwise, select Options > Subscribe new. The list of your contacts is shown. 3. Select a contact from the list and if the contact has a user ID saved, the contact is added to the subscribed names list. View To view the presence information, see "Search" on page 37. 1. Select Menu > Contacts > Subscribed names. The status information of the first contact in the subscribed names list is displayed. The information that the person wants to give to the others may include text and some of the following icons: , or indicate that the person is either available, discreet or not available. indicates that the person's presence information is not available. 2. Select Details to view the details of the selected contact; or select Options > Subscribe new, Chat, Send message, Send bus. card, or Unsubscribe. Unsubcribe To unsubscribe a name, select Menu > Contacts > Subscribed names > Options > Unsubscribe. To unsubscribe a contact from the Contacts list, select the contact and Details; then select the user ID and Options > Unsubscribe > OK. ■ Settings Select Menu > Contacts > Settings, and select either Memory in use to select SIM card or phone memory for your contacts. To recall names and number from both memories, select Phone and SIM. In that case, the names and numbers will be saved in the phone memory. To select how the names and numbers in contacts are displayed, select Contacts view. To view the free and used memory capacity, select Memory status. ■ Groups Select Menu > Contacts > Groups to arrange the names and phone numbers saved in the memory into caller groups with a different ringing tone and a group image. 40
-
 1
1 -
2
-
3
-
4
-
5
-
6
-
7
-
8
-
9
-
10
-
11
-
12
-
13
-
14
-
15
-
16
-
17
-
18
-
19
-
20
-
21
-
22
-
23
-
24
-
25
-
26
-
27
-
28
-
29
-
30
-
31
-
32
-
33
-
34
-
35
-
 36
36 -
 37
37 -
 38
38 -
 39
39 -
 40
40 -
 41
41 -
 42
42 -
 43
43 -
 44
44 -
 45
45 -
 46
46 -
47
-
48
-
49
-
50
-
51
-
52
-
53
-
54
-
55
-
56
-
57
-
58
-
59
-
60
-
61
-
62
-
63
-
64
-
65
-
66
-
67
-
68
-
69
-
70
-
71
-
72
-
73
-
74
-
75
-
76
-
77
-
78
-
79
-
80
-
81
-
82
-
83
-
84
-
85
-
86
-
87
-
88
-
89
-
90
-
91
-
92
-
93
-
94
-
95
-
96
-
97
-
98
-
99
-
100
-
101
-
102
-
103
-
104
-
105
-
106
-
107
-
108
-
109
-
110
-
111
-
112
-
113
-
114
-
115
-
116
-
117
-
118
-
119
-
120
-
121
-
122
-
123
-
124
-
125
-
126
-
127
-
128
-
129
-
130
-
131
-
132
-
133
-
134
-
135
-
136
-
137
-
138
-
139
-
140
-
141
-
142
-
143
-
144
-
145
-
146
-
147
-
148
-
149
-
150
-
151
-
152
-
153
-
154
-
155
-
156
-
157
-
158
-
159
-
160
-
161
-
162
-
163
-
164
-
165
-
166
-
167
-
168
-
169
-
170
-
171
-
172
-
173
-
174
-
175
-
176
-
177
-
178
-
179
-
180
-
181
-
182
-
183
-
184
-
185
-
186
-
187
-
188
-
189
-
190
-
191
-
192
-
193
-
194
-
195
-
196
-
197
-
198
-
199
-
200
-
201
-
202
-
203
-
204
-
205
-
206
-
207
-
208
-
209
 |
 |
