Oki B6250n Reference Guide - Page 31
Hecking, Rinting, Esult
 |
View all Oki B6250n manuals
Add to My Manuals
Save this manual to your list of manuals |
Page 31 highlights
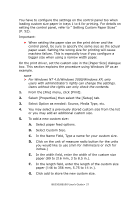
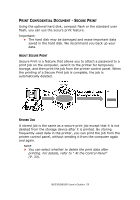
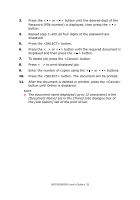
1. Press the button. 2. Check that [Print Jobs Menu] is displayed and then press the < > button. 3. Press the < > or < > button until the desired digit of the Password (PIN number) is displayed, then press the < > button. 4. Repeat step 3 until all four digits of the password are displayed. 5. Press the button. 6. Press the < > or < > button until the desired document is displayed and then press the < > button. 7. Input the number of copies desired, then press . 8. After printing, the job is deleted. 9. Press [Cancel] to exit the menu. PROOF PRINT - PRINT AFTER CHECKING PRINTING RESULT Using the optional hard disk, compact flash or the standard User Flash, you can use the proof print feature. Important: • We recommend you back up your data. ABOUT PROOF PRINT Proof Print is a feature that allows you to store the print data of multiple copies on the hard disk or flash, print out only the first set to check the print result and if satisfactory, print the remaining copies from the control panel. B6250/B6500 User's Guide> 31
-
 1
1 -
2
-
3
-
4
-
5
-
6
-
7
-
8
-
9
-
10
-
11
-
12
-
13
-
14
-
15
-
16
-
17
-
18
-
19
-
20
-
21
-
22
-
23
-
24
-
25
-
 26
26 -
 27
27 -
 28
28 -
 29
29 -
 30
30 -
 31
31 -
 32
32 -
 33
33 -
 34
34 -
 35
35 -
 36
36 -
37
-
38
-
39
-
40
-
41
-
42
-
43
-
44
-
45
-
46
-
47
-
48
-
49
-
50
-
51
-
52
-
53
-
54
-
55
-
56
-
57
-
58
-
59
-
60
-
61
-
62
-
63
-
64
-
65
-
66
-
67
-
68
-
69
-
70
-
71
-
72
-
73
-
74
-
75
-
76
-
77
-
78
-
79
-
80
-
81
-
82
-
83
-
84
-
85
-
86
-
87
-
88
-
89
-
90
-
91
-
92
-
93
-
94
-
95
-
96
-
97
-
98
-
99
-
100
-
101
-
102
-
103
-
104
-
105
-
106
-
107
-
108
-
109
-
110
-
111
-
112
-
113
-
114
-
115
-
116
-
117
-
118
-
119
-
120
-
121
-
122
-
123
-
124
-
125
-
126
-
127
-
128
-
129
-
130
-
131
-
132
-
133
-
134
-
135
-
136
-
137
-
138
-
139
-
140
-
141
-
142
-
143
-
144
-
145
-
146
-
147
-
148
-
149
-
150
-
151
-
152
-
153
-
154
-
155
-
156
-
157
-
158
-
159
-
160
-
161
-
162
-
163
-
164
-
165
-
166
-
167
-
168
-
169
-
170
-
171
-
172
-
173
 |
 |