Oki B6250n Reference Guide - Page 51
Setting paper size: Setting Custom Paper Sizes
 |
View all Oki B6250n manuals
Add to My Manuals
Save this manual to your list of manuals |
Page 51 highlights
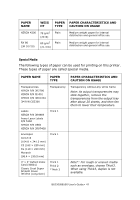
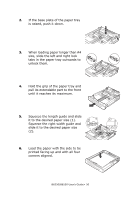
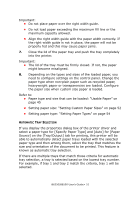
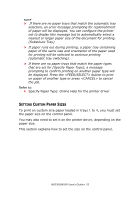
Important: • Do not place paper over the right width guide. • Do not load paper exceeding the maximum fill line or the maximum capacity allowed. • Align the right width guide with the paper width correctly. If the right width guide is not in place, the paper will not be properly fed and this may cause paper jams. 7. Close the lid of the paper tray and push the tray completely into the printer. Important: • The lid of the tray must be firmly closed. If not, the paper might become misaligned. 8. Depending on the types and sizes of the loaded paper, you need to configure settings on the control panel. Change the paper type when non-plain paper such as recycled paper, heavyweight paper or transparencies are loaded. Configure the paper size when custom size paper is loaded. Refer to: • Paper type and size that can be loaded: "Usable Paper" on page 45 • Setting paper size: "Setting Custom Paper Sizes" on page 52 • Setting paper type: "Setting Paper Types" on page 54 AUTOMATIC TRAY SELECTION If you display the properties dialog box of the printer driver and select a paper type for [Specify Paper Type] and [Auto] for [Paper Source] on the [Tray/Output] tab for printing, this printer will be able to automatically detect paper trays loaded with the selected paper type and then among them, select the tray that matches the size and orientation of the document to be printed. This feature is known as automatic tray selection. If there are multiple trays that match those criteria for automatic tray selection, a tray is selected based on the lowest tray number. For example, if tray 1 and tray 2 match the criteria, tray 1 will be selected. B6250/B6500 User's Guide> 51
-
 1
1 -
2
-
3
-
4
-
5
-
6
-
7
-
8
-
9
-
10
-
11
-
12
-
13
-
14
-
15
-
16
-
17
-
18
-
19
-
20
-
21
-
22
-
23
-
24
-
25
-
26
-
27
-
28
-
29
-
30
-
31
-
32
-
33
-
34
-
35
-
36
-
37
-
38
-
39
-
40
-
41
-
42
-
43
-
44
-
45
-
 46
46 -
 47
47 -
 48
48 -
 49
49 -
 50
50 -
 51
51 -
 52
52 -
 53
53 -
 54
54 -
 55
55 -
 56
56 -
57
-
58
-
59
-
60
-
61
-
62
-
63
-
64
-
65
-
66
-
67
-
68
-
69
-
70
-
71
-
72
-
73
-
74
-
75
-
76
-
77
-
78
-
79
-
80
-
81
-
82
-
83
-
84
-
85
-
86
-
87
-
88
-
89
-
90
-
91
-
92
-
93
-
94
-
95
-
96
-
97
-
98
-
99
-
100
-
101
-
102
-
103
-
104
-
105
-
106
-
107
-
108
-
109
-
110
-
111
-
112
-
113
-
114
-
115
-
116
-
117
-
118
-
119
-
120
-
121
-
122
-
123
-
124
-
125
-
126
-
127
-
128
-
129
-
130
-
131
-
132
-
133
-
134
-
135
-
136
-
137
-
138
-
139
-
140
-
141
-
142
-
143
-
144
-
145
-
146
-
147
-
148
-
149
-
150
-
151
-
152
-
153
-
154
-
155
-
156
-
157
-
158
-
159
-
160
-
161
-
162
-
163
-
164
-
165
-
166
-
167
-
168
-
169
-
170
-
171
-
172
-
173
 |
 |