Oki ML490 Network User's Guide for OkiLAN 6120i - Page 198
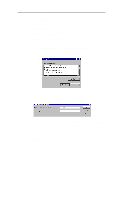
Control Panel, Network, TCP/IP Protocol, Properties, Microsoft TCP/IP printing, Close
 |
View all Oki ML490 manuals
Add to My Manuals
Save this manual to your list of manuals |
Page 198 highlights
Windows Printing Section 6 - Chapter 1 - OkiLAN 6120i Setup for Windows NT System Requirements • Administrator privileges • Windows NT installation disks or CD Install TCP/IP on NT Server If Microsoft TCP/IP has not been installed on the Windows NT print server, follow the steps below: 1. Open the Windows NT Control Panel. 2. Double-click the Network icon. 3. Select the Protocols tab. 4. Select TCP/IP Protocol and click the Properties button. 5. Assign the server an IP address (for LANs without Internet access, it is suggested to use 10.10.10.1). Click OK. Install LPR Print Monitor 1. Open the Windows NT Control Panel. 2. Select the Services tab. 3. Select Add, then Microsoft TCP/IP printing. 4. Click the Close button. 5. Restart the system. Assign Print Server IP Address 1. Using OkiNet for IP, assign the print server an IP address; for example, 10.10.10.2. Note: For more information on using OkiLAN 6120i TCP/IP, see OkiNet for TCP/IP. OKI OkiLAN 6120i User's Guide VI - 7
-
 1
1 -
2
-
3
-
4
-
5
-
6
-
7
-
8
-
9
-
10
-
11
-
12
-
13
-
14
-
15
-
16
-
17
-
18
-
19
-
20
-
21
-
22
-
23
-
24
-
25
-
26
-
27
-
28
-
29
-
30
-
31
-
32
-
33
-
34
-
35
-
36
-
37
-
38
-
39
-
40
-
41
-
42
-
43
-
44
-
45
-
46
-
47
-
48
-
49
-
50
-
51
-
52
-
53
-
54
-
55
-
56
-
57
-
58
-
59
-
60
-
61
-
62
-
63
-
64
-
65
-
66
-
67
-
68
-
69
-
70
-
71
-
72
-
73
-
74
-
75
-
76
-
77
-
78
-
79
-
80
-
81
-
82
-
83
-
84
-
85
-
86
-
87
-
88
-
89
-
90
-
91
-
92
-
93
-
94
-
95
-
96
-
97
-
98
-
99
-
100
-
101
-
102
-
103
-
104
-
105
-
106
-
107
-
108
-
109
-
110
-
111
-
112
-
113
-
114
-
115
-
116
-
117
-
118
-
119
-
120
-
121
-
122
-
123
-
124
-
125
-
126
-
127
-
128
-
129
-
130
-
131
-
132
-
133
-
134
-
135
-
136
-
137
-
138
-
139
-
140
-
141
-
142
-
143
-
144
-
145
-
146
-
147
-
148
-
149
-
150
-
151
-
152
-
153
-
154
-
155
-
156
-
157
-
158
-
159
-
160
-
161
-
162
-
163
-
164
-
165
-
166
-
167
-
168
-
169
-
170
-
171
-
172
-
173
-
174
-
175
-
176
-
177
-
178
-
179
-
180
-
181
-
182
-
183
-
184
-
185
-
186
-
187
-
188
-
189
-
190
-
191
-
192
-
 193
193 -
 194
194 -
 195
195 -
 196
196 -
 197
197 -
 198
198 -
 199
199 -
 200
200 -
 201
201 -
 202
202 -
 203
203 -
204
-
205
-
206
-
207
-
208
-
209
-
210
-
211
-
212
-
213
-
214
-
215
-
216
-
217
-
218
-
219
 |
 |
