Panasonic AG-HVX200PJ Operating Instructions - Page 126
Updating the driver in the camera, Condensation
 |
View all Panasonic AG-HVX200PJ manuals
Add to My Manuals
Save this manual to your list of manuals |
Page 126 highlights
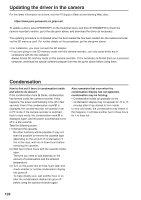
Updating the driver in the camera For the latest information on drivers, visit the P2 Support Desk at the following Web sites. https://eww.pavc.panasonic.co.jp/pro-av/ To update a driver, select PROPERTY on the thumbnail menu and then SYSTEMINFO to check the camera-recorder's version, go to the site given above, and download the driver as necessary. The updating procedure is completed when the downloaded file has been loaded into the camera-recorder via the SD memory card. For further details on this procedure, go the site given above. • For installation, you must connect the AC adapter. • If you are going to use SD memory cards with this camera-recorder, use only cards which are in compliance with the SD standard. Always format SD memory cards on this camera-recorder. If it is necessary to format them on a personal computer, download the special software program from the site given above before using them. Condensation How to find out if there is condensation inside and what to do about it If the condensation mark blinks, condensation has formed inside the camera-recorder. If this happens, the power automatically turns off in few seconds. Even if the condensation mark is displayed, the camera-recorder will operate if set to P2 mode. If the camera-recorder is switched back to tape mode, the condensation mark is displayed again, and the power automatically turns off in a few seconds. Take the following action. (1) Remove the cassette. No other functions will be possible. It may not even be possible to remove the cassette tape depending on the amount of condensation. If this is the case, wait two to three hours before removing the cassette. (2) Wait two to three hours with the cassette holder open. The time you need to wait depends on the amount of condensation and the ambient temperature. (3) Turn on the power two to three hours later and check whether or not the condensation display has gone off. To make doubly sure, wait another hour or so after the condensation display has gone off before using the camera-recorder again. Also remember that even when the condensation display has not appeared, condensation may be forming. • Condensation builds up gradually so the condensation display may not appear for 10 to 15 minutes after it has started to form inside. In very cold areas, the condensation may freeze. If this happens, it will take another two to three hours for it to thaw out. 126
-
 1
1 -
2
-
3
-
4
-
5
-
6
-
7
-
8
-
9
-
10
-
11
-
12
-
13
-
14
-
15
-
16
-
17
-
18
-
19
-
20
-
21
-
22
-
23
-
24
-
25
-
26
-
27
-
28
-
29
-
30
-
31
-
32
-
33
-
34
-
35
-
36
-
37
-
38
-
39
-
40
-
41
-
42
-
43
-
44
-
45
-
46
-
47
-
48
-
49
-
50
-
51
-
52
-
53
-
54
-
55
-
56
-
57
-
58
-
59
-
60
-
61
-
62
-
63
-
64
-
65
-
66
-
67
-
68
-
69
-
70
-
71
-
72
-
73
-
74
-
75
-
76
-
77
-
78
-
79
-
80
-
81
-
82
-
83
-
84
-
85
-
86
-
87
-
88
-
89
-
90
-
91
-
92
-
93
-
94
-
95
-
96
-
97
-
98
-
99
-
100
-
101
-
102
-
103
-
104
-
105
-
106
-
107
-
108
-
109
-
110
-
111
-
112
-
113
-
114
-
115
-
116
-
117
-
118
-
119
-
120
-
 121
121 -
 122
122 -
 123
123 -
 124
124 -
 125
125 -
 126
126 -
 127
127 -
 128
128 -
 129
129 -
 130
130 -
 131
131 -
132
-
133
-
134
-
135
-
136
-
137
-
138
 |
 |
