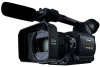
Panasonic AG-HVX200PJ Operating Instructions - Page 81
Audio dubbing
 |
View all Panasonic AG-HVX200PJ manuals
Add to My Manuals
Save this manual to your list of manuals |
Page 81 highlights
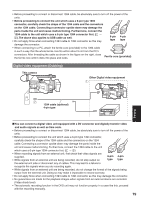
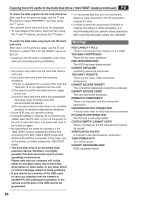
Audio dubbing Background music or narration can be added to the images you have recorded on the tape. 1 Set the POWER switch to ON. 2 In the setup menus, select an audio recording system in RECORDING SETUP screen, AUDIO REC. • For menu operation (Page 97) 32K(12bit): The sound is recorded using the 12-bit/32kHz (4-channel) system. Use this mode when you want keep the sound that recorded while you were shooting even after audio dubbing has been performed. 48K(16bit): The sound is recorded using the 16-bit/48kHz (high-quality stereo) system. When audio dubbing is performed, the sound that was recorded while you are shooting will be erased. 3 Start shooting. 4 Press the mode button to switch to the VCR mode. CAMERA MCR VCR PC DUB 5 In the setup menus, select an audio recording system in the AV IN/OUT SETUP screen, A. DUB INPUT. • For menu operation (Page 97) MIC: The sound of the built-in microphone or the external unit connected to INPUT 1/2 connector is recorded. (Select by CH1 SELECT switch and CH2 SELECT switch.) A_IN: The sound of audio component connected to AUDIO IN/OUT connector (pin jack) is recorded. TAPE 6 Find the scene you want to add and set the unit to the still mode. 7 Press the AUDIO DUB button to establish the status ready for audio dubbing. Press the A. DUB button on the remote control unit. • "A.DUB " appears. 8 Press the button, input the sound and start audio dubbing. When the button is pressed again, the pause mode is established. To resume audio dubbing, repeat steps 7 and 8. • To end audio dubbing while it is underway, press the button. AUDIO DUB button Menu operation controls AUDIO DUB/ THUMBNAIL REC END SEARCH SET MENU PAGE/ AUDIO MON/VAR • Audio dubbing cannot be performed in the LP mode because the track width on the tape is narrower than the head width. (Continued on the next page) Editing 81
-
 1
1 -
2
-
3
-
4
-
5
-
6
-
7
-
8
-
9
-
10
-
11
-
12
-
13
-
14
-
15
-
16
-
17
-
18
-
19
-
20
-
21
-
22
-
23
-
24
-
25
-
26
-
27
-
28
-
29
-
30
-
31
-
32
-
33
-
34
-
35
-
36
-
37
-
38
-
39
-
40
-
41
-
42
-
43
-
44
-
45
-
46
-
47
-
48
-
49
-
50
-
51
-
52
-
53
-
54
-
55
-
56
-
57
-
58
-
59
-
60
-
61
-
62
-
63
-
64
-
65
-
66
-
67
-
68
-
69
-
70
-
71
-
72
-
73
-
74
-
75
-
 76
76 -
 77
77 -
 78
78 -
 79
79 -
 80
80 -
 81
81 -
 82
82 -
 83
83 -
 84
84 -
 85
85 -
 86
86 -
87
-
88
-
89
-
90
-
91
-
92
-
93
-
94
-
95
-
96
-
97
-
98
-
99
-
100
-
101
-
102
-
103
-
104
-
105
-
106
-
107
-
108
-
109
-
110
-
111
-
112
-
113
-
114
-
115
-
116
-
117
-
118
-
119
-
120
-
121
-
122
-
123
-
124
-
125
-
126
-
127
-
128
-
129
-
130
-
131
-
132
-
133
-
134
-
135
-
136
-
137
-
138
 |
 |
