Panasonic AG-HVX200PJ Operating Instructions - Page 56
Using scene files continued, YES. Press
 |
View all Panasonic AG-HVX200PJ manuals
Add to My Manuals
Save this manual to your list of manuals |
Page 56 highlights
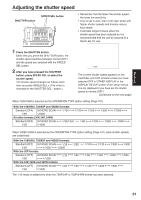
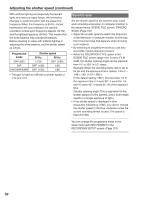
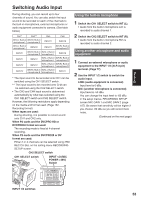
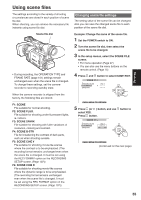
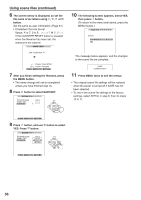
Using scene files (continued) 6 The screen below is displayed, so set the file name of six letters using , , or button. Set the same as user information. (Page 61) • Characters that can be set Space, A to Z, 0 to 9 If the COUNTER RESET button is pressed when the filename has been set, the characters are cleared. 10 The following screen appears, select YES, then press button. (To return to the menu level above, press the MENU button.) The message below appears, and the changes to the scene file are complete. 7 After you finish setting the filename, press the MENU button. • The name change will not be completed unless you have finished step 10. 8 Press button to select SAVE/INIT. 11 Press MENU twice to exit the menus. • The original scene file settings will be restored when the power is turned off if SAVE has not been selected. • To return the scene file settings to the factory settings, select INITIAL in step 9, then do steps 10 to 11. 9 Press button, and use button to select YES. Press button. 56
-
 1
1 -
2
-
3
-
4
-
5
-
6
-
7
-
8
-
9
-
10
-
11
-
12
-
13
-
14
-
15
-
16
-
17
-
18
-
19
-
20
-
21
-
22
-
23
-
24
-
25
-
26
-
27
-
28
-
29
-
30
-
31
-
32
-
33
-
34
-
35
-
36
-
37
-
38
-
39
-
40
-
41
-
42
-
43
-
44
-
45
-
46
-
47
-
48
-
49
-
50
-
 51
51 -
 52
52 -
 53
53 -
 54
54 -
 55
55 -
 56
56 -
 57
57 -
 58
58 -
 59
59 -
 60
60 -
 61
61 -
62
-
63
-
64
-
65
-
66
-
67
-
68
-
69
-
70
-
71
-
72
-
73
-
74
-
75
-
76
-
77
-
78
-
79
-
80
-
81
-
82
-
83
-
84
-
85
-
86
-
87
-
88
-
89
-
90
-
91
-
92
-
93
-
94
-
95
-
96
-
97
-
98
-
99
-
100
-
101
-
102
-
103
-
104
-
105
-
106
-
107
-
108
-
109
-
110
-
111
-
112
-
113
-
114
-
115
-
116
-
117
-
118
-
119
-
120
-
121
-
122
-
123
-
124
-
125
-
126
-
127
-
128
-
129
-
130
-
131
-
132
-
133
-
134
-
135
-
136
-
137
-
138
 |
 |
