Panasonic HCV110 HCV110 User Guide
Panasonic HCV110 Manual
 |
View all Panasonic HCV110 manuals
Add to My Manuals
Save this manual to your list of manuals |
Panasonic HCV110 manual content summary:
- Panasonic HCV110 | HCV110 User Guide - Page 1
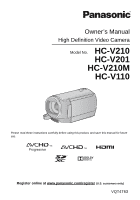
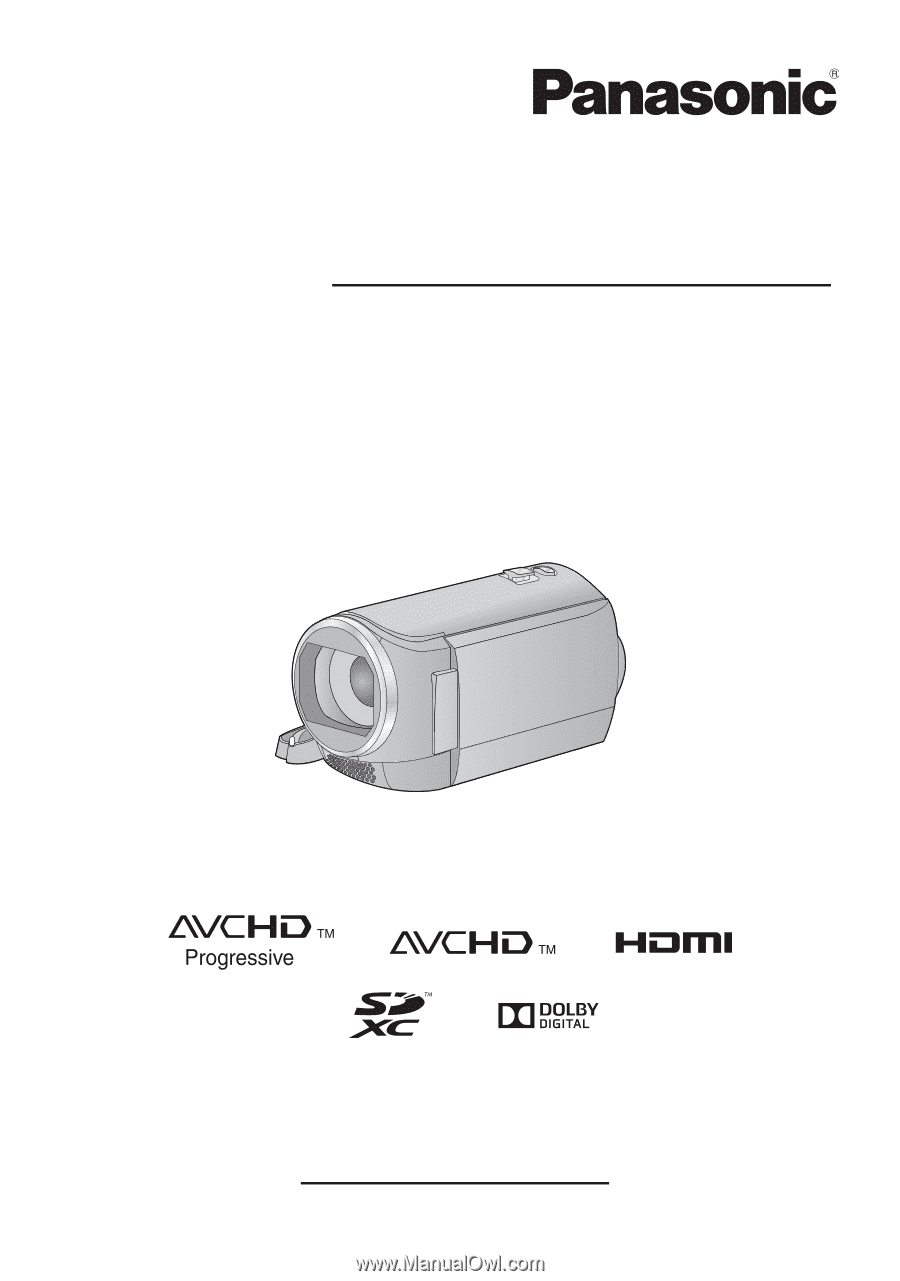
Owner's Manual High Definition Video Camera Model No. HC-V210 HC-V201 HC-V210M HC-V110 Please read these instructions carefully before using this product, and save this manual for future use. Register online at www.panasonic.com/register (U.S. customers only) VQT4T63 - Panasonic HCV110 | HCV110 User Guide - Page 2
recorded content Panasonic does not accept any responsibility for damages directly or indirectly due to any type of problems that result other non-built-in memory related component). ∫ Handling of built-in memory [HC-V210M] This unit is equipped with the built-in memory. When using this component - Panasonic HCV110 | HCV110 User Guide - Page 3
16 for more details on SD cards. ∫ For the purposes of this owner's manual ≥ SD Memory Card, SDHC Memory Card and SDXC Memory Card are referred to reference are indicated by an arrow, for example: l 00 This owner's manual are designed for use with models , , and . Pictures may be slightly - Panasonic HCV110 | HCV110 User Guide - Page 4
functions of menus 47 Manual recording 53 White Balance 54 Manual shutter speed/ Iris adjustment 55 Recording with Manual Focus 56 Copying between SD card and Built-in Memory [HC-V210M 76 Copying/playing back with a USB HDD [HC-V210]/[HC-V201]/[HC-V210M 78 Preparing for copying/playing - Panasonic HCV110 | HCV110 User Guide - Page 5
the PC display 100 Starting HD Writer LE 2.0 101 Reading the operating instructions of the software applications 101 If using Mac 102 Others Indications 103 Messages 105 About recovery 106 Troubleshooting 107 Cautions for use 112 About copyright 116 Recording modes/ approximate recordable - Panasonic HCV110 | HCV110 User Guide - Page 6
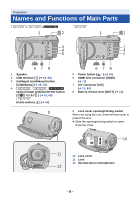
Names and Functions of Main Parts / / 1 2 1 2 3 4 5 A/V 678 1 Speaker 2 USB terminal [ ] (l 83, 98) 3 Intelligent auto/Manual button [iA/MANUAL] (l 26, 53) 4 / / Optical image stabilizer/Delete button [ O.I.S./ ] (l 42, 64) Delete button [ ] (l 64) 9 3 4 5 A/V 678 5 Power - Panasonic HCV110 | HCV110 User Guide - Page 7
(l 28, 31, 43) ≥ Use the cursor button to select the recording functions and playback operations, and to operate the menu screen. ≥ In this owner's manual, the cursor button is denoted as shown below or as 3/4/2/1. Example: For pressing the (down) button ≥ It can open up to 90o. ≥ It can - Panasonic HCV110 | HCV110 User Guide - Page 8
/ / 25 26 25 26 28 28 27 25 Photoshot button [ ] (l 25) 26 Zoom lever [W/T] (In Recording Mode) (l 41) Thumbnail display switch [ / ]/ Volume lever [sVOLr] (In Playback Mode) (l 29) 27 / / DC input terminal [DC IN] (l 11) ≥ Do not use any other AC adaptors except the supplied one. - Panasonic HCV110 | HCV110 User Guide - Page 9
safely. The dedicated battery (VW-VBT190/VW-VBT380) supports this function. The only batteries suitable for use with this unit are genuine Panasonic products and batteries manufactured by other companies and certified by Panasonic. Panasonic cannot in any way guarantee the quality, performance or - Panasonic HCV110 | HCV110 User Guide - Page 10
in the figure. Removing the battery Be sure to hold down the power button until the status indicator goes off. Then remove the battery while supporting the unit to prevent it from dropping. Move the battery release lever in the direction indicated by the arrow and remove the battery when unlocked - Panasonic HCV110 | HCV110 User Guide - Page 11
Charging the battery When this unit is purchased, the battery is not charged. Charge the battery fully before using this unit for the first time. ∫ Charging with an AC adaptor. The unit is in the standby condition when the AC adaptor is connected. The primary circuit is always "live" as long as - Panasonic HCV110 | HCV110 User Guide - Page 12
A USB terminal B To the AC outlet ≥ Insert the plugs as far as they will go. 1 Open the LCD monitor. 2 Connect the USB cable to the AC adaptor. ≥ Check that the plug portion of the AC adaptor is not loose or misaligned. 3 Plug the AC adaptor into the AC outlet. 4 Connect the USB - Panasonic HCV110 | HCV110 User Guide - Page 13
to when using the AC adaptor. ≥ If the status indicator flashes at a particularly fast or slow rate, refer to page 114. ≥ We recommend using Panasonic batteries (l 9). ≥ If you use other batteries, we cannot guarantee the quality of this product. ≥ Do not heat or expose to flame. ≥ Do not leave - Panasonic HCV110 | HCV110 User Guide - Page 14
[3.6 V/1940 mAh] VW-VBT380 (optional) [3.6 V/3880 mAh] HC-V210/HC-V210M Charging Recording Recording time format mode 2 h 20 min (5 h time 2 h 20 min (3 h 10 min) 2 h 20 min (5 h 20 min) HC-V201 Recording Recording format mode AVCHD iFrame MP4 AVCHD iFrame MP4 [1080/60p] [HA], [HG], - Panasonic HCV110 | HCV110 User Guide - Page 15
is charging time when this unit is connected to a PC, Panasonic Blu-ray disc recorder, or DVD recorder. Battery model number [Voltage min) 2 h 50 min (5 h 20 min) 4 h 45 min (9 h 45 min) HC-V110 Recording Recording format mode AVCHD iFrame MP4 AVCHD iFrame MP4 AVCHD iFrame MP4 [HA], [HG] [ - Panasonic HCV110 | HCV110 User Guide - Page 16
speed e.g.: standard regarding continuous writing. Check via the label on the card, etc. ≥ Please check the latest information on the support website below. http://panasonic.jp/support/global/cs/e_cam (This website is in English only.) ≥ When using an SDHC Memory Card/SDXC Memory Card with other - Panasonic HCV110 | HCV110 User Guide - Page 17
Inserting/removing an SD card When using an SD card not from Panasonic, or one previously used on other equipment, for the first time on this unit, format the SD card. (l 38) When the SD card is formatted, - Panasonic HCV110 | HCV110 User Guide - Page 18
Preparation Turning the unit on/off You can turn the unit on and off using the power button or by opening and closing the LCD monitor. Turning the unit on and off with the power button Open the LCD monitor and press the power button to turn on the unit. To turn off the unit Hold down the power - Panasonic HCV110 | HCV110 User Guide - Page 19
Preparation Selecting a mode Operate the mode switch to change the mode to or . Recording Mode (l 23, 25) Playback Mode (l 28, 57) - 19 - - Panasonic HCV110 | HCV110 User Guide - Page 20
Preparation Setting date and time The clock is not set at the time of purchase. Make sure to set the clock. ¬ Change the mode to . 1 Select the menu. (l 31) : [SETUP] # [CLOCK SET] 2 Select the date or time using 2/1 and set the desired value using 3/4. A Displaying the World time setting (l 32 - Panasonic HCV110 | HCV110 User Guide - Page 21
Basic Before recording ∫ Basic camera positioning 1 Hold the unit with both hands. 2 Put your hand through the grip belt. ≥ When recording, make sure your footing is stable and there is - Panasonic HCV110 | HCV110 User Guide - Page 22
Basic Selecting a media to record [HC-V210M] The card and built-in memory can be selected separately to record motion pictures or still pictures. 1 Change the mode to . 2 Select the menu. (l 31) : [ - Panasonic HCV110 | HCV110 User Guide - Page 23
Basic Recording motion pictures ≥ Open the lens cover before turning on the unit. (l 6) 1 Change the mode to and open the LCD monitor. 2 Press the recording start/stop button to start recording. A When you begin recording, ; changes to ¥. 3 Press the recording start/stop button again to - Panasonic HCV110 | HCV110 User Guide - Page 24
≥ To change the recording format, change the [REC FORMAT] or [REC MODE]. (l 48, 49) ≥ The images recorded between pressing the recording start/stop button to start recording and pressing it again to pause recording become one scene. When you record with the [REC FORMAT] set to [iFrame] or [MP4], the - Panasonic HCV110 | HCV110 User Guide - Page 25
Basic Recording still pictures ≥ Open the lens cover before turning on the unit. (l 6) 1 Change the mode to and open the LCD monitor. 2 Press the button. ≥ The still picture operating display ( ) will turn red while recording still pictures. ∫ About the screen indications in Still Picture - Panasonic HCV110 | HCV110 User Guide - Page 26
pointing the unit to what you want to record. /MANUAL Intelligent auto/Manual button Press this button to switch Intelligent Auto Mode/Manual Mode (l 53). Mode Portrait Scenery Spotlight Low light Normal as when faces are of certain sizes or at certain tilts or when digital zoom is used. - 26 - - Panasonic HCV110 | HCV110 User Guide - Page 27
2 000K 8) Auto Focus 9) The unit focuses automatically. ≥ Auto Focus does not work correctly in the following situations. Record pictures in the Manual Focus Mode. (l 56) j Recording distant and close-up objects at the same time j Recording a subject behind dirty or dusty window j Recording - Panasonic HCV110 | HCV110 User Guide - Page 28
Basic Motion picture/Still picture playback NOV 15 2013 0h00m15 s is displayed only for / / 1 Change the mode to . 2 Select the play mode select icon A using 3/4/2 and press the ENTER button. ≥ This can also be set from the menu. [VIDEO SETUP] or [PICT. SETUP] # [MEDIA, VIDEO/PICTURE] 3 - Panasonic HCV110 | HCV110 User Guide - Page 29
4 Select the scene or the still picture to be played back using 3/4/2/1, then press the ENTER button. ≥ When you select / and press the ENTER button, the next (previous) page is displayed. 5 Select the operation icon using 3/4/2/1. E Operation icon ≥ Press the ENTER button to display/not display the - Panasonic HCV110 | HCV110 User Guide - Page 30
played back with this unit) Please check compatibility in the operating instruction of your device. ≥ MP4 motion pictures that can be played Camera File system) established by JEITA (Japan Electronics and Information Technology Industries Association). ≥ The file format of still pictures supported - Panasonic HCV110 | HCV110 User Guide - Page 31
Basic Using the menu screen ヮユワヶ 1 Press the MENU button. 2 Press 3/4/2/1 to select the top menu A, then press the ENTER button. To get back to the previous screen Press 2 of the cursor button. To exit the menu screen Press the MENU button. 3 Select the submenu B using 3/4 and press 1 or - Panasonic HCV110 | HCV110 User Guide - Page 32
Basic Using the Setup Menu [DISPLAY] Set the display method for the screen information display. : [SETUP] # [DISPLAY] # desired setting [ON] (Display all information)/[OFF] (Display part of information) [EXT. DISPLAY] Please refer to page 72. [CLOCK SET] Please refer to page 20. [SET WORLD TIME - Panasonic HCV110 | HCV110 User Guide - Page 33
4 (Only when setting the region of your travel destination) Select [DESTINATION] using 2/1 and press the ENTER button. ≥ When the home region is set for the first time, the screen for selecting home/travel destination appears after setting the home region successively. If the home region has already - Panasonic HCV110 | HCV110 User Guide - Page 34
[ECONOMY (BATT)] When about 5 minutes have passed without any operation, this unit automatically turns off to save battery life. : [SETUP] # [ECONOMY (BATT)] # [ON] ≥ This unit will not automatically turn off even if [ECONOMY (BATT)] is set to [ON] in following cases: j Using the AC adaptor* j - Panasonic HCV110 | HCV110 User Guide - Page 35
[QUICK START] This unit is put into recording pause approx. 0.6 seconds after the LCD monitor is reopened. ≥ When in Quick Start Standby Mode about 60% of the power used in recording pause mode is being consumed, so the recording time will be reduced. ≥ / / Quick Start will not work if there - Panasonic HCV110 | HCV110 User Guide - Page 36
[ALERT SOUND] Starting and stopping of recording and unit on/off can be confirmed with this sound. When [OFF] is selected, the sound is not output at the start/end of recording, etc. : [SETUP] # [ALERT SOUND] # desired setting (Volume low)/ (Volume high)/[OFF] 2 Beeps for 4 times When an error - Panasonic HCV110 | HCV110 User Guide - Page 37
[HDMI RESOLUTION] Please refer to page 73. [VIERA Link] Please refer to page 74. [TV ASPECT] Please refer to page 72. [INITIAL SET] Set to [YES] for changing the menu settings back to - Panasonic HCV110 | HCV110 User Guide - Page 38
[FORMAT MEDIA] Please be aware that if a medium is formatted, then all the data recorded on the medium will erase and cannot be restored. Back up important data on a PC, disc, etc. (l 90) : [SETUP] # [FORMAT MEDIA] # desired setting [Built-inMemory]*1/[SD CARD]/[HDD]*2 *1 only *2 / / - Panasonic HCV110 | HCV110 User Guide - Page 39
update the firmware version of this unit. (Only when the mode is at the position) : [SETUP] # [Firmware Upgrade] For the latest update information, check the support website below. (As of December 2012) http://panasonic.jp/support/global/cs/e_cam (This Site is English only) - 39 - - Panasonic HCV110 | HCV110 User Guide - Page 40
[DEMO MODE] This item is used to start the unit demonstration. (Only when the mode is at the position) : [SETUP] # [DEMO MODE] # [ON] ≥ If [DEMO MODE] is switched to [ON] and you press the MENU button when there is no SD card inserted and while this unit is connected to the AC adaptor, the - Panasonic HCV110 | HCV110 User Guide - Page 41
zoom magnification can be set with [ZOOM MODE]. (l 48) ∫ About Zoom bar Zoom bar is displayed during the zoom operation. W T B Optical Zoom C i.Zoom/Digital zoom (Blue) ≥ If you take your finger off the zoom lever during zoom operation, the operation sound may be recorded. When returning the - Panasonic HCV110 | HCV110 User Guide - Page 42
≥ When recording with a tripod, we recommend that you set the optical image stabilizer off. ≥ Stabilization may not be possible under strong camera shaking conditions. ∫ Image stabilizer function Use the image stabilizer to reduce the effects of shake during recording. ¬ Change the mode to . Select - Panasonic HCV110 | HCV110 User Guide - Page 43
Advanced (Recording) Recording functions of operation icons Select the operation icons to add different effects to the images to be recorded. ¬ Change the mode to . 1 2 Press the ENTER button to display (e.g. Backlight Compensation) the operation icons on the screen. Select an operation icon. - Panasonic HCV110 | HCV110 User Guide - Page 44
Fade When you start recording, the image/audio gradually appears. (Fade in) When you pause recording, the image/audio gradually disappears. (Fade out) ≥ The Fade setting is canceled when the recording stops. ∫ To select the color for Fade in/out : [RECORD SETUP] # [FADE COLOR] # [WHITE] or [BLACK] - Panasonic HCV110 | HCV110 User Guide - Page 45
Guidelines You can check if the image is level while recording. The function can also be used to estimate the balance of the composition. It will switch every time the icon is selected. # # #Setting canceled ≥ The guidelines do not appear on the images actually recorded. / / Tele Macro A - Panasonic HCV110 | HCV110 User Guide - Page 46
Color Night Rec This function allows you to record color images in very low light situations. (Minimum required illumination: approx. 1 lx) ≥ Recorded scene is seen as if frames were missed. ≥ If set in a bright place, the screen may become washed out for a while. ≥ Bright dots that are usually - Panasonic HCV110 | HCV110 User Guide - Page 47
Advanced (Recording) Recording functions of menus ≥ Change the mode to . [SCENE MODE] When you record images in different situations, this mode automatically sets optimum shutter speeds and apertures. : [RECORD SETUP] # [SCENE MODE] # desired setting [OFF]: 5Sports: Portrait: Soft Skin: Spotlight: - Panasonic HCV110 | HCV110 User Guide - Page 48
to 42k Up to 48k This zoom function allows you to maintain high-definition picture quality. (Up to 72k) Digital zoom (Up to 100k) Digital zoom (Up to 2500k) ≥ The larger the digital zoom magnification, the more the image quality is degraded. [REC FORMAT] Switches the recording format of the motion - Panasonic HCV110 | HCV110 User Guide - Page 49
[REC MODE] Switch the quality and recording format of the motion picture to record in AVCHD. ≥ Set [REC FORMAT] to [AVCHD]. : [RECORD SETUP] # [REC MODE] # desired setting / / [1080/60p]*1: [HA]/[HG]/[HE]*2: Set the recording mode to 1080/60p. Set the recording mode to 1080/60i. [HA]/[HG]/[HE - Panasonic HCV110 | HCV110 User Guide - Page 50
≥ Still pictures are recorded to the SD card after Relay Recording. ≥ is displayed on the thumbnail display during the playback of the scene that was relay- recorded on the built-in memory. [FACE FRAMING] Detected faces appear with frames. : [RECORD SETUP] # [FACE FRAMING] # desired setting [ - Panasonic HCV110 | HCV110 User Guide - Page 51
/ [SHOOTING GUIDE] Message is displayed when this unit is moved rapidly. : [RECORD SETUP] # [SHOOTING GUIDE] # [ON] When "CAMERA PANNING IS TOO This is for reducing the wind noise coming into the built-in microphones. ≥ Switch to Manual Mode. (l 53) : [RECORD SETUP] # [WIND CUT] # [ON] ≥ This - Panasonic HCV110 | HCV110 User Guide - Page 52
[PICTURE SIZE] The higher the number of pixels, the higher the clarity of the picture when printing. : [PICTURE] # [PICTURE SIZE] # desired setting / / Picture size 10 M 4224k2376 2.1 M 1920k1080 Aspect ratio 16:9 Picture size 8.9 M 3968k2232 2.1 M 1920k1080 Aspect ratio 16:9 ≥ / - Panasonic HCV110 | HCV110 User Guide - Page 53
recording ¬ Change the mode to . Press the Intelligent auto/Manual button to switch to Manual Mode. ≥ MNL appears on the screen. /MANUAL 4/5 NEXT 5/5 NEXT White Balance (l 54) Manual Shutter Speed (l 55) Iris Adjustment (l 55) Focus (l 56) ≥ Press the ENTER button to display/not display the - Panasonic HCV110 | HCV110 User Guide - Page 54
Auto White Balance will not be performed correctly. Always open the lens cover before turning on the unit. ≥ When the display flashes, the Manual White Balance previously adjusted is stored. Whenever recording conditions change, re-set the White Balance. ≥ When setting both the White Balance and the - Panasonic HCV110 | HCV110 User Guide - Page 55
iris/gain value, set the shutter speed and then set the iris/gain value. Manual shutter speed adjustment ≥ You may see a band of light around an object power supply frequency is 60 Hz, or 1/100 in areas of 50 Hz. Manual iris/gain adjustment ≥ If the gain value is increased, the noise on the screen - Panasonic HCV110 | HCV110 User Guide - Page 56
: [RECORD SETUP] # [MF ASSIST] # [ON] ≥ Display the operation icon by pressing the ENTER button, and switch to manual icon by pressing 4. 2 Select [MF] using the cursor button to change to Manual Focus. ≥ MF appears on the screen. 3 Press 2/1 to adjust the focus. MF MF : To focus on a close - Panasonic HCV110 | HCV110 User Guide - Page 57
Advanced (Playback) Playback Operations Motion picture playback using operation icon For details on the basic playback operations, refer to page 28. Playback operation Cursor button/Playback display Operating steps Slow-motion playback During Pause With the playback paused, press and hold 1 - Panasonic HCV110 | HCV110 User Guide - Page 58
Creating still picture from motion picture A single frame from the recorded motion picture can be saved as a still picture. 2.1M (1920k1080) still pictures will be recorded for the AVCHD scenes and iFrame scenes, and 0.2M (640k360) still pictures will be recorded for the MP4 scenes. Press the - Panasonic HCV110 | HCV110 User Guide - Page 59
Zooming in on a still picture during playback (Playback zoom) You can zoom in on still pictures during playback. 1 Move the zoom lever to side. ≥ You can zoom to a maximum of 4a. (1k # 2k # 4k) 2 Shift the position of the zoomed portion using the cursor button. ≥ The location of the zoom displays - Panasonic HCV110 | HCV110 User Guide - Page 60
Advanced (Playback) Various playback functions Playing back motion pictures/still pictures by date The scenes or the still pictures recorded on the same day can be played back in succession. 1 Select the date select icon using the cursor button, then press the ENTER button. is displayed only - Panasonic HCV110 | HCV110 User Guide - Page 61
Highlight Playback [HC-V210]/[HC-V201]/[HC-V210M] Part that was recognized as clearly recorded is extracted from multiple scenes, and it can be played back in a short time with effects and music - Panasonic HCV110 | HCV110 User Guide - Page 62
3 (When [SELECT DATE] is selected) Select the date to be played back and press the ENTER button. ≥ A maximum of 7 days can be selected. ≥ Selected date will be surrounded in red. Press the ENTER button again to cancel. (When [SELECT SCENES] is selected) Select the scenes to be played back and - Panasonic HCV110 | HCV110 User Guide - Page 63
Changing the playback settings and playing back the slide show 1 Select using the cursor button, then press the ENTER button. 2 (Only when you would like to change the settings) Select the item to change and press the ENTER button. [DATE SETUP]: Select the date to be played back. [SLIDE - Panasonic HCV110 | HCV110 User Guide - Page 64
Advanced (Playback) Deleting scenes/still pictures Deleted scenes/still pictures cannot be restored, so perform appropriate confirmation of the contents before proceeding with deletion. ¬ Change the mode to . ∫ To delete the scene or still picture being played back Press the Optical image - Panasonic HCV110 | HCV110 User Guide - Page 65
3 (When [MULTI] is selected in Step 2) Select the scene/still picture to be deleted, then press the ENTER button. ≥ The scene/still picture is selected and the indication appears on the thumbnail. Press the ENTER button again to cancel the operation. ≥ Up to 99 scenes can be selected to be deleted. - Panasonic HCV110 | HCV110 User Guide - Page 66
Dividing a scene (AVCHD) It is possible to divide an AVCHD scene. Any unwanted parts in the scene can be deleted after dividing. ≥ Set the mode switch to , select the play mode selection icon, and select the AVCHD scene. (l 28) 1 Select the menu. : [EDIT SCENE] # [DIVIDE] # [SET] 2 Select - Panasonic HCV110 | HCV110 User Guide - Page 67
Dividing a scene to partially delete (iFrame, MP4) Divide the iFrame or MP4 scene, and delete unnecessary parts. This divides the recorded scenes in two and deletes the front half or back half. The scenes that were deleted after division cannot be recovered. ≥ Set the mode switch to , select - Panasonic HCV110 | HCV110 User Guide - Page 68
Protecting scenes/still pictures Scenes/still pictures can be protected so that they are not deleted by mistake. (Even if you protect some scenes/still pictures, formatting the media will delete them.) ≥ Change the mode to . 1 Select the menu. : [VIDEO SETUP] or [PICT. SETUP] # [SCENE PROTECT - Panasonic HCV110 | HCV110 User Guide - Page 69
Advanced (Playback) Relay scene combining [HC-V210M] You can combine the relayed scene (l 49) in the built-in memory and the continued scene in the SD card to be one into the - Panasonic HCV110 | HCV110 User Guide - Page 70
To cancel relay information : [EDIT SCENE] # [RELAY INFO CANCEL] ≥ When the relay information is canceled, combining of the relayed scenes will not be possible anymore. Combining of the relay scene cannot be performed if the available space on the SD card is less than the volume of the relayed scene - Panasonic HCV110 | HCV110 User Guide - Page 71
Video terminal ≥ HDMI is the interface for digital devices. If you connect this unit to a HDMI mini cable (l 73) ≥ Playback using VIERA Link™ (l 74) B AV cable (supplied) a genuine Panasonic HDMI mini cable (RP-CDHM15, RP-CDHM30: optional). Check the accessories in the basic owner's manual. *2 Use - Panasonic HCV110 | HCV110 User Guide - Page 72
the connected TV.) ≥ Check the input setting (input switch) and the audio input setting on the TV. (For more information, please read the operating instructions for the TV.) 3 Change the mode to to play back. ≥ When connecting the device to a television, the television image will not be displayed - Panasonic HCV110 | HCV110 User Guide - Page 73
on the TV and then play it back. http://panasonic.net/ ≥ It may not be possible to play back scenes on the TV depending on the [REC FORMAT] and [REC MODE]. ≥ For details on how to play back, please read the operating instructions for the TV. Connecting with a HDMI mini cable Select - Panasonic HCV110 | HCV110 User Guide - Page 74
devices made by other companies that are compatible with VIERA Link, refer to the operating instructions for the respective devices. ≥ This unit supports "VIERA Link Ver.5" function. "VIERA Link Ver.5" is the standard for Panasonic's VIERA Link compatible equipment. This standard is compatible with - Panasonic HCV110 | HCV110 User Guide - Page 75
the devices. ≥ Available linked operations between this unit and a Panasonic TV is different depending on the types of Panasonic TVs even if they are compatible with VIERA Link. Refer to the operating instructions of the TV for the operations that support on the TV. ≥ Operation is not possible with - Panasonic HCV110 | HCV110 User Guide - Page 76
/Dubbing Copying between SD card and Built-in Memory [HC-V210M] Motion pictures or still pictures recorded with this unit on a single SD card is not enough, you can copy to multiple SD cards following the instruction on the screen. In this case, the last scene copied to an SD card is automatically - Panasonic HCV110 | HCV110 User Guide - Page 77
/still pictures or 99 dates can be set in succession. ≥ If 2 or more SD cards are necessary to copy, change the card following the instructions on the screen. 4 Press the MENU button when the copy complete message is displayed. ≥ The thumbnail view of the copy destination is indicated. When - Panasonic HCV110 | HCV110 User Guide - Page 78
back with a USB HDD [HC-V210]/[HC-V201]/[HC-V210M] ≥ In this Owner's manual, "USB hard disk drive" instructions of the USB HDD for how to use it. Preparing for copying/playing back For the latest compatible USB HDD recommended by Panasonic, check the support website below. http://panasonic.jp/support - Panasonic HCV110 | HCV110 User Guide - Page 79
be performed by connecting the USB HDD with the scenes and still pictures copied from this unit to other devices. j Playback on Panasonic TV with a USB terminal j Dub onto the Panasonic Blu-ray disc recorder with a USB terminal j Save on a PC or rewrite on USB HDD using HD Writer LE 2.0 When the - Panasonic HCV110 | HCV110 User Guide - Page 80
∫ Formatting This is for initializing the USB HDD. ≥ Please be aware that if a media is formatted then all the data recorded on the media is erased and cannot be recovered. Back up important data on a PC etc. ≥ Connect this unit with the USB HDD, select [Playback HDD], and press the ENTER button. : - Panasonic HCV110 | HCV110 User Guide - Page 81
Copy selected files 1 Connect this unit to the USB HDD to prepare for copying. (l 78) ≥ You cannot supply power to the USB HDD from this unit. 2 Select [Copy selected files] using the cursor button, then press the ENTER button. ≥ It can also be set by selecting [COPY] from the menu. 3 / - Panasonic HCV110 | HCV110 User Guide - Page 82
Playing back the USB HDD ≥ Only mortion picture/still picture that have been copied by connecting this unit to the USB HDD or created with HD Writer LE 2.0 can be played back. A USB Connection Cable (supplied with recommended USB HDD) B recommended USB HDD (commercially-available) ≥ Insert the - Panasonic HCV110 | HCV110 User Guide - Page 83
the USB cable. To dub iFrame scenes, refer to page 86. You can dub using a Panasonic Blu-ray disc recorder or high-definition (AVCHD) compatible DVD recorder. ≥ Depending on the recorders image quality. (l 86) See the software instruction manual for details on HD Writer LE 2.0. (l 101) - 83 - - Panasonic HCV110 | HCV110 User Guide - Page 84
Dubbing in high-definition picture quality ∫ To dub using equipment with an SD card slot You can dub by directly inserting an SD card. ≥ To copy scenes or still pictures from the built-in memory to an SD card, see page 76. ∫ To dub using equipment with a USB terminal You can dub by connecting a - Panasonic HCV110 | HCV110 User Guide - Page 85
with any other USB cables.) ≥ When this unit is connected to a Panasonic Blu-ray disc recorder or a DVD recorder using a USB cable while the unit. ≥ For details on dubbing and playback methods, read the operating instructions of the Blu-ray disc recorder or DVD recorder. ≥ When you connect - Panasonic HCV110 | HCV110 User Guide - Page 86
the A/V terminal to which the unit is connected. ≥ See the operating instructions of the video device for details. ≥ Insert the plugs as far as they comes with this unit if supplied. Check the accessories in the basic owner's manual. ≥ Change the mode to . 1 Connect this unit to a video - Panasonic HCV110 | HCV110 User Guide - Page 87
security settings (encryption settings). For details, refer to the manuals of your Eye-Fi card and access point. ≥ Install Eye-Fi settings. (For settings methods etc., please read the card operating instructions or consult the card manufacturer) ≥ Inserting an Eye-Fi card (commercially available - Panasonic HCV110 | HCV110 User Guide - Page 88
the required settings in advance on your PC, you can transfer selected files alone. For settings methods etc., please read the card operating instructions or consult the card manufacturer. ≥ Install the software supplied with the Eye-Fi card on your PC, and configure the selection transfer - Panasonic HCV110 | HCV110 User Guide - Page 89
≥ The Eye-Fi menu only appears when an Eye-Fi card is used. ≥ The Eye-Fi transfer feature cannot be guaranteed to continue to operate in the future due to changes to the card specification etc. ≥ Update the firmware of the Eye-Fi card to the latest one using the software supplied with the Eye- Fi - Panasonic HCV110 | HCV110 User Guide - Page 90
like Blu-ray discs, DVD discs or SD cards using HD Writer LE 2.0, the software installed in the supplied CD-ROM. Refer to the operating instructions of HD Writer LE 2.0 (PDF file) for details on how to use it. ∫ Smart wizard The Smart wizard screen is automatically displayed when you connect - Panasonic HCV110 | HCV110 User Guide - Page 91
Notice ≥ When using an SDXC Memory Card, check the following support site. http://panasonic.net/avc/sdcard/information/SDXC.html ≥ Do not insert a disc unit. To write motion picture data recorded with the Panasonic High Definition Video Camera sold previously, use the HD Writer supplied with the - Panasonic HCV110 | HCV110 User Guide - Page 92
or described on the CD-ROM, instruction manuals, and any other media provided to use the Software for commercial software hosting services. Article 5 Reverse Engineering, Decompiling or regulation of the country where Licensee resides. Panasonic, or its distributors will not be responsible - Panasonic HCV110 | HCV110 User Guide - Page 93
Article 9 With regard to MICROSOFT SQL SERVER COMPACT 3.5 produced by Microsoft Corporation (1) Licensee shall use the MICROSOFT SQL SERVER COMPACT 3.5 only when included in the Software, and shall not use the MICROSOFT SQL SERVER COMPACT 3.5 in any other configuration or method. Licensee shall not - Panasonic HCV110 | HCV110 User Guide - Page 94
With a PC Operating environment ≥ Even if the system requirements mentioned in this owner's manual are fulfilled, some PCs cannot be used. ≥ A CD-ROM drive is necessary to install the supplied software applications. (A compatible Blu-ray disc/DVD writer drive - Panasonic HCV110 | HCV110 User Guide - Page 95
the software) ≥ When writing to a DVD/Blu-ray disc/SD, the twice amount of free space as the disc is necessary. Sound DirectSound Support Interface USB port [Hi-Speed USB (USB 2.0)] Other requirements Mouse or equivalent pointing device Internet connection ≥ Supplied CD-ROM is available for - Panasonic HCV110 | HCV110 User Guide - Page 96
∫ To use the HD Writer LE 2.0 You will need a high performance PC depending on the functions to be used. It may not properly play back or properly operate depending on the environment of the PC used. Refer to the operating environment and notes. ≥ Operation during the playback may become slow if - Panasonic HCV110 | HCV110 User Guide - Page 97
displayed automatically, select [Start] # [Computer] (or double-click on [Computer] on the desktop), and then double-click [Panasonic]. 2 Click [Yes]. 3 Click [Next]. ≥ Operate following the instruction on the screen. ≥ If the country or region cannot be selected, select [NTSC Area]. The PC must be - Panasonic HCV110 | HCV110 User Guide - Page 98
With a PC Connecting to a PC ≥ Connect this unit to the PC after the software applications are installed. ≥ Remove the supplied CD-ROM from your PC. / / A USB cable (supplied) ≥ Insert the plugs as far as they will go. ≥ / / Use the AC adaptor to free you from worrying about the - Panasonic HCV110 | HCV110 User Guide - Page 99
. ≥ When using an SDXC Memory Card, check the following support site. http://panasonic.net/avc/sdcard/information/SDXC.html ∫ To disconnect USB cable safely icon in task tray displayed on the PC, and then click [Eject Panasonic Video Camera]. ≥ Depending on your PC's settings, this icon may not be - Panasonic HCV110 | HCV110 User Guide - Page 100
AVCHD AVCHDTN BDMV PANA_EXT ≥ Do not delete the SD card's folders. Doing so may make the SD card unusable in this unit. ≥ When data not supported by this unit has been recorded on a PC, it will not be recognized by this unit. ≥ Always use this unit to format SD cards. - 100 - - Panasonic HCV110 | HCV110 User Guide - Page 101
. (On the PC) Select [Start] # [All Programs] # [Panasonic] # [HD Writer LE 2.0] # [HD Writer LE 2.0]. ≥ For details on how to use the software applications, read the PDF operating instructions of the software. Reading the operating instructions of the software applications ≥ You will need Adobe - Panasonic HCV110 | HCV110 User Guide - Page 102
HD Writer LE 2.0 is not available for Mac. ≥ iMovie'11 supported. For details about iMovie'11, please contact Apple Inc. ≥ equivalent pointing device ≥ Even if the system requirements mentioned in this owner's manual are fulfilled, some computers cannot be used. ≥ The USB equipment operates with - Panasonic HCV110 | HCV110 User Guide - Page 103
MF 1/100 OPEN 0dB 0h00m00s R 1h20m PRE-REC 2.1M R 3000 NOV 15 2013 12:34 A //// Intelligent Auto Mode (l 26) MNL Manual Mode (l 53) Scene Mode (l 47) +2 / +1 / -1 Power LCD (l 36) ¥/; (Red) Recording ; (Green) Recording pause 0h00m00s Elapsed recording time (l 23) ("h" is - Panasonic HCV110 | HCV110 User Guide - Page 104
C *1 Built-in memory recording possible status (still picture) (White) Card recording possible status (still picture) (Green) 10 M *2/ 8.9 M *3/ 2.1 M / 0.2 M recognizing the card (still picture) Number of recording pixels for still pictures (l 25, 52, 58) In Playback Mode, the picture size - Panasonic HCV110 | HCV110 User Guide - Page 105
This message does not indicate that there is a problem with this unit. CHECK CARD. This card is compatible with this unit. (l 9) If using a Panasonic battery compatible with this unit, remove the battery and needs repair. Detach the power and contact consumer support. Do not attempt to repair it by - Panasonic HCV110 | HCV110 User Guide - Page 106
About recovery If faulty management information is found, the messages may appear and a repair is performed. (Repairing may take time depending on the error.) ≥ is displayed when abnormal management information is detected when the scenes are displayed in thumbnail. ≥ Use a sufficiently - Panasonic HCV110 | HCV110 User Guide - Page 107
Troubleshooting is due to condensation. It is not a malfunction. Please refer to page 3. Problem This unit cannot be turned on. This unit does not stay on long enough TV using the TV remote control, the VIERA Link is at work. If you are not using the VIERA Link, set [VIERA Link] to [OFF]. (l 74) - Panasonic HCV110 | HCV110 User Guide - Page 108
points ≥ [DISPLAY] of the [SETUP] is [OFF]. (l 32) Problem The unit arbitrarily stops recording. Auto Focus function does not work. " record a scene that is hard to bring into focus in Auto Focus Mode, use the Manual Focus Mode to adjust the focus. (l 27, 56) ≥ Before turning on the unit, - Panasonic HCV110 | HCV110 User Guide - Page 109
on a PC, disc etc. Problem Although this unit is correctly connected manual. (Setting on other devices) ≥ If the TV input does not switch automatically, switch the input using the TV remote control. ≥ Check the VIERA Link setting on the connected device. ≥ Please refer to the operating instructions - Panasonic HCV110 | HCV110 User Guide - Page 110
on the screen. ≥ You will need Adobe Acrobat Reader 5.0 or later or Adobe Reader 7.0 or later to read the PDF operating instructions for HD Writer LE 2.0. Problem If the SD card is inserted in this unit, it is not recognized. Others Check points ≥ If the SD card is formatted on a PC, it - Panasonic HCV110 | HCV110 User Guide - Page 111
the HD Writer LE 2.0, but it will play back smoothly if you set the seamless settings in the HD Writer LE 2.0. Refer to the operating instructions for the HD Writer LE 2.0. Principal reasons for not playing back smoothly ≥ When the scenes were recorded on different dates ≥ When scenes lasting under - Panasonic HCV110 | HCV110 User Guide - Page 112
by electromagnetic wave radiation. ≥ Do not use this unit near cell phones because doing so may result in noise adversely affecting the pictures and alter the camera body or peel the surface finish. Do not use these solvents. ≥ When using a chemical dust cloth, follow the instructions that came with - Panasonic HCV110 | HCV110 User Guide - Page 113
below. When the built-in memory data deletion screen appears, select [YES], and then follow the on-screen instructions. ≥ Please look after the data in your built-in memory carefully. Panasonic will not be held responsible in the unlikely case that private data is divulged. About the battery The - Panasonic HCV110 | HCV110 User Guide - Page 114
Do not throw old battery into fire. ≥ Heating a battery or throwing it into a fire may result in an explosion. If the operating time is very short even after the battery has been recharged, the battery has worn out. Please purchase a new battery. About the AC adaptor ≥ If the temperature of the - Panasonic HCV110 | HCV110 User Guide - Page 115
for approximately 3 seconds on the screen below. When the SD card data deletion screen appears, select [YES], and then follow the on-screen instructions. LCD monitor ≥ When the LCD screen is dirty or condensation has occurred, please wipe it using a soft cloth such as eyeglass cleaner. ≥ When - Panasonic HCV110 | HCV110 User Guide - Page 116
VIERA Link™ is a trademark of Panasonic Corporation. ≥ EZ Sync™ is a trademark of Panasonic Corporation. ≥ HDAVI Control™ is a trademark of Panasonic . ≥ Other names of systems and products mentioned in these instructions are usually the registered trademarks or trademarks of the manufacturers who - Panasonic HCV110 | HCV110 User Guide - Page 117
/ / This product incorporates the following software: (1)the software developed independently by or for Panasonic Corporation, (2)the software owned by third party and licensed to Panasonic Corporation, (3)the open source software. For the software categorized as (3), please refer to the - Panasonic HCV110 | HCV110 User Guide - Page 118
Others Recording modes/approximate recordable time ≥ SD cards are only mentioned with their main memory size. The stated times are the approximate recordable times for continuous recording. Recording format Recording mode [1080/60p]* Picture size/frame rate 1920k1080/60p 4 GB 19 min SD - Panasonic HCV110 | HCV110 User Guide - Page 119
Others Approximate number of recordable pictures ≥ SD cards are only mentioned with their main memory size. The stated number is the approximate number of recordable pictures. Picture size Aspect ratio 4 GB SD card 16 GB 64 GB 10 M *1 4224k2376 700 2900 11500 8.9 M *2 3968k2232 16:9 800 3200 - Panasonic HCV110 | HCV110 User Guide - Page 120
Panasonic Corporation Web site: http://panasonic.net
-
 1
1 -
 2
2 -
 3
3 -
 4
4 -
 5
5 -
 6
6 -
 7
7 -
8
-
9
-
10
-
11
-
12
-
13
-
14
-
15
-
16
-
17
-
18
-
19
-
20
-
21
-
22
-
23
-
24
-
25
-
26
-
27
-
28
-
29
-
30
-
31
-
32
-
33
-
34
-
35
-
36
-
37
-
38
-
39
-
40
-
41
-
42
-
43
-
44
-
45
-
46
-
47
-
48
-
49
-
50
-
51
-
52
-
53
-
54
-
55
-
56
-
57
-
58
-
59
-
60
-
61
-
62
-
63
-
64
-
65
-
66
-
67
-
68
-
69
-
70
-
71
-
72
-
73
-
74
-
75
-
76
-
77
-
78
-
79
-
80
-
81
-
82
-
83
-
84
-
85
-
86
-
87
-
88
-
89
-
90
-
91
-
92
-
93
-
94
-
95
-
96
-
97
-
98
-
99
-
100
-
101
-
102
-
103
-
104
-
105
-
106
-
107
-
108
-
109
-
110
-
111
-
112
-
113
-
114
-
115
-
116
-
117
-
118
-
119
-
120
 |
 |
Owner’s Manual
High Definition Video Camera
Model No.
HC-V210
HC-V201
HC-V210M
HC-V110
Please read these instructions carefully before using this product, and save this manual for future
use.
VQT4T63
Register online at www.panasonic.com/register
(U.S. customers only)