Panasonic HCV110 HCV110 User Guide - Page 88
Using Eye-Fi direct mode, Selecting files to transfer, Select the menu.
 |
View all Panasonic HCV110 manuals
Add to My Manuals
Save this manual to your list of manuals |
Page 88 highlights
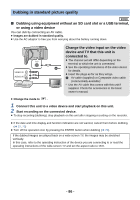
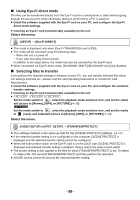
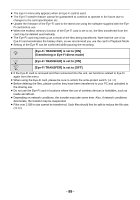
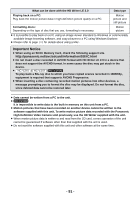
∫ Using Eye-Fi direct mode The files can be transferred directly from the Eye-Fi card to a smartphone or tablet without going through the access point when necessary setting is performed in a PC in advance. ≥ Install the software supplied with the Eye-Fi card on your PC, and configure the Eye-Fi direct mode settings. ≥ Inserting an Eye-Fi card (commercially available) to the unit Select the menu. : [SETUP] # [Eye-Fi DIRECT] ≥ This mode is displayed only when [Eye-Fi TRANSFER] is set to [ON]. ≥ The mode will be canceled using the following steps. j When the unit is turned off j If you start recording motion picture In addition to the steps above, the mode may also be canceled by the Eye-Fi card. ≥ When connected via Eye-Fi direct mode, [ECONOMY (BATT)]/[ECONOMY (AC)] are disabled. ∫ Selecting files to transfer If you perform the required settings in advance on your PC, you can transfer selected files alone. For settings methods etc., please read the card operating instructions or consult the card manufacturer. ≥ Install the software supplied with the Eye-Fi card on your PC, and configure the selection transfer settings. ≥ Inserting an Eye-Fi card (commercially available) to the unit ≥ / / Set the mode switch to , select the playback mode selection icon, and set the video/ still picture to [iFrame], [MP4], or [PICTURE] (l 28) Set the mode switch to , select the playback mode selection icon, and set the media to (card), and video/still picture to [iFrame], [MP4], or [PICTURE] (l 28) Select the menu. : [VIDEO SETUP] or [PICT. SETUP] # [TRANSFER/PROTECT] ≥ The settings method is the same as that for the [SCENE PROTECT] settings. (l 68) ≥ If the selected transfer setting is not configured on the computer, [SCENE PROTECT] is displayed and the selected transfer setting cannot be configured. ≥ When the write protect switch on the Eye-Fi card is on the LOCK side, [SCENE PROTECT] is displayed and selected transfer setting is disabled. Please unlock the write protect switch. ≥ The protect setting is also applied to the files for which [TRANSFER/PROTECT] is set. To delete or rotate a file, first cancel [TRANSFER/PROTECT] and then perform the operation. ≥ AVCHD scenes cannot be used as the selected transfer setting. - 88 -
-
 1
1 -
2
-
3
-
4
-
5
-
6
-
7
-
8
-
9
-
10
-
11
-
12
-
13
-
14
-
15
-
16
-
17
-
18
-
19
-
20
-
21
-
22
-
23
-
24
-
25
-
26
-
27
-
28
-
29
-
30
-
31
-
32
-
33
-
34
-
35
-
36
-
37
-
38
-
39
-
40
-
41
-
42
-
43
-
44
-
45
-
46
-
47
-
48
-
49
-
50
-
51
-
52
-
53
-
54
-
55
-
56
-
57
-
58
-
59
-
60
-
61
-
62
-
63
-
64
-
65
-
66
-
67
-
68
-
69
-
70
-
71
-
72
-
73
-
74
-
75
-
76
-
77
-
78
-
79
-
80
-
81
-
82
-
 83
83 -
 84
84 -
 85
85 -
 86
86 -
 87
87 -
 88
88 -
 89
89 -
 90
90 -
 91
91 -
 92
92 -
 93
93 -
94
-
95
-
96
-
97
-
98
-
99
-
100
-
101
-
102
-
103
-
104
-
105
-
106
-
107
-
108
-
109
-
110
-
111
-
112
-
113
-
114
-
115
-
116
-
117
-
118
-
119
-
120
 |
 |