Panasonic PVDV953D Digital Video Camera - Page 39
PLAYBACK ZOOM FUNCTION, PLAYBACK DIGITAL EFFECT FUNCTIONS, Playback with Wipe Mode and Mix Mode
 |
View all Panasonic PVDV953D manuals
Add to My Manuals
Save this manual to your list of manuals |
Page 39 highlights
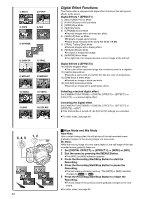
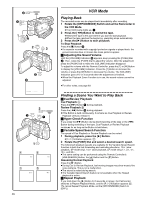
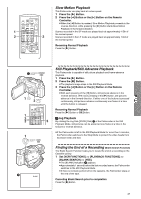
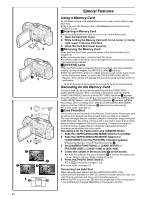
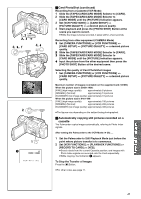
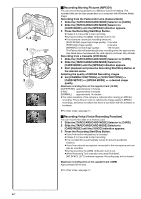
START/ DATE/ PHOTO STOP OSD TIME SHOT COUNTER RESET TITLE MULTI/ P-IN-P ¥REC A.DUB ZOOM T sVOL r V/REW PLAY FF/W W 61 5 STILL ADV PAUSE STILL ADV E ; D INDEX STOP INDEX K ∫ L SELECT VAR. SEARCH STORE MENU P.B. ZOOM OFF/ON SET P.B.DIGITAL ITEM 2 1 3 ZOOM 2t 1 2 1 START/ DATE/ PHOTO STOP OSD TIME SHOT COUNTER RESET TITLE MULTI/ P-IN-P ¥REC A.DUB ZOOM T sVOL r V/REW PLAY FF/W W 61 5 STILL ADV PAUSE STILL ADV E ; D INDEX STOP INDEX K ∫ L SELECT VAR. SEARCH STORE MENU P.B. ZOOM OFF/ON SET P.B.DIGITAL ITEM 1 2 3 4 START/ DATE/ PHOTO STOP OSD TIME SHOT COUNTER RESET TITLE MULTI/ P-IN-P ¥REC A.DUB ZOOM T sVOL r V/REW PLAY FF/W W 61 5 STILL ADV PAUSE STILL ADV E ; D INDEX STOP INDEX K ∫ L SELECT VAR. SEARCH P.B. ZOOM STORE MENU OFF/ON SET P.B.DIGITAL ITEM WIPE MIX Playback Zoom Function A part of the image can be enlarged up to 10 times during playback. 1 During playback, press the [P.B. ZOOM] Button on the Remote Controller. ≥The center of the image is enlarged to approximately double the size. Changing the Zoom Magnification 2 Change the magnification by pressing the [W] or [T] Button on the Remote Controller. ≥You can increase the magnification up to 10k. Changing the enlarged area of an image 3 Press the Arrow Button on the Remote controller that points to the area you want to enlarge. ≥When the playback is stopped, the position of the enlarged image area is reset to the center automatically. Canceling the Playback Zoom Function Press the [P.B. ZOOM] Button on the Remote Controller. ≥For other notes, see page 70. Playback Digital Effect Functions During playback, special Digital Effects can be added to the Recording. The digital effects that may be applied in the process of recording (except Picture in Picture Mode) will be the same as these added effects. 1 Press the [1] Button. 2 Press the [SELECT] Button on the Remote Controller and select desired Digital Effect. ≥When the [SELECT] Button is pressed repeatedly, the Digital Effect selection changes. MULTI )WIPE )MIX )STROBE )NEGA )SEPIA )B/W )TRAIL ) SOLARI )MOSAIC ) MIRROR ≥The same setting can also be set using the [DIGITAL EFFECT] on the [VCR FUNCTIONS] Main-Menu. Suspending Playback Digital Effect Temporarily Press the [OFF/ON] Button 1 to suspend or restart the digital effect. When the digital effect is paused temporarily, the selected effect's indication flashes. Canceling the Digital Effect Press the [SELECT] Button on the Remote Controller repeatedly until the Digital Effect Indication is cleared. ≥For other notes, see page 70. ª Playback with Wipe Mode and Mix Mode 1 Press the [1] Button to start playback. 2 Press the [SELECT] Button on the Remote Controller and select [WIPE] or [MIX]. 3 Press the [STORE] Button for the moment you want to save as a still picture. ≥The [WIPE] or [MIX] Indication changes to [B] or [C] and the image is saved. 4 Press the [OFF/ON] Button in the scene in which you want to use the Wipe or Mix effect. ≥The scene changes as a result of the Wipe or Mix effect. ≥The Wipe Function and Mix Function can be used only from the Remote Controller during playback. ≥If the [OFF/ON] Button is pressed while Wipe Function or Mix Function is used, the effect will stop temporarily at that point. Pressing the [OFF/ON] Button again will bring back the effect. 39
-
 1
1 -
2
-
3
-
4
-
5
-
6
-
7
-
8
-
9
-
10
-
11
-
12
-
13
-
14
-
15
-
16
-
17
-
18
-
19
-
20
-
21
-
22
-
23
-
24
-
25
-
26
-
27
-
28
-
29
-
30
-
31
-
32
-
33
-
 34
34 -
 35
35 -
 36
36 -
 37
37 -
 38
38 -
 39
39 -
 40
40 -
 41
41 -
 42
42 -
 43
43 -
 44
44 -
45
-
46
-
47
-
48
-
49
-
50
-
51
-
52
-
53
-
54
-
55
-
56
-
57
-
58
-
59
-
60
-
61
-
62
-
63
-
64
-
65
-
66
-
67
-
68
-
69
-
70
-
71
-
72
-
73
-
74
-
75
-
76
-
77
-
78
-
79
-
80
-
81
-
82
-
83
-
84
-
85
-
86
-
87
-
88
-
89
-
90
-
91
-
92
 |
 |
