Panasonic WJ-ND300A/10000V Operating Instructions - Page 31
Copying (Duplicate
 |
View all Panasonic WJ-ND300A/10000V manuals
Add to My Manuals
Save this manual to your list of manuals |
Page 31 highlights
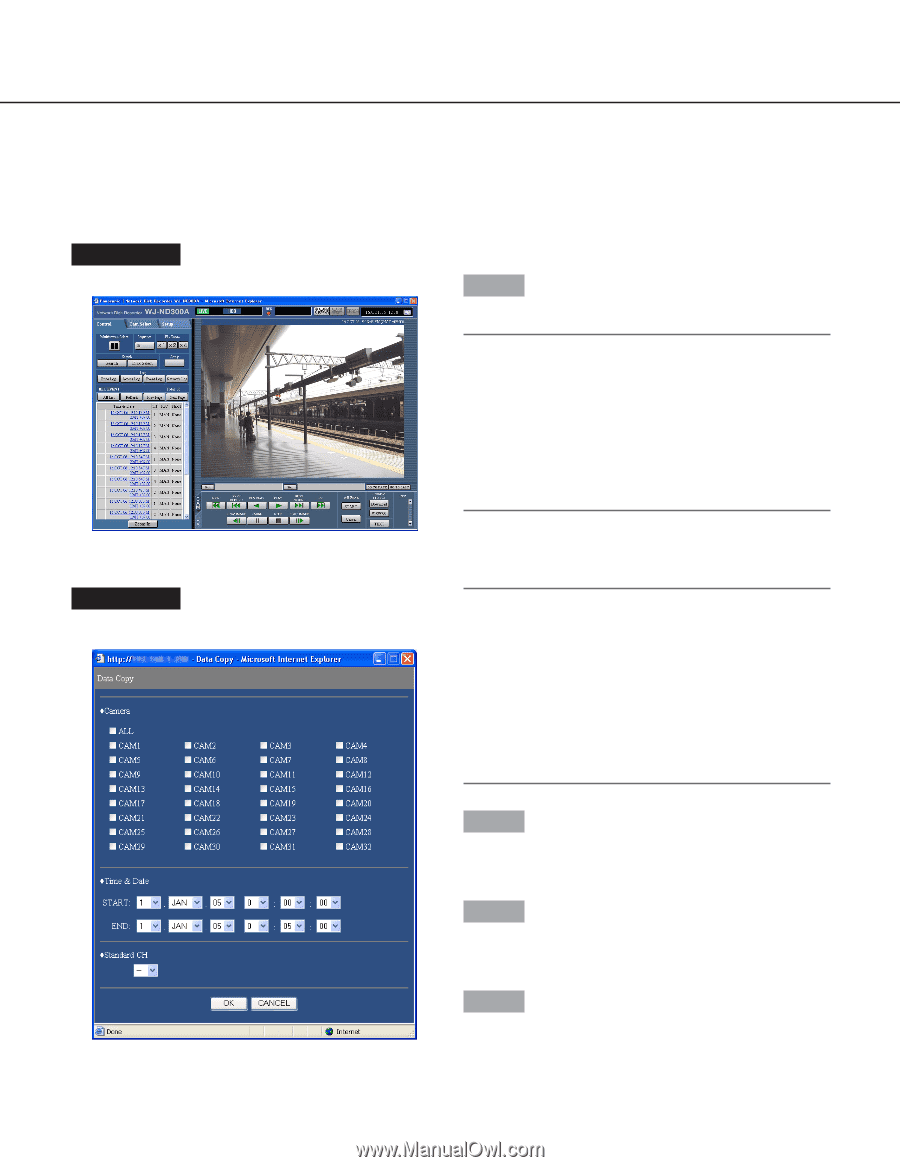
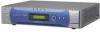
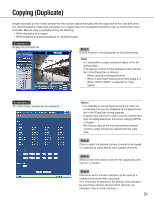
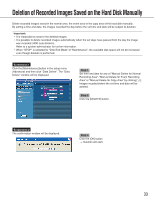
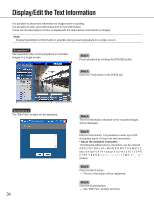
Copying (Duplicate) Images recorded on the normal area/event area can be copied manually onto the copy area of the hard disk drive. It is recommended to make back-up copies on a regular basis for unexpected situations such as malfunction of the hard disk. Manual copy is available during the following. • While displaying live images • While playback or pausing playback of recorded images Screenshot 1 Display the [Control] tab. Step 1 Click the button in the [Copy] box of the [Control] tab. Note: It is impossible to copy recorded images in the following cases. (The pop-up window will be displayed when the button in the [Copy] box is clicked.) • When copying is being performed • When a download is being performed (page 41) • When "COPY AREA" is selected for "Disk Select" Screenshot 2 The "Data Copy" window will be displayed. Notes: • It is possible to cancel copying using the copy can- cel window that can be displayed by clicking the button in the [Copy] box during copying. • Copying may start from a point several seconds later than the designated start time when copying MPEG4 images. • SD memory data of the selected camera channel and time range will also be copied onto the copy area. Step 2 Click to select the desired camera channel to be copied. It is possible to select two or more camera channels. Step 3 Select a start time and an end time for copying by clicking the [i] button. Step 4 Determine which camera channel is to be used as a standard time zone when searching. (It is necessary to determine the primary time and date by selecting a camera channel when cameras are installed in two or more countries.) 31
-
 1
1 -
2
-
3
-
4
-
5
-
6
-
7
-
8
-
9
-
10
-
11
-
12
-
13
-
14
-
15
-
16
-
17
-
18
-
19
-
20
-
21
-
22
-
23
-
24
-
25
-
 26
26 -
 27
27 -
 28
28 -
 29
29 -
 30
30 -
 31
31 -
 32
32 -
 33
33 -
 34
34 -
 35
35 -
 36
36 -
37
-
38
-
39
-
40
-
41
-
42
-
43
-
44
-
45
-
46
-
47
-
48
-
49
-
50
-
51
-
52
-
53
-
54
-
55
-
56
-
57
-
58
-
59
-
60
-
61
-
62
-
63
-
64
-
65
-
66
 |
 |