Panasonic WJ-ND300A/10000V Operating Instructions - Page 42
Screenshot 3, Step 5
 |
View all Panasonic WJ-ND300A/10000V manuals
Add to My Manuals
Save this manual to your list of manuals |
Page 42 highlights
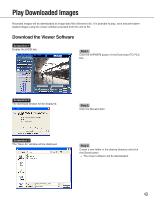
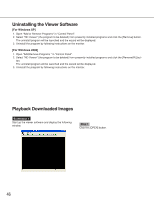
Screenshot 2 The "Download" pop-up window will be displayed. Step 4 Click the [OK] button after selecting "ON" or OFF" for "Alter Detect" to determine whether or not to attach an alteration detection code to recorded images to be downloaded. Note: The download time will be longer when "ON" is selected for "Alter Detect". Screenshot 3 The download window will be displayed. Step 5 Click the [Save] button. Screenshot 4 The "Save As" window will be displayed. Step 6 Create a new folder in the desired directory and click the [Save] button. → Recorded images will be downloaded as image data files (filename.n3r). 42
-
 1
1 -
2
-
3
-
4
-
5
-
6
-
7
-
8
-
9
-
10
-
11
-
12
-
13
-
14
-
15
-
16
-
17
-
18
-
19
-
20
-
21
-
22
-
23
-
24
-
25
-
26
-
27
-
28
-
29
-
30
-
31
-
32
-
33
-
34
-
35
-
36
-
 37
37 -
 38
38 -
 39
39 -
 40
40 -
 41
41 -
 42
42 -
 43
43 -
 44
44 -
 45
45 -
 46
46 -
 47
47 -
48
-
49
-
50
-
51
-
52
-
53
-
54
-
55
-
56
-
57
-
58
-
59
-
60
-
61
-
62
-
63
-
64
-
65
-
66
 |
 |

42
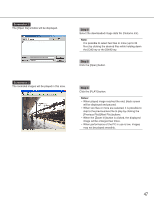
Screenshot 3
The download window will be displayed.
Step 5
Click the [Save] button.
Screenshot 4
The "Save As" window will be displayed.
Step 6
Create a new folder in the desired directory and click
the [Save] button.
→
Recorded images will be downloaded as image data
files (filename.n3r).
Screenshot 2
The "Download" pop-up window will be displayed.
Step 4
Click the [OK] button after selecting "ON" or OFF" for
"Alter Detect" to determine whether or not to attach an
alteration detection code to recorded images to be
downloaded.
Note:
The download time will be longer when "ON" is
selected for "Alter Detect".