Pfaff creative 7570 Owner's Manual
Pfaff creative 7570 Manual
 |
View all Pfaff creative 7570 manuals
Add to My Manuals
Save this manual to your list of manuals |
Pfaff creative 7570 manual content summary:
- Pfaff creative 7570 | Owner's Manual - Page 1
I I creative 7570 PFAFF creative 7570 1 . I Instruction book - Pfaff creative 7570 | Owner's Manual - Page 2
page open to simplify the understanding of this instruction manual when reading it. A Safety rules For the United Kingdom only The leads must definitely not be available from electrical suppliers or the PFAFF agencies. Please also observe the general safety notes on page 2. Index on pages 4-7 - Pfaff creative 7570 | Owner's Manual - Page 3
area, such as threading needle, changing needle, threading bobbin, or changing presser foot, etc. 1 6. Always unplug sewing machine from the electric outlet when removing covers, lubricating, or when making any other user servicing adjustments mentioned in the instruction manual. 1 7. Hold plug - Pfaff creative 7570 | Owner's Manual - Page 4
31 30-_ I 28- 2345 P A F c th'e 7570 4i 26 7 e_. 9 /i ci 1'6\ ?4 19 17 15 \24 23 -tJ - - 48 47 . 46 16 3839 40 41 PFAFF creative 7570 j 44 4 4 4 444 42 55 /57 56\ 4 45 - Pfaff creative 7570 | Owner's Manual - Page 5
"reverse" key "bartack" buttonhole key (26) Sewing foot lifter (27) Needle holder with retaining screw (28) Detachable work support with accessory compartment (29) Sewing foot holder with sewing foot (30) Needle threader (31) Thread guide (32) Threading slots (33) Needle thread tension (34) Take-up - Pfaff creative 7570 | Owner's Manual - Page 6
that your PFAFF sewing machine is just as simple to operate as this instruction book is to read. It's worth it, because there is no other way to see everything the machine can do and to make full use of its features. If you have any questions, no problem! Your PFAFF dealer is at your service with - Pfaff creative 7570 | Owner's Manual - Page 7
work or when changing mechanical parts or accessories, always disconnect the machine from the mains by pulling out the mains plug. 3. The maximum permissable wattage for the sewing lamp is 15 watts. 4. The tension of the drive belt may only be adjusted by a Pfaff mechanic. 5. The machine is to be - Pfaff creative 7570 | Owner's Manual - Page 8
stitch Bobbin case Bobbin thread Bobbin thread monitor Bobbin thread, raising the Bobbin thread tension Bobbin winding Buttonholes Buttonholes with gimp thread Card Carrying case Changing a sewing foot Changing stitch length and width. Changing the batteries Changing the needle Changing the needle - Pfaff creative 7570 | Owner's Manual - Page 9
settings Letter width Light bulb Light knit mending stitch Linen embroidery Lowering the feed dog Maintenance and sewing faults Master switch Maxi Design cards Maxi patterns Maxi stitch combinations Maxi stitches Memories Menu M-memory Monograms Needle chart Needle positions Needle thread tension - Pfaff creative 7570 | Owner's Manual - Page 10
and patchwork foot Quilt stitch Reverse sewing Richelieu Roll-hemming Round buttonhole Ruffler Sewing screen symbols Sewing faults and their remedies Sewing feet Sewing foot lifter Sewing functions Sewing-function keys Sewing lamp Sewing on buttons Sewing recommendations Shirring foot Single pattern - Pfaff creative 7570 | Owner's Manual - Page 11
48 Technical section 1 9-38 Thread cutter 32 Thread tension 28 Threading the needle thread 30 j Threading through the needle , Top cover 36 22 Topfeed 1 Traditional embroidery techniques 35 161-182 Twin-needle cording foot 1 50 Twin-needle embroidery 1 80 Twin-needle key 48 Upper - Pfaff creative 7570 | Owner's Manual - Page 12
fringe foot, etc. 9 For sewing on elastic, darning tears and inserting patches. Suitable for almost all fabrics. For securing seams invisibly and for shell edging. 6 For sewing hems invisibly for stretch materials (edge securing). 6 For sewing and finishing seams with an edge thread. 5 For - Pfaff creative 7570 | Owner's Manual - Page 13
corsetry parts. threads, for shirring and smocking. 6 Provides a highly elastic seam for sportswear. 7 For embroidering in connection with the embroidery programs. 21 Stem stitch, wide 22 Stretch triple zigzag stitch For embroidering in connection with the embroidery programs. - For sewing - Pfaff creative 7570 | Owner's Manual - Page 14
knit wear or very thin woven fabrics we recommend sewing foot No. 1 a and Dual Feed for buttonhole sewing. 46 Eyelet buttonhole with tapered bar For buttonholes in jeans, trousers and sports wear. 8.5 Eyelet buttonhole with lengthwise bar For buttonholes in outer wear, lady's suits, coats etc - Pfaff creative 7570 | Owner's Manual - Page 15
Embroidery stitch programs 49 50 51 52 53 54 55 56 57 58 59 60 61 63 64 65 66 67 68 69 70 71 72 73 74 75 76 77 78 79 80 81 82 83 84 85 86 87 88 89 90 91 92 93 94 95 96 97 98 99 100 101 102 103 104 1051106 107 108 109 110 111 112 113 114 j115 116 117 118 - Pfaff creative 7570 | Owner's Manual - Page 16
_ Embroidery stitch programs I 119 120 121 122 123 124 125 126 127 128 129 130 131 132 133 134 135 136 137 138 139 140 141 - Pfaff creative 7570 | Owner's Manual - Page 17
Embroidery stitch programs 189 190 191 192 193 194 195 196 197 198 199 $ Alphabets and monograms aAaO:aAbAbQcAcQdAdO Z8 Maxi stitches 200 201 202 203 204 205 206 207 208 209 13 - Pfaff creative 7570 | Owner's Manual - Page 18
Maxi stitches 210 211 212 213 214 2 215 1)217 218 121 220 221 222 223 224 225 14 226 I 227 I 228 I 229 IH * The stitches are not shown in their original size - Pfaff creative 7570 | Owner's Manual - Page 19
in -I cOrn1 C + I Cl) -< in C I- 44 cO -U -< > Co Ci) Ci) m z 0 - Pfaff creative 7570 | Owner's Manual - Page 20
"Creative fantasy" embroidery unit - you can in no time at all turn your "creative 7570" into a professional embroidering machine which can do the most incredible things: multi-coloured allover embroidery, such as you have previously only seen on bought articles. CREATIVE FANTASY A combined sewing - Pfaff creative 7570 | Owner's Manual - Page 21
rein to your imagination L '-I' The selection of patterns on the Creative Fantasy embroidery cards is really enormous, so it's hard to make a choice. What a good thing your Pfaff dealer has an outline of all the patterns on each card, because then you can select your favorite ones at leisure. Get - Pfaff creative 7570 | Owner's Manual - Page 22
YOU LIKE TO DESIGN II. EMBROIDERY PATTERNS OF YOUR OWN? [ Well you can! With the Creative Designer you can realize you own individual pattern ideas. Just draw your pattern on a I programmable card and enter the stitches into the machine. [ The "creative 7570" will then embroider the design - Pfaff creative 7570 | Owner's Manual - Page 23
a ) D) Z) - '4. co - - - Pfaff creative 7570 | Owner's Manual - Page 24
N) 0 - - - - - - - - - - - - - - - - - Pfaff creative 7570 | Owner's Manual - Page 25
j PFAFF cratjve 7570 I , 1*v \ I Contents Electrical connection Detachable work support Winding the bobbin Bobbin case Bobbin thread tension Threading the needle thread Needle threader Thread cutter Sewing foot lifter Pulling up the bobbin thread Changing the sewing foot Dual feed Top feed - Pfaff creative 7570 | Owner's Manual - Page 26
"O' . 04 Carrying case Place the enclosed mains cord, the toot control, and the instruction book in the compartment of the carrying case. Top cover Open cover (53) upwards. J /510 k 04 dflr .1 Programs The programs of the sewing machine are illustra ted on the inside of the top cover. - Pfaff creative 7570 | Owner's Manual - Page 27
Foot control cord Pull the foot control cord out of the toot control. The foot control has an automatic cord-rewind reel. Connecting the foot control Connect the plug of the foot control with the connection socket of the sewing machine (45). - - __ \cD / :* Li Master switch When the master - Pfaff creative 7570 | Owner's Manual - Page 28
. wI Removing the detachable work support (free-arm) In order to sew with the free arm, swing the detachable work support to the left and lift it out of the hole. When you swing it back in again, make sure th,ii the detachable work support is flush with the free arm of the sewing machine. 24 - Pfaff creative 7570 | Owner's Manual - Page 29
Preparing the machine for bobbin winding TwrHehiolneelddanisnetehgeeddplihesrkoawnc(ied4ldlw3un)hroeeitn.emlth(o4ev2ed)idrfeiurcrmtiinloygnatohnfde tbthueornbabrtrhionew. - fl4ui al tdI - Zn, 'I,' Placing the bobbin Switch off bobbin so (41) snaps the that into master switch. Place the - Pfaff creative 7570 | Owner's Manual - Page 30
the thread into guide C and pull it under the thread tension disk B with both hands. Wind the thread end clockwise a few times around the bobbin. Push the bobbin to the right. •1.• Switch on the master switch (24) Hold the end of the thread firmly and press the foot control.The winding action - Pfaff creative 7570 | Owner's Manual - Page 31
it. Threading Place the thread into guide C and pull it under the thread tension disk B with both hands. Wind the thread clockwise a few times around the bobbin. Push the bobbin to the right. Switch on the master switch Hold the end of the thread firmly and press the foot control. The winding action - Pfaff creative 7570 | Owner's Manual - Page 32
take out the empty bobbin. Thread tension To obtain optimum seam appearance and durability, make sure needle and bobbin thread tensions are correctly adjusted to each other; i.e. the threads are interlaced between the two fabric plies. For fancy seams and buttonholes, the thread interlace should be - Pfaff creative 7570 | Owner's Manual - Page 33
. left to Turn adjusting screw C just a little to increase the bobbin thread tension. the right to Inserting the bobbin case Lift latch F and push the bobbin case fully onto pin 0 of the sewing hook. Opening E of the bobbin cover. case must face upwards. Close the hook Check: Pull - Pfaff creative 7570 | Owner's Manual - Page 34
the sewing toot lifter (26) and turn the handwheel until the take up lever (34) has reached its highest position. Place the thread on the reel holder (38) and fit the corresponding unwinding disk. Now pull the thread into guide A. Then pass the thread to the right or left along thread tension disk - Pfaff creative 7570 | Owner's Manual - Page 35
In order to make the threading of the needle easier and quicker the PFAFF needle threader is provided. Lower the sewing foot (see next page). Turn the handwheel until the needle has reached its highest position. Place the needle thread over hook 0 and hold it taut. Move the needle threader (30 - Pfaff creative 7570 | Owner's Manual - Page 36
(26). Pulling up the bobbin thread Raise the sewing foot. Hold the needle thread and turn the handwheel towards you until the needle has reached its highest position and the bobbin thread has formed a loop. Pull the needle thread to bring up the bobbin thread. - Bobbin thread Close the hook cover - Pfaff creative 7570 | Owner's Manual - Page 37
ruragdennmshtdfi.nelouenodisettotddswablinensenaedwpanptsugpaHiarrotdegseussdithsnaiogttgotfhhtbetthehhuesfeteottobosbpnaetaochwciukonkiptlna.weagtnRaftfdorahodioeospstetrsa5eathtAshmoste,lheedtdeheer Engaging the sewing foot tlhPihfoletalecdrseee(rw2th(6i2en)9gsi)sefwsoloooiwnttgheharofetolddto - Pfaff creative 7570 | Owner's Manual - Page 38
The built in dual teed / IDT System PFAFF offers the ideal solution for sewing difficult materials: the built in dual feed. This system feed the material from the top and the bottom simultaneously just the same as by industrial sewing macl nes. The fabric is fed precisely. On light or difficult - Pfaff creative 7570 | Owner's Manual - Page 39
Engaging the top feed Raise the sewing (54) downwards foot. Then push the top until it snaps into place. feed Disengaging the top teed Hold the top feed with two fingers at the marked places. - Pfaff creative 7570 | Owner's Manual - Page 40
through the needle Bobbin winding is also possible with a completely threaded machine. Raise sewing foot litter (26). Pull the needle thread under the sewing foot and through the right-hand threading slot (32) u pwa rds. Now insert the thread from left to right in take-ui lever (34). The take - Pfaff creative 7570 | Owner's Manual - Page 41
Changing the needle sTnSceorweerdiwetlcmeh(2oao7tvf)eift:asthnLhedoigwmphueaerllsstttthehepreossinwenewti.eticdNnhlgeo. wfdooloowtonaswnendartsdheset. the fixing nntToeeoeetdidhnlleees,eraerpntau:drs.ThtLhiigeonhwgftleeairntt tushtpihedeeassfeAiwxfaioinrnfggathssfceoirtoengtweoeaed(ns2ld.e7) - Pfaff creative 7570 | Owner's Manual - Page 42
II 4 4i - Pfaff creative 7570 | Owner's Manual - Page 43
- J * ----- --- cD (lco D a 0 U) CD - Pfaff creative 7570 | Owner's Manual - Page 44
40 - Pfaff creative 7570 | Owner's Manual - Page 45
4 PFAFF creative 7570 uI 2 3 4 24 43 Contents Start-up functions Page 42 Language selection Page 42 Adjusting the contrast in the display Page 43 Enabling and disabling the help messages Pages 4 3-44 Explanation of the basic menu Page 45 Stitch length and width Page 46 Needle - Pfaff creative 7570 | Owner's Manual - Page 46
Creative can be displayed in four different languages. Hold key"l" pressed while turning on the sewing machine. batteries in the machine, press the "o.k." key or activate the foot control.Then the machine will be ready to sew. (For battery change see page 156.) 90 r; r ) OuJ Please note! Batteries - Pfaff creative 7570 | Owner's Manual - Page 47
error messages An additional feature of the Creative is to recog nize errors and to indicate them in the display. The following errors are recognized: • If you run out of needle thread or the needle thread breaks when sewing, embroidering or darning. • If the sewing foot lifter is not in the correct - Pfaff creative 7570 | Owner's Manual - Page 48
stop in case of needle thread message: LI - in sewing mode X - in embroidery mode X - no machine operation due to incorrect sewing foot lifter and feed dog position. Messages marked with a cross are enabled while the others are disabled. If you want to change the messages, e.g. disable the messages - Pfaff creative 7570 | Owner's Manual - Page 49
machine on, the first page with 10 sewing programs is shown automatically. The straight stitch is highlighted and can be sewn immediately. If you want to sew programs Example: In order to sew pattern No. 23 you must press - you will brouse automatically to the buttonhole and fancy stitch pages. - Pfaff creative 7570 | Owner's Manual - Page 50
you have select a pattern, this is high lighted in the display. The sewing machine is ready to sew since the pattern is programmed with optimum length and width setting in the machine memory. In order to change these pre-programmed settings you must press the key underneath the pattern again or the - Pfaff creative 7570 | Owner's Manual - Page 51
stitch stitch is shown with its length settings. On the j J If you wish the foot control, J to.The machine will sew a tack at the seam start the machine will sew a few sew with the programmed straight stitch. When changing the program or switching off the machine the programmed length is lost. - Pfaff creative 7570 | Owner's Manual - Page 52
PFAFF creative 7570 Made in Germany C 0 ,,' P or ihi, Ihu ii A t Description of the sewing function keys cod or C me ,, Reverse key (25) When the reverse key is pressed, the green diode lights up and the machine sews backwards. By Slow sewing (3) By pressing this key, the sewing speed of - Pfaff creative 7570 | Owner's Manual - Page 53
thread tension, pattern By pressing the "esc" key the previous screen is displayed or a function is aborted. mirroring, pattern start and end, the correct sewing foot and possible special accessories. 1-0 Numbered keys (7) c) For certain sewing sections (buttonholes, rn-p. card, alphabets - Pfaff creative 7570 | Owner's Manual - Page 54
at the seam end. After tying off the machine will stop automatically. card Press this key if you wish to select patterns from the maxi design cards or from the Creative fantasy cards. Also press this key to file several patterns on one Creative card. Pattern start (13) a) Using this key you return - Pfaff creative 7570 | Owner's Manual - Page 55
tar /' Summary of the options for pattern selection You have various options to select a pattern of the creative. a) Selection via the program keys: As soon as you switch the machine on, the basic menu containing 30 frequently used patterns appears automatically. The first pattern of the basic menu - Pfaff creative 7570 | Owner's Manual - Page 56
i [1 2 3 4 5 890 info ! menu b) Numerical pattern You can also call up selection a pattern by entering the pattern number. When the key "0-9" is pres sed, you will see in the display: ' Enter the desired pattern number via the number keyboard "1-0" and press "o.k." The display shows the - Pfaff creative 7570 | Owner's Manual - Page 57
with the key underneath it and can be sewn imme cating the pattern and its settings for pattern width, length, and balance. I diately. If you want to change the width and length settings, you must press the same key I I 0 L-> rfi [2 4] 67 8 9 r esc manu InQ d) Selecting a group of 10 - Pfaff creative 7570 | Owner's Manual - Page 58
control over what you have 11w changed. -- w__ 11w 11w or t cut rn u Onl flfljt I ho Plu 1 234567890 øSC infn Setting the pattern width On the right-hand side below the pattern the sym bol for pattern width is displayed along with the machine default setting of 9 mm. r I ft.C r I tr You - Pfaff creative 7570 | Owner's Manual - Page 59
cursor keys it is possible to increase the stitch density of a pattern without altering the for the stitch density is displayed along with the default setting of 0.35. total pattern length. 3 On the right-hand side of the screen the symbol .35 To increase use cursor key "-*' to reduce use - Pfaff creative 7570 | Owner's Manual - Page 60
be sewn by the machine. Pattern start and pattern end are marked by arrows. The areas next to this give information on the sewing feet to be used and Sewing recommendations on the Dual Feed, pattern mirroring and needle When you have selected a pattern directly it will thread tension. As soon as - Pfaff creative 7570 | Owner's Manual - Page 61
patterns (from the machine program) There are 30 maxi patterns with numbers 200-229 at your disposal. These large-area embroidery patterns can be sewn with a width of up to 60 mm. Moreover you can insert maxi design cards into the machine to enlarge the program. These cards contain 12 maxi patterns - Pfaff creative 7570 | Owner's Manual - Page 62
1 (2 [3 H56 7 8 9 o In order to select the maxi patterns you can use the cursor keys to scroll through all screen pages up to pattern 200, or you just press key "0-9' Now you can directly enter the desired pattern number with the number keys and confirm with r '1-;;-' The, The, Ab t cod 1 - Pfaff creative 7570 | Owner's Manual - Page 63
pattern, the pattern will be highlighted which means that it will be ready to be sewn. If you and The correction length and settings (see section "Balance"). width setting is carried out in the same way as for the 9-mm patterns. J press the key once again the pattern is shown as a continuous - Pfaff creative 7570 | Owner's Manual - Page 64
appears. By pressing the cursor key a cross hairs appears The center of the cross hairs indicates the original position and "-" which is of the needle. Use the cursor keys "-." to determine the reverse correction, indicated on the axes of the bar cross and as numeric value "0-7" below symbols - Pfaff creative 7570 | Owner's Manual - Page 65
from "0-10" is indicated next to symbols "+" and Confirm the setting by pressing "o.k.". 3) Correction of pattern and program combinations Even pattern . In the p-memory (you need the additional De signer): As soon as the sewing screen is dis I I played, you will see on the right next to your - Pfaff creative 7570 | Owner's Manual - Page 66
fi [2 [3 5 6 ,7 8 9 0 L info . )/ Activating the code You can lock your creative 7570 (e.g. for child The display shows the message: safety) by entering a numerical code. When enter- S* ing the code for the first time, press the "info" key ( - Pfaff creative 7570 | Owner's Manual - Page 67
has been entered, the message I I I to "+". "o.k." = continue "esc" = delete code "info" = change code If the code appears: entered is not correct, the message Wrong code! Machine locked. In on tahgisaicna. sNeoywouenmteurstthsewcitocrhretchtecmomacbhininaetioonff. and 65 I11 - Pfaff creative 7570 | Owner's Manual - Page 68
12 3 4 5 6 7 8 9 0 meru info menu )I 4zJ . .. As soon as you press the "ok." key, the sewing If you wish to change the code, press the "info" j machine switches to the basic menu and is ready key. The message to sew. Enter your code number I. To delete the code, press the "esc" key. The - Pfaff creative 7570 | Owner's Manual - Page 69
0) Accessories and Utility stitches 'nholes Pattern combinations - Pfaff creative 7570 | Owner's Manual - Page 70
Ar As T tu or 1 h4 or Co On flit Thi sot Pte 4 L aF, - Pfaff creative 7570 | Owner's Manual - Page 71
'- ocD 3 z 5z. 0 0) I Ifilitv tifrhic - Pfaff creative 7570 | Owner's Manual - Page 72
fl cud I lit, It (it ( ( cit (('Ii ( Jnl 'U (4$ - Pfaff creative 7570 | Owner's Manual - Page 73
Contents Alphabets/monograms Changing the letter width Switching from upper to lower case letters sequences (deleting, inserting) Maxi stitch combinations Cursor function Eight-way feed stitches (connecting stitches) Creative card Pages 72-74 Page 73 Page 74 Page 75 Pages 75-77 Pages 78-80 Pages 81 - Pfaff creative 7570 | Owner's Manual - Page 74
they can be combined as word sequen ces in the m-memory, The monogram on the right side of the screen is a crosswise feed pattern with a sewing width of 15 or 18 mm. The individual letters are always sewn as single pattern and word sequences in the m-.memory are, therefore, not possible - Pfaff creative 7570 | Owner's Manual - Page 75
oL I :;- the numbered keys below the arrows. For confir mation, press the "o.k." key. I - w 1-> C) •1 [ r [1 f3 14J info menu\ \ Letter width j To change the letter width press key"9" A menu appears on the screen displaying different stitch widths which can be selected by pressing the - Pfaff creative 7570 | Owner's Manual - Page 76
1: {2 E 7 10 : Switching from upper case to lower case letters in the script alphabet 0 E The script alphabet can be sewn in upper and lower case letters. By pressing the "A-z" key all Select monogram style "A-a' The menu containing the full alphabet appears. alphabet styles appear on the - Pfaff creative 7570 | Owner's Manual - Page 77
__ I I 2 E 31 31 31 31 H F czz j .J M-memory In order to create a pattern sequence, several letters must be combined in an M-memory. There After pressing the "m" key (16), the message appears in the display: are 32 M-memories at your disposal (MO -M31). Please select: Up to 85 patterns can - Pfaff creative 7570 | Owner's Manual - Page 78
[i [2 [3 4 5 6 7 8 9 0 After you have confirmed with the "ok." key this message appears on the display: z 0 The pattern sequence is empty... "esc"= abort 0 rr II I 4- U I hi ( Ih -> (ul ( )iI - Pfaff creative 7570 | Owner's Manual - Page 79
and inserting letters With the cursor keys "*-" and "-*" you can make J changes in an already entered text. Using the cursor keys select the the key with the symbol C3j if you wish to sew the sequence. nk ) i;:;;:- rM The stitch width set for the first letter will apply to all further letters in - Pfaff creative 7570 | Owner's Manual - Page 80
see Pages 85-86). r' r I 1 E [i [2 [3 41 5 6 7 8 9 0 esc L Pattern sequence If you wish to create a pattern sequence form the different patterns of the machine, you must select a free M-memory (see Page 75). Then press key "0-9". The following message is displayed on the screen: "Pattern No - Pfaff creative 7570 | Owner's Manual - Page 81
I 12 t - I13- 1 iL1Jt J menu Now enter, say, pattern number 162 via keys "1-0". Then confirm with "o.k.' oJ JC [ 0 I. I H H[2 1.1 H H Lk Now you are in the programming screen. In the top right-hand side of the screen the pattern number and number of the selected memory are displayed, and below - Pfaff creative 7570 | Owner's Manual - Page 82
stitch length and width The stitch width and stitch length can be changed by pressing the keys "1-0" underneath the screen before saving the pattern sequence. 890 L - Pfaff creative 7570 | Owner's Manual - Page 83
the pattern shows the maximum width of a maxi stitch. • Pressing the "esc" or"o.k." key, you .'vill quit this screen. Now press the key below the "sewing machine" icon and your sewing machine is ready to sew. 'I 3 Confirm by pressing the "o.k." key or abort by pressing "esc" 81 - Pfaff creative 7570 | Owner's Manual - Page 84
can insert, add will bring you back to the sewing screen. or delete patterns (see section "Cursor"). U r-i ( L] I h This symbol indicates that you can load the 44 pattern sequences from the M-memory of the mchine onto a Creative card (see Page 94). t This symbol represents the stitch density - Pfaff creative 7570 | Owner's Manual - Page 85
press the key below "ZO" several times. Pressing the key below" i1 "you will return to the originally displayed size immediately. j Then the sewing screen will be displayed. Pressing the "edt" key will bring you back to the programming screen, the originally displayed size, j however, remains - Pfaff creative 7570 | Owner's Manual - Page 86
the machine and press the "card" t key (14). Select the desired pattern with the corresponding key. It will be highlighted. Confirm with "o.k."; the memory screen will be displayed. On the right hand side of the display you will see the message "Press o.k. to save". Width and length can be changed - Pfaff creative 7570 | Owner's Manual - Page 87
2 L° j7 8 •9 Lh Deleting/Inserting a pattern within a sequence If you wish to delete or insert a pattern within a sequence, or check it, you need to use the cursor. When selecting a pattern within a pattern sequence the cursor is always positioned at the beginning of the sequence. Using the cursor - Pfaff creative 7570 | Owner's Manual - Page 88
112134567890 info menu ) / ok. 0-9 clear Inserting a pattern Press teh "0-9" key and enter the number of your desired motif using the "1-0" keys. Confirm with On the screen the message appears: "Store by pressing "o,k," Press the "o,k." key. The new pattern will then be inserted into your - Pfaff creative 7570 | Owner's Manual - Page 89
J J 1 J 1; 12 890 j Now press key "4" below" j... (delete pattern) I The pattern will be deleted. j I I I 1 2 3L4L51161 7j8 9 -- - J Select key "7" below" J ". Your sewing machine is now ready to sew. I IY 87 I - Pfaff creative 7570 | Owner's Manual - Page 90
to the !1 patterns, new shapes and large-area embroidery pattern start of the next embroidery program. motifs will be created. The connecting stitches You can achieve the most beautiful results if the are stored in the sewing machine computer as connecting stitches are overstitched by the - Pfaff creative 7570 | Owner's Manual - Page 91
[ [ [1 4] 5 6 17 8 1 esc menu Eight-way feed stitches Example: Press the"m" key and key"2" for J M-memory. On the screen the M-memory direc tory appears. Select an empty M-memory and • confirm with the "o.k." key. On the screen the j message appears: "Empty pattern sequence 4- [1 [2 [3 5 67 89 - Pfaff creative 7570 | Owner's Manual - Page 92
[1 2 3 4 5 6 7 8 9 0 menu o.k. A-z LE Now press key (18) Eight arrows appear on the display representing the different sewing directions. "I Lz H - Pfaff creative 7570 | Owner's Manual - Page 93
Our example consists of: 53/1 Ox direction 6 S1 53/1 Ox direction 6 i 53/lOx direction 7 i 53/1 Ox direction 7 Li This way, you can create a continuous embroidery pattern, If you wish to close up your pattern, add another pattern 53 at the end. Press the key underneath " ' Now you motif is ready - Pfaff creative 7570 | Owner's Manual - Page 94
I. L L Example No. 1; 1 x No. 139 5x 1 x No. 139 5x[ 1 x No. 139 5x1 1 x No. 139 5x[ L L :: Example No. 2: 1 x No. 138 6x[ 1 x No. 138 6x 1 x No. 138 6x 1 x No. 138 6xL 92 - Pfaff creative 7570 | Owner's Manual - Page 95
Example No.3: 1 x No. 162 2xt1 4xt 1 x No. 162 2xW 4x 1 x No. 162 2xW 4x Example No.4: 1 x No. 221 2xm 4x 1 xNo. 138 5x11 1 xNo. 138 2x 1 xNo. 138 5x 1 x No. 162 2xW 4x1J Leaves; No. 190 Pattern length: 20 Pattern width: 6.0 - 4 Press key "Single pattern" Bells: • Select memory e • No. 166 - Pfaff creative 7570 | Owner's Manual - Page 96
or maxi patterns), eight-way feed stitches, self-created patterns from the Designer (see Designer Instructions, page 47), and up to 56 embroidery patterns from the embroidery device on the "Creative card". This ensures that the patterns you have created yourself are saved for good. This way you - Pfaff creative 7570 | Owner's Manual - Page 97
a Creative card in slot (47). Press the "card" key (14) on the sewing machine. By pressing the "o.k." key again, the number is saved.The display shows: The display shows: Card 1001 "Card number 1000+" The card is empty Now enter a figure with the number keys (7), e.g. Press "clear" to change - Pfaff creative 7570 | Owner's Manual - Page 98
esc info menu Deleting a pattern from the "Creative card" If you wish to delete a pattern from the "Creative card' press the "card" key (14) on the sewing machine. The screen will show the rn-memories of the card, or a menu in case the card does not only contain patterns or pattern sequences. If - Pfaff creative 7570 | Owner's Manual - Page 99
- - *_ '- - _ _ -__- - acMical Accessories and Utility stitches - Pfaff creative 7570 | Owner's Manual - Page 100
- Pfaff creative 7570 | Owner's Manual - Page 101
Contents Utility stitches Pages 101-121 Buttonholes Pages 122-136 U, Sewing feet Pages 137-152 C, Needle chart Pages 152-153 z4.0 99 - Pfaff creative 7570 | Owner's Manual - Page 102
- Pfaff creative 7570 | Owner's Manual - Page 103
to 6 mm as required. Some sewing jobs can be done more easily by changing the needle position, e.g. topstitching a collar or sewing in a zipper. With keys 7, 8 and 9 you can select the Creative's 19 needle positions. When doing so make sure that the needle is in the highest position. Programmable - Pfaff creative 7570 | Owner's Manual - Page 104
changes from the right needle position on. It you press the key" ' the stitch width changes starting from the left needle position, e.g. for eyelet embroidery and cording fabric under blind stitch foot no. 3 so that the crease line runs along edge guide B. • When the needle enters the crease line - Pfaff creative 7570 | Owner's Manual - Page 105
zigzag J stitch. • For instructions see description on the left. . .. t C •ø C. . C U, 0 U, U, a) C) Stretch triple straight stitch TIP: If you wish to topstitch a collar edge with Program 01 program 01, use the function "needle down" and This program is used for sewing all seams where great - Pfaff creative 7570 | Owner's Manual - Page 106
elastic close to the edge. • Gather the fabric with a 6 mm long straight stitch, • Push the part that you have prepared in this way under the elastic or place it underneath, and pin it firmly in place. • Sew it on with the elastic stitch. Leave the ends of the elastic tape overlapping a little - Pfaff creative 7570 | Owner's Manual - Page 107
Creative offers a selection of overlock stitches. These join two plies of fabric and serge them in one operation. They have a higher elasticity than usual stitches, they are more durable and what is more, TIP: We recommend using blind stitch foot No. 3 when sewing overlock seams. This guides the - Pfaff creative 7570 | Owner's Manual - Page 108
with the knit-edge foot (special accessories), this stitch can even be used for open-knit fabrics. Fashion-knit garment sections can also be joined effortlessly with this stitch. TIP: To prevent the seam from stretching while sewing, it is advisable to add a woollen thread under light tension. 106 - Pfaff creative 7570 | Owner's Manual - Page 109
enters the left hole in the button. • Now lower the presser foot lifter; the button is J now held by the shank. • Now sew on the button. Make sure that the needle also enters the right hole in the button. • The machine sews a tack and the program is completed. j TIP: By lowering the feed - Pfaff creative 7570 | Owner's Manual - Page 110
density will automatically be increased. With program No. 25 you can sew professional pocket bartacks as used in the apparel industry. It also provides on skirt slashes or pockets. Using a thicker thread hand-stitched. the arrowhead Using a thread bartacks looks like in a contrast color you can - Pfaff creative 7570 | Owner's Manual - Page 111
28 is mainly for strengthening damaged areas of fabric. • Stitch over the damaged area at the required length. • Press the reverse key; the machine finishes sewing the darning program and the darning length is thus saved. The saved darning length can now be repeated as often as needed. rrritf - Pfaff creative 7570 | Owner's Manual - Page 112
00 Fit darning toot No. 6. Set the needle at its highest position by turning the handwheel, and push the pin of the darning foot fully into the hole of the sewing foot holder slightly pressing the darning foot between thumb and forefinger. When doing this, the guide fork should place itself around - Pfaff creative 7570 | Owner's Manual - Page 113
the first corner, Fold the corner 3 Program 02 Program 00 Serge the raw edges of the fabric with zigzag or and stitch over it diagonally. Sew the lace continu ously onto the next edge. All other sides are done in the same way. .1 overlock stitches. Place the lace onto the fabric - Pfaff creative 7570 | Owner's Manual - Page 114
gathering seams close to each other elastic threads shoud be inserted into the foot (approx. 0.5 cm = 1/8 of an inch apart> Now from the side and drawn into the grooves. While gather the part by pulling the bottom threads of sewing the gathering seam, make sure that the the seams. You determine - Pfaff creative 7570 | Owner's Manual - Page 115
can make very elastic j seams with a hemstitching effect for example on corsetry. • Serge the fabric edges and tack-baste them j onto the reverse side. • Lay the edges to be sewn with about 3 mm between them under the sewing foot. 3 • Overstitch from the face side ensuring that the needle perforates - Pfaff creative 7570 | Owner's Manual - Page 116
the face side of the fabric. Make sure that the needle enters the fabric close against the seam. Guilt stitch Program 11 In traditional quilting three fabric layers are joined with small hand-made stitches.This is done quicker and more practical with the sewing machine, eq. with program 11, see - Pfaff creative 7570 | Owner's Manual - Page 117
very suitable for repairing holes, tears and damaged areas. Depending on the size of the damaged area, sew over this area with rows of elastic stitches until it is well covered. When doing so, make sure that the stitch rows overlap each other. When mending tears, frayed edges or small holes, it - Pfaff creative 7570 | Owner's Manual - Page 118
wear the bobbin without tension. The needle thread is and corsetry. There are different techniques: 1> Smocking with gimp thread L a regular sewing or embroidery thread. Since elastic threads are much thicker than normal bob (non-elastic) bin threads, the tension on the bobbin case must be set - Pfaff creative 7570 | Owner's Manual - Page 119
hemming has to be sewn on this side. insert the hemmer. Lower the foot, sew a few stitches and pull the fabric into the scroll of the hemmer with the threads of the seam beginning. The zigzag stitch must be set at a width so that the inserted fabric edge is overstitched closely. C E E 0 0 C 0 0, 00 - Pfaff creative 7570 | Owner's Manual - Page 120
the crosswise seam. right side of the sewing-foot holder. 4) 0 Additionally, you can set the needle so that it enters close to the edge of the zipper teeth by N using one of the Creative's 19 needle positions. C) If the foot is engaged right, the needle must only be moved to the right If - Pfaff creative 7570 | Owner's Manual - Page 121
same distance. J • Stop shortly before the seam end and leave the needle in the material. Raise the sewing foot and open the zipper. A • Now the seam can be finished. • Engage the zipper foot on the right and set the TIP: Using the edge guide you will achieve an J needle at the required position. - Pfaff creative 7570 | Owner's Manual - Page 122
Sewing on patches Program 15 The best way to darn larger holes is to cover the damaged area with a piece of new material of a damaged material up to the seam on the wrong side. TIP: In order to turn at the corners more easily, use the "needle down'S function, 0a, 0 4a-,I 0. C 0 C a) C,) 120 - Pfaff creative 7570 | Owner's Manual - Page 123
I I I e be 1% ' - I a * %4 'qir -S Traditional Accessories and - Pfaff creative 7570 | Owner's Manual - Page 124
"keyhole buttonhole with gimp sure. thread"). Set the needle thread tension at + 3. To ensure that every single buttonhole is exactly the right size, the Creative 7570 is equipped with the buttonhole guide No. 10 and sensor tech nology. Using this equipment you can sew perfect buttonholes even - Pfaff creative 7570 | Owner's Manual - Page 125
I I I I I I I Inserting the buttonhole guide: 1 Push the metal part of the buttonhole guide into the slot below the needle plate from the J rear (between the two red arrows).The white plastic part is over the needle plate. d J 2. Push the guide forwards until the catch lies against the rear - Pfaff creative 7570 | Owner's Manual - Page 126
buttonholes: 1. Standard buttonhole No.40 (for blouses, shirts, dresses etc.) a) fully automatic b) semi-automatic 2. Stretch buttonhole buttonhole No. 42 for fine elastic materials and for decorative buttonholes, a) fully automatic b) semi-automatic 4. Blouse buttonhole 5. Keyhole buttonhole No. 39 - Pfaff creative 7570 | Owner's Manual - Page 127
1-' 1r311r1v1rr81r91ro1 info men\ Sewing the buttonhole Standard buttonhole, fully automatic, with but J tonhole guide No.10 or buttonhole foot No. 5 A • Select buffonhole No. 40. On the dsplay appears the above shown J message. / [o- clear • Using the numbered keys "1 -0" you can enter - Pfaff creative 7570 | Owner's Manual - Page 128
will then he sewn auto matically, however, the sewing machine will reduce the sewing speed before the buttonhole is finish ed. As soon as the second buttonhole ceani is as long as the first seam press the "reverse" key. The Creative will sew the second bdrtack and tie off. Important: The self - Pfaff creative 7570 | Owner's Manual - Page 129
are sewn fully automatically. gramming screen along with length and width For semi-automatic buttonholes, not only the settings. buttonhole length and stitch width can be set, but also the stitch density. 0 H Ii I Is 1 2113 14 6 7 '8 9 ° I H - - - - - j LIOhL rnont You can alter - Pfaff creative 7570 | Owner's Manual - Page 130
. Watch the red marks on the buttonhole foot while sewing. Press the "reverse" key. The machine now sews the first bartack and the second buttonhole seam. Shortly before the buttonhole is finished, the sewing machine reduces sewing speed. When the second buttonhole seam is the same length as the - Pfaff creative 7570 | Owner's Manual - Page 131
and stitch density of the second J • by self-defining the length and stitch width of the buttonhole (see standard buttonhole). buttonhole seam can be set with the balance. Important: Before you start the buttonhole, pull buttonhole foot No. 5A to the front up to the second red mark! I129 - Pfaff creative 7570 | Owner's Manual - Page 132
pla ced with the rounding facing the edge. The se wing of the buttonhole, however, begins at the bartack. Mark the length of the buttonholes on the fabric first, making sure to measure from the starting point inwards. Always sew the buttonholes from the inside out wards towards the edge. The round - Pfaff creative 7570 | Owner's Manual - Page 133
purl seam can be key "6' set using the balance. The stitch density cannot be altered for this button Caution: Before starting the buttonhole, pull hole type. Therefore you should use a stronger buttonhole foot No. 5 A forwards up to the thread or gimp thread if necessary (see "Button second - Pfaff creative 7570 | Owner's Manual - Page 134
. Therefore you should sew this buttonhole with a stronger thread or gimp thread if required (see section "Buttonholes with gimp thread"). r The stitch density of the second seam can be adjusted with the balance. Important! Before you start the buttonhole, push buttonhole foot No. 5A forwards - Pfaff creative 7570 | Owner's Manual - Page 135
at specialized shops. • Push the runner forwards up to the second marking. • Now sew buttonhole No. 40, 41 or 42. • Place the gimp thread over the front ridge of the buttonhole foot and clamp the thread ends to the right and left into the rear ridge. a, 0 I I I 1' 1; C Ua,, I.. 0 U, 0a - Pfaff creative 7570 | Owner's Manual - Page 136
the buttonhole guide backwards. • Place the gimp thread over the front ridge. Pull the thread ends taut backwards under the sewing foot. Clamp them right and left of the back ridge respectively. E • Push the runner forwards up to the second red mark. • Before you start sewing, press the "needle - Pfaff creative 7570 | Owner's Manual - Page 137
. Important: The sewing foot must not be raised during this procedure! • Pull the gimp thread to the left and backwards until the loop is just in front of the needle. • Now sew the rounding carefully. 4444 • Then, hold the gimp thread slightly tauter and finish sewing the buttonhole. Cut off the - Pfaff creative 7570 | Owner's Manual - Page 138
•0 - Pfaff creative 7570 | Owner's Manual - Page 139
L i.. L. &. 0. C) C) ACD (i3() C) C') CD 0. -n Cl) (7 Cl) 0. CD CD 0. CD C.) Accessories and - Pfaff creative 7570 | Owner's Manual - Page 140
1 t1 r r - Pfaff creative 7570 | Owner's Manual - Page 141
f4 a. Accessories and needles Sewing feet (accessories> Special accessories table Felling foot/Appliqué foot Fringe foot/Pintuck foot Cording foot/Shirring toot Pages 140-142 Page 143 Page 144 Page 145 Page 146 Knit edge toot/Ruffler 7/9 hole foot/Braiding foot Quilt and patchwork foot Page 147 - Pfaff creative 7570 | Owner's Manual - Page 142
Standard sewing-foot No. 0 A Part No.: 98-694 828-00 Fancy stitch foot for top feed No.1 A Part No.: 98-694 836-00 Fancy stitch foot for sewing without top feed No. 2 A Part No.: 98-694-838-00 -k Blind stitch and overlock foot No. 3 Part No.: 98-694-890-00 140 - Pfaff creative 7570 | Owner's Manual - Page 143
Zipper and edge sewing foot No. 4 Part No.: 98-694-884-00 Buttonhole foot No. 5 A , Part No.: 98-694-830-00 Ah . . Buttonhole guide No.10 Part No.: 93-037 595-91 Darning foot No. 6 Part No.: 93-035 960-91 0 C', 0 jI 141 - Pfaff creative 7570 | Owner's Manual - Page 144
Roll hemmer foot No.7 Part No.: 96-694 818-00 Embroidery foot No. 8 Part No.: 98-694-840-00 Edge guide No. 3 Part No.: 98-8O2--422OO Oil Soft brush Seam ripper 3rd Spool holder to be placed on the pin (special accessories) 142 - Pfaff creative 7570 | Owner's Manual - Page 145
Single-needle cording foot 93-036 91 5-91 For cording Shirring foot 93-036 998-9 1 For shirring frills etc. Braiding foot 93-036 936-9 1 For sewing over cords and thicker threads 7/9 hole foot 93-036 946-9 1 For attaching threads and tapes Eyelet plate 93-036 977-45 For eyelet embroidery - Pfaff creative 7570 | Owner's Manual - Page 146
and patterns you can create countless new designs. You can make a perfect, densely stitched seam with the appliqué foot which has a special cutout on the underside for tie zigzag seam. • Insert the appliqué foot into the sewing machine. • Transfer your drafted pattern to the face side/ smooth side - Pfaff creative 7570 | Owner's Manual - Page 147
a longer stitch length; it is best to sew a test seam first. • Now set the needle thread tension quite tight (at about 5) to make the seam more prominent. • Sew one pintuck. When you sew the second • When you have finished, pull the work out of the machine carefully because if you pull too fast - Pfaff creative 7570 | Owner's Manual - Page 148
.rfatbhreic • Be sure to guide the fabric edges evenly through the foot. • atDhtiesthegenrgofaorogvneettohafnetdhsehreirsmreiownvgienfgoitofiotnobttyhhepoudldsirheeircntagitointthdeoof wn back. Tip: the By increasing the stitch length, you needle thread tension and can increase the gathering - Pfaff creative 7570 | Owner's Manual - Page 149
The knit-edge foot makes it easy to sew thick J seams on knitted fabrics or fur imitations. To obtain a perfect seam on shapecut parts, we recommend adding a wool thread under slight j tension and overstitching it at the same time. Program: 33 j Stitch width: 6.0 Tension: 3-5 Ruffler With the - Pfaff creative 7570 | Owner's Manual - Page 150
through the eyelet type guide and pull it through the front hole backwards underneath the sewing foot. • Insert the braiding foot. • Select the desired fancy stitch, e g. Program 17 and stitch over the thread or tape. Program: 17 Stitch length: 2 Stitch width: 6 Tension: 3 Program: 142 - Pfaff creative 7570 | Owner's Manual - Page 151
is 4 of an inch (6,3 mm) and between the needle and • Set the needle thread tension at 9 and the bobbin thread tension rather loose. It is best to use a second bobbin case. • When you now sew over the three fabric layers, the inner edge of the foot >8 of an inch (3,1 mm). you will only see the - Pfaff creative 7570 | Owner's Manual - Page 152
threads (see page ???). • Set the needle thread tension rather taut (5 approx.) and sew a cording (also see page ??? with or without gimp thread). • If you sew a second cording, you can let the cording that you have already sewn run in the guide groove which is protruding on one side of the foot - Pfaff creative 7570 | Owner's Manual - Page 153
sewing foot and screw on the binder. • Cut the beginning of the bias tape at a diagonal. • Push the tape into the scroll of the binder and pull out to the back. j • Adjust the binder so that the needle This can also be achieved j by changing the needle position. • Stitch a few centimetres (about - Pfaff creative 7570 | Owner's Manual - Page 154
4.0 mm Suitable for 1 Normal cording Normal cording Wide cording Extra wide cording Decorative designs sewn with twin needles Before you start sewing, turn the handwheel fabric properly. In this way, needle breakage and check to can be largely make sure avoided. the needles stitch into the - Pfaff creative 7570 | Owner's Manual - Page 155
and embroidery work 130/705 H-SUK Size: 70/110 Medium -EEJ---- ball point Coarse knitted fabrics, Lastex, double jersey fabrics, Quiana and Simplex 130/705 H-PS Size: 75 + 90 130/705 H-SKF Size: 70 110 -- _.___ -,jj Medium Stretch-fabric needle developed especially ball point for Pfaff - Pfaff creative 7570 | Owner's Manual - Page 156
- Pfaff creative 7570 | Owner's Manual - Page 157
I 4 r & I Contents Changing the bafferies Changing the needle plate Cleaning and oiling Changing the sewing lamp Sewing faults and their removal Page 156 Page 157 Page 157 Page 158 Page 159 Cu Cu 0 C C Cu 4-' C Cu C :0 155 - Pfaff creative 7570 | Owner's Manual - Page 158
Changing the batteries: c Switch on the sewing machine to avoid de leting the memories during the battery change. Tilt the machine over on the side as illustrated. * The battery compartment is installed in the base. Using a screwdriver lightly push the catch into recess A, lift it, and remove - Pfaff creative 7570 | Owner's Manual - Page 159
- J j I I I Changing the needle plate Cleaning and lubricating 3 • Switch off the master switch. • Raise the sewing foot lifter. • Switch off the master switch. • Remove the needle plate and lower the feed • Pull the needle plate upwards at the back and dog. j remove it. • Clean the - Pfaff creative 7570 | Owner's Manual - Page 160
Changing the sewing lamp • Switch off the master switch. • Disconnect the mains plug and the foot control from the machine. • Remove the detachable workplate. The sewing lamp (bulb) is located inside the needle head of the sewing machine. Removal - Pfaff creative 7570 | Owner's Manual - Page 161
the stitch Check needle-thread and bobbin-thread tensions. Use perfect threads only. Do not wind free-hand. Run the thread through the primary tension. Thread up correctly. Check needle-thread and bobbin-thread tensions. J 5. The machine does not feed or feeds irregularly Sewing lint has collected - Pfaff creative 7570 | Owner's Manual - Page 162
L_. -F * • - Pfaff creative 7570 | Owner's Manual - Page 163
j j I I Termadbitrioonjadle techniques I1 Pages 161-182 11 'I I J I I 161 I. - Pfaff creative 7570 | Owner's Manual - Page 164
0) "3 -.-- r- - - Pfaff creative 7570 | Owner's Manual - Page 165
V. Contents General tips on embroidering Joined borders Cross stitch Linen embroidery Hemstitching Eyelet embroidery Richelieu Quilting Twin needle sewing Pattern stencils Monograms Page 164 Page 166 Pages 167-170 Page 171 Pages 172-1 74 Pages 175-1 76 Page 177 Pages 178-1 79 Page 180 - Pfaff creative 7570 | Owner's Manual - Page 166
,yoimtrecesaunpltrsba.ectiesaes,ybtuot Thread tension In general, a looser thread embroidery work than for tension is used utility sewing (i for 2). Iibennmocabbrdberdioaniistdiecoedanrsy,ebtymhseltoiurgbrehnotiulbnynbgitifonothrtmethhearaedrnajidugdshtbtti - Pfaff creative 7570 | Owner's Manual - Page 167
I. - L.-J EEEu' p 4% - (31 Traditional embroidery techniques r * 4,i, L 4'. •1 4d - Pfaff creative 7570 | Owner's Manual - Page 168
? c\) Li? ( y ) j JHbbameororveieaoerrnniderpde,yeaedaarrrrcsltyewobicolopsaouforyrrldaoasmsngrelauyerrynassweedmsxuitsdtahih.ttmrahiMecbpakbllaedeyndsseehcsioeoorsfrfameetsh.beh.oTmieYnwhiobsenuyraygoomsaiuhvdreeoaecrturaiahylnovdi-ucatcskhihrlnreaeoeebam awstldeessin when embroidering. a - Pfaff creative 7570 | Owner's Manual - Page 169
J J Cross stitches Cimropsosrtsatnittcshubejmecbtrwoiidtheirnietrsadhiatvioenaallw, faoylsklboeriesntican embroidery techniques. What used to be stitched deal of effort can now be 7570 surprisingly quickly by hand with a great sewn with the Creative and easily. - Pfaff creative 7570 | Owner's Manual - Page 170
,anvorTee.erh9weey0ysiot-puh9he9acocviapaecntlolibymn cehsseuiaus nmntitgpo aesfbrtolietch these settings if required. Tip: Programs 91, 93, metrical designs and 94, are 97 and 99 are sym very suitable for sewing opposite one another. .. t _ ,V 4' A •, " 4' 4' .F 4 - cv - Pfaff creative 7570 | Owner's Manual - Page 171
Embroidering cross stitch motifs with programs 100-109 YgTanMrroeheaux-eammtscectseaornmcouoesoscamsironcimbesghtsiibnytowicaotnhthuhieeorimcrnti.hhmsoTetaoaairfgiredsneidonoteiahvrtntehiibtdonieseunraasefuletodotwlcilfironanuowctlsohssubitehdcosviecrtfiedesftseceelshrraiessrv.ntgpeeterlpyos: • - Pfaff creative 7570 | Owner's Manual - Page 172
the" m) "key for pattern sequence. • Now enter the selected cross stitches into a free M-memory. • To sew the memories pattern, recall the programmed successively by pressing the key"4" • WTscthoihtercerhemnseaypsorokiunnedstdshtaestrottamtsrheitdiewndigslneegwpootifhninteghtnesoetnseaedrtwthl - Pfaff creative 7570 | Owner's Manual - Page 173
wLwiehnlielt-enloeevmmedbbrrtoeoicdidheenryriqi,nufgiell.eisFdoarinvtheerimys wsbpreeollcidikaenlrowywhdnietaesn-iogdnn-s are most suitable to make the embroidery more prominent. Always use special embroidery threads Transfer and the tear-away stabilizer as desired pattern, i.e. an an - Pfaff creative 7570 | Owner's Manual - Page 174
/ / / .4 Hemstitching 1EbhdwoFwntEio0yehvisrooifsmemerdrrshvpaaerymtpbehayosvhaowrerntoesaedsuyiocandmli,trsinclief.sdysasaChguWieaeotlbskiirirnwuntrntenyithadcigthaoicechbehnateweailbmigmnfvendtnyrsdhme.ogulsneectamtUcodtehi.hcyohtesCaishaocOstwderirnpuqhnlenesthgretuiiveluahonnin, - Pfaff creative 7570 | Owner's Manual - Page 175
the desired width out of as when hemstitching by the Tip: Use the "slow sewing" function so needle stitches evenly and bunches the that the threads neatly. hand. - • Erneemsepbderlcoetiidmveeur saptlrooennggrteabrmoastth. Wthfaehbersniicddeeodiongfgetshthewisiet,hdtghtheese into the pulled - Pfaff creative 7570 | Owner's Manual - Page 176
Making a hem with a hemstitch seam Tsthiitschsienagmwporrokvoidnestaba lepecrlfoetchts,edngaepkfiinnsishortotowheemls-. • Needle 130/705 H, size 80. • Programs No. 112, 114 and 117 • Iron the hem over twice in the desired width. • Pull one or more of the threads just above the hem. • - Pfaff creative 7570 | Owner's Manual - Page 177
.edvbeecraaaunltiubfuetilli eyelet embroideries. • embroidery hoop. • Cffaaubbtrriioccnomevuoesrrttthwfietotpigfinahbtilrnyictahrteohureenyadedletsht eapnlpaditne.p. uTshhe the • • Remove the sewing foot. Place the sewing foot lifter in darning position. Pull up the bobbin thread - Pfaff creative 7570 | Owner's Manual - Page 178
bobbin thread and hold it for the first few stitches. • gSfartbiatrmcihc.Wsalrohowiulelnyddaotnhidnegecvsueotn,wlytui.trhTnhttehheestsihtecolheoceptsewdmituphsrttohbee very close to each other. • Then secure with a tew straight stitches. Pattern example for eyelet embroidery a> SSfk2oeterimlytmec - Pfaff creative 7570 | Owner's Manual - Page 179
this very embroidery is artistic easy to form of bar create with and eyelet your sewing machine. • Tip: It is even easier with function "needle down' • Ttthhhaeetinrwccialolrneffotuorlmulyrstch.ueDt ocouunttootuthtcesufatatbaarwbicoaufyrtotm2hemthbmeacafkrroeinamgs material! • - Pfaff creative 7570 | Owner's Manual - Page 180
!hgrn,rUdetyhsaoeeidusarsiansiCltnvyidrti,sceihahpbtoloiyevwloyeseueev7swce5taer7inrn0igttdhwpotrrihelolyraveodlaiouddorienksq(apuaqeisumlrtliiiolfantntgmcs)htaiaitdncsehg color for the bobbin. Sqtlsshatuteiyirittteleccttar,hhhsdeewoo.tgffienl.nltethh8sed-eeidiosl9pnqea,o.uptailWphlyntre - Pfaff creative 7570 | Owner's Manual - Page 181
J And this is how it is done: J • Cyoofuut6o.h3ua5tvetmhmemapdsaherotsourlodbf oyaulorguehratdq.yuAibltseewaiinmtchluatedllmeodwplainantctehese templates. • fSgoeprtrmheearsd.mToahullet ssteqheusaqprueaarsrtsethsaasatreiynotuthhecenapnsaemtwteanrtncthoagnteodther to form the surface of the - Pfaff creative 7570 | Owner's Manual - Page 182
.tslr.haleiocasetd • Thread the threads as usual, taking care not tc • get them tangled. Ptoultlhteheletfht raenaddsoninetotoththeethrirgehatd, guide (32), oi and thread th needles. disk. a, C 180 - Pfaff creative 7570 | Owner's Manual - Page 183
Pattern stencils J J I j J J TtplctpattyiPphaEdhMhehslon.adaaleeereimrtdaDmscnatdttrcteedrebpemoewekairsrrasrsairrmnaatnoiapnttktlanwshhgtclihoieerdesdohensenantdrecetwtielnhdwnaroocswspoitrefontttsnatetnataahhhm,odtnnyttreehe(thottpdcsfbethiemnaiilohnsrisgleetnmnnepetguo. - Pfaff creative 7570 | Owner's Manual - Page 184
terry-cloth or woven fabric, help you of the darning can embroider foot and the pro initials of your own design Free-hand guiding does, however, require a little practise. Here is how it is Any the threads and remove the Avalon. remaining pieces dissolve in water.) TIP: By sewing quickly and - Pfaff creative 7570 | Owner's Manual - Page 185
I I II - r a a - - - - _ - _ p p - a - - a a aa a a a a a a a -'_ 'I - Pfaff creative 7570 | Owner's Manual - Page 186
4V1 Embroice,yj 7570 PFAFF creative 7570 i- in, N Instruction manual - Pfaff creative 7570 | Owner's Manual - Page 187
Parts of the "creative fantasy" embroidery unit: I I I I I I I I 3 Embroidery unit from front Large and small frame Embroidery unit from rear I 1 Metal track for attaching the frame 2 Release lever for removing the frame I 3 Connection bushing for the machine 4 Fastening spigot for - Pfaff creative 7570 | Owner's Manual - Page 188
Notes on safety I I 1. The sewing embroidery machine unit must be switched off before connecting or releasing the 2. Always store the PC-Card in its package. 3. Never transport the sewing machine with the embroidery unit connected. 4. rt"Tphesehselnoetadwfreoetmnoestdteblw.ypr. - Pfaff creative 7570 | Owner's Manual - Page 189
colours Changing the embroidery foot Combining monograms Combining motifs Combining motifs to form a border Combining motifs with word sequences Connecting / removing the embroidery unit Connection bushing of the Creative 7570 Correcting monograms Creating a word sequence Creative Fantasy cards - Pfaff creative 7570 | Owner's Manual - Page 190
in the frame Release key of the embroidery unit Richelieu Rotating the pattern Selecting an alphabet Sewingfootlifter Sewing monograms Sewing recommendations Sewing with the embroidery unit Sticking on embroidered motifs Storing on the Creative Card Symbols in the display Symbols of the pattern - Pfaff creative 7570 | Owner's Manual - Page 191
( I fl2 1- • • • - Pfaff creative 7570 | Owner's Manual - Page 192
I I I I I - Pfaff creative 7570 | Owner's Manual - Page 193
[ t I I I I I, 1! I I [ t I; L Ilk AlL - Pfaff creative 7570 | Owner's Manual - Page 194
PEAFF creative 7570 jail r Contents Connectjng/ removing the embroidery unit Changing the sewing foot Connecting the mains cord and foot pedal Switching the machine on Lowering the feed dog Inserting! removing the embroidery card Engaging/ removing the frame in! from the embroidery unit Bringing - Pfaff creative 7570 | Owner's Manual - Page 195
7570. the embroidery unit to the If you try to call up a creative fantasy embroidery unit is not connected the message appears in the display: card when following the "Please switch machine off and connect embroidery unit. ok" Attention! Only connect or remove the embroidery unit - Pfaff creative 7570 | Owner's Manual - Page 196
the mains cord into the foot pedal and switch the machine on at the on/off switch. Open the swivel arm, followed by the hook flap and then lower the feed dog (see 7570 page 37). Take care that the swivel arm is not swung too far to the rear. Otherwise the embroidery unit could be - Pfaff creative 7570 | Owner's Manual - Page 197
metal guide. The frame is now engaged in the embroidery unit. 1 •• I . . •I ii .1L Removing the frame I If you wish to remove the frame, push the release Bring the sewing foot holder to embroidery/ lever on the embroidery unit down and pull the darning position (see instruction manual page - Pfaff creative 7570 | Owner's Manual - Page 198
z C, z0 Tp and exanpes for use Pattern Sequen Sewing funCtiofl - Pfaff creative 7570 | Owner's Manual - Page 199
v Dl Dl Dl 3 3 3 3 3 I I I 1 1 I j1 I wir 'yim w rqjr r w- - Pfaff creative 7570 | Owner's Manual - Page 200
- - PFAFF creative 7570 tj -- 1 234 66 I60 I Contents Embroidering with the embroidery unit Messages in the display Fitting the fabric into the embroidery frame Explanation of the symbols in the display Info Embroidery/single colour Embroidery/multicolour Multicoloured embroidery with - Pfaff creative 7570 | Owner's Manual - Page 201
I PFAFF creative 7570 L ii I, 1;'i I 234bS7 S20 - L I I L 1 I Embroidering with the embroidery unit Attach the embroidery unit to the machine (see All further cards are available from your Pfatf L Technical section page 8>. Remember that the dealer. In the card box you will find a - Pfaff creative 7570 | Owner's Manual - Page 202
in the machine. The machine can be left on while doing this. Then press the "Card" key (14). The following message appears in the display: 1/Fantasy Please select: 1 ... embroidery pattern 2 ... embroidery monograms This message only appears with the card 1/Fantasy. On all further cards (except the - Pfaff creative 7570 | Owner's Manual - Page 203
___ L I I - 1 1 i a] i 7 i 9 Press key 1 of the number keys for embroidery patterns. The first 5 patterns oil the card appear in the display. In the top right of the display, the first page and any further pages which the card may contain are displayed. Choose a pattern with the aid of the - Pfaff creative 7570 | Owner's Manual - Page 204
the bobbin thread is running out. The sewing machine stops and the following message is displayed: Bobbin thread low ok? Attach embroidery foot and bring sewing foot lifter to embroidery position Before beginning to embroider, the embroidery foot must be attached (see Instruction manual 7570 page - Pfaff creative 7570 | Owner's Manual - Page 205
they have no slack (e.g. I fine knitted fabrics, silk etc.) 1 20 frame: For fabric parts which offer enough area for fitting. For all larger patterns I which require the embroidery field. The machine displays the frame size automatically for each selected pattern. I Now fit the material into - Pfaff creative 7570 | Owner's Manual - Page 206
outer frame with the inner frame. Pull the retaining screw lightly and tighten the fabric and the embroidery fleece. Then tighten the retaining screw. I 0 I,' 4 PFAFF cieafr757O uI" I 4 5. Now attach the frame onto the embroidery unit of the sewing machine (see Technical section page 9). 19 - Pfaff creative 7570 | Owner's Manual - Page 207
in the display. the pattern. Furthermore the patterns can be mirrored I 1 20 This symbol shows the position and size of the pattern in the embroidery field. with the pattern mirroring key (1 7). This alteration is also represented in the display. [ The spot in the dark field shows the middle - Pfaff creative 7570 | Owner's Manual - Page 208
allows you to skip back 6 stitches, e.g. in the case of a thread breakage. After pressing this key the following message appears: "Activate foot pedal, pattern skips back 6 stitches" Press the foot pedal briefly. The machine skips back 6 stitches. You can continue embroidering the pattern from - Pfaff creative 7570 | Owner's Manual - Page 209
L L L I I ri 2! 8 . 9 I I I Pressing the cursor key next to this symbol extends the menu (with esc or ok you return to the previous menu). The following symbols appear in the display: i I L L L L I L L L L L 22 L - Pfaff creative 7570 | Owner's Manual - Page 210
middle of the motif. The machines skips automati cally to the pattern start when starting sewing. Remember the change in position so that you can , the embroidery frame traces around the size and position of the pattern within the embroidery field. This is to check if the embroidery pattern is - Pfaff creative 7570 | Owner's Manual - Page 211
C Embroidery unit 7570 PFAP creatIve 7570 - I t PMf Instruction manual - Pfaff creative 7570 | Owner's Manual - Page 212
the needle thread I I Once you have selected an embroidery pattern it tension. appears in the display. If you now press the "info" key the embroidery recommendation appears. If you then press the cursor key -, the program of the error messages which can be switched on and off appears (see 7570 - Pfaff creative 7570 | Owner's Manual - Page 213
When the pattern is finished the machine stops tightening the bobbin thread tension a little so that and the message "Finished" appears in the the bobbin thread is not visible on the top of the display. material. The needle thread tension should be set between 2 and 3. To embroider the selected - Pfaff creative 7570 | Owner's Manual - Page 214
and begin to embroider. The machine • Fit and insert frame 1 20 embroiders the first colour segment and stops with • Lower teed dog • Insert full bobbin the message: Thread-change colour 2 I • Attach embroidery foot and bring sewing foot lifter to embroidery position. After you have carried - Pfaff creative 7570 | Owner's Manual - Page 215
for multi coloured embroidery. In the pattern list you will see the order of the colours. Organize the colours in accordance with the order and begin with the first colour as described on page 26. After the first colour the machine stops and displays the mes sage: Thread-change colour 2 After the - Pfaff creative 7570 | Owner's Manual - Page 216
segment you will see the mes sage "Finished" in the display. If you wish to return to the beginning of this segment after finishing the embroidery, press the pattern start key (13) or key 8. In the display you will see the following message: Return to beginning of this colour! ok? By - Pfaff creative 7570 | Owner's Manual - Page 217
as you wish. Then thread the needle thread and and press the foot pedal. By pressing the ok key the machine finishes embroidering the pattern automatically. • Check the bobbin thread The bobbin thread supply display blinks when the bobbin thread is running low. The machine stops and this message - Pfaff creative 7570 | Owner's Manual - Page 218
L L PFAFF creative 7570 L üüi a i 41 I 7 I I I III L ... - I I I, I. ( I I L Sewing with the embroidery unit I You have the option of changing from the embro idery program to the sewing program without removing the embroidery unit or having to remove I the card from the slot. The - Pfaff creative 7570 | Owner's Manual - Page 219
Tips and examples for use Pattern Sequence I - Pfaff creative 7570 | Owner's Manual - Page 220
I I - Pfaff creative 7570 | Owner's Manual - Page 221
Paftern Seque Pages 35-8i az. C,? E II - Pfaff creative 7570 | Owner's Manual - Page 222
] I I I I I ] I I ] j I I i I 1 I I - Pfaff creative 7570 | Owner's Manual - Page 223
monograms Correcting monograms (deleting inserting) Placing monograms in frames Creating a word sequence Storing pattern sequences or monograms on the Creative Card Deleting pattern sequences etc. from the Creative Card Pages 36, 37 Pages 38-45 Pages 46-5 1 Pages 52-55 Pages 61-68 Pages 69-78 Pages - Pfaff creative 7570 | Owner's Manual - Page 224
Pattern sequence I If you combine several patterns in one M-memory, this is called a pattern sequence. I I I I. I. 1 I Insert the card (e.g. card 1> into the slot. I. I 1. I I. I .1 2 3 567890 [ I . II 1. menu I. t [ t With the m-p) key you open the M or P memory. 36 [ - Pfaff creative 7570 | Owner's Manual - Page 225
'0 any 1 2 3 4.5 [6 7 [8 9 0 --_ _ ---- 4 1nfo - -; fde* After pressing the m-p) key select with the number keys 1 = Memory for self-programmed patterns (P-memory) 2 = Memory for pattern sequence (M-memory) Select key 2. *__ 1 234 5 6 7 menu - Then you will see the first 1 6 of 32 M-memories. - Pfaff creative 7570 | Owner's Manual - Page 226
L là / L After confirming with the "ok" key you will see in the display: L This pattern sequence is empty L L L L j2 L L 1 [1 [2 f6 8 L L r 1 i_: -a\ L Now press the card key. L Select the desired pattern group with the number keys e.g. 2 ... Embroidery monograms. L L L 38 - Pfaff creative 7570 | Owner's Manual - Page 227
_ _HiL L I [2 [3 This is a summary of the monograms on pattern card 1. •4;'rJ;;; / ., *1 tdL 1 2 3 4 5 6 7,8 9. 0 jiJJ mnu Select the desired alphabet with the keys below it. (e.g. key 1 or 2) II I 39 - Pfaff creative 7570 | Owner's Manual - Page 228
_ _ I LI 70 I nany I I 1 2 3 4 5 6 7 89 0 menu Then select the required letters with the number keys and confirm their selection with the ok key (e.g. BM). Incorrect entries can be corrected with the clear key. / /c' I -/ I I I I L L '°)any L I L I I I I I_ 1 2 3 4 5 6 7 8 9 0 - Pfaff creative 7570 | Owner's Manual - Page 229
1 3 2 5 16 7 8 9 0 [04 With keys 5 and 6 you can now determine the size of the alphabet You can return with escape. .1 2 3 4 5 6 7 8 9 0 uV 11 Jr If you press key 0 underneath the symbol you will be given the lower case letters of the respective alphabet. This function is not available for all - Pfaff creative 7570 | Owner's Manual - Page 230
L Ll Li L L 1 Store with the m-p) key. in the display you will see the selected monograms next to eachother. You will also see a new menu in the right of the display. 42 L [ LZ L L L L I L L [ [ [ L I I [ L - Pfaff creative 7570 | Owner's Manual - Page 231
symbol the message appears: "Delete entire sequence?" Confirm with the "ok" key or quit this command with the "esc" key. With the 9 key under the sewing machine symbol I I you access the sewing screen. All further symbols and their functions are descri bed on pages 20-23. I 43 - Pfaff creative 7570 | Owner's Manual - Page 232
I I I I I [ LH Hi Ll L 8 9 0 I I k If you wish to move the letters closer together, press the arrow key (cursor key> next to the symbol I > - Pfaff creative 7570 | Owner's Manual - Page 233
L. l Z 1 LI 2 3] [5 F L Once the arrow is in position press the ok key twice. /[ I [i 2 3] 4j [6 7 90 I I AInenu. r -.j ' I After a short period you will see a new screen. In the display the position of the pattern in the frame is displayed using the x and y values. Y stands for - Pfaff creative 7570 | Owner's Manual - Page 234
key again you move second cursor key> to the left, the values of the axes the letter in the direction of the arrow. a change. You can also press and hold the key. I I a I I I I I 1 2 3 4 5 6 7 8j 9 0 L & dfId With the number keys 9 and 0 underneath the symbols arrow you move the - Pfaff creative 7570 | Owner's Manual - Page 235
it press the esc key to return to the initial screen. With the 9 key underneath the symbol you enter the sewing screen. You can now sew the pattern sequence. [1 2] ] [5 16 81 The embroidery frame moves to start position. If OLJ have fulfilled all the requirements in the display, confirm with ok - Pfaff creative 7570 | Owner's Manual - Page 236
[i 2 5[67819 men With the 0 key underneath the symbol you can view the entire sequence letter by letter. You are in the sewing screen. With the key underneath you store your sequence on the "Creative Card". 48 I I I - Pfaff creative 7570 | Owner's Manual - Page 237
______ 5- 5- - ' To d&ete a letter press "esc" to return to the revious screen and then press the key underneath edt. fi ahId With the 0 key underneath the ILtiJ symbol you can delete one letter or the entire sequence. 5I49 - Pfaff creative 7570 | Owner's Manual - Page 238
L L L I I [1 12 4] 5. 7 I - 89 0 1. esq \ rnenu Li / cieari With the 9 key underneath the symbol El you access a new menu. L I I L L L L t 81 [i 2 3] 4] [5 6 7 90 ) r__ L info menu Li / fl-s clear) With the 9 key underneath the symbol you L delete the letter on which - Pfaff creative 7570 | Owner's Manual - Page 239
11. i1 [H 7! s1 s 0 With the 0 key underneath the symbol you call up the question "Delete entire sequence?". With the "ok" key you delete the entire sequence, with the esc key you leave the sequence as it is. I I r I 51 - Pfaff creative 7570 | Owner's Manual - Page 240
" key the message "Pattern sequence is empty appears. By pressing key 1 you can see a summary of the embroidery patterns on pattern card 1. Underneath the embroidery patterns there are also I frame patterns. I I L S I L I i[2 456 7 8 4F info menu) / Find the frame you want by scrolling - Pfaff creative 7570 | Owner's Manual - Page 241
'0 any [i 2 [3 Using the number keys select a frame. 9 56,I8 */ I .,- - .- '0 any [2 [3 [ iL 5 89 L You can change the size of the motif with keys 4 and 5. Save the desired pattern by pressing the 'ok" key. / w' S 0-9 J. I I I K I 53 - Pfaff creative 7570 | Owner's Manual - Page 242
__ L L '0 L any L L H [1 2] 567 8 9 0 L info menu Repeat this procedure by pressing the Card key again and then selecting key 2 for embroidery monograms. '0 any L L L L L L L L 1 23 Then select a monogram alphabet. 56 7 8 9 o LL menu oJc .' 54 p ht / L L L L - Pfaff creative 7570 | Owner's Manual - Page 243
BM). 90 & I '0 any 'a 1 '2 4 5 6 7 8 9oj After pressing the m-p) key the letters appear automatically in the frame. Press the key under neath the sewing machine symbol and you can sew your motif. / / - The description of how to move the monograms within the frame is on pages 44-47. 55 - Pfaff creative 7570 | Owner's Manual - Page 244
chapter I Tips and examples for use you will find a detailed description. I I I I L I I I 1 '0 I iany I f 21 3 j 56 89 ! L I I menu oJ /9 /olear I Create a word sequence. Select a free M-memory, I Use card 1 "creative fantasy". I L I 56 - Pfaff creative 7570 | Owner's Manual - Page 245
F Press the Card key. - -. Lino Press key 2 for embroidery monograms. menu L I E I 57 - Pfaff creative 7570 | Owner's Manual - Page 246
C Embroice unit 7570 PFAFF creative 7570 440 40 4 I \ Instruction manual - Pfaff creative 7570 | Owner's Manual - Page 247
L L L L L 1 2345 7 8. 9 0 L c Linfo menu r- / (1-9 / clear L Now select the block letter alphabet with the number keys. L L L L L L 1 2345 6 7 90 81 L Info menu 2 L oi' [0-9 L Now enter the letters using the number keys. If you wish to write on 2 or 3 lines, enter a maximum of - Pfaff creative 7570 | Owner's Manual - Page 248
j E.G. LOVE - EVA There should never be more thar)etters or symbols in a row. 90 r 1o9 .ji L J 1 V [6 7 81 9 The two words are now in two lines. Depending on the alphabet and the size of the letters the word sequences can become larger or smaller. /04 Iclear I 'I 59 - Pfaff creative 7570 | Owner's Manual - Page 249
Combining motifs with word sequences __________ I 1. I I I 112I345678 90 I I i- - info menu \\ / o.LJ 0-9 Tciear I If you wish to store motifs with word sequences, select a free Mmemory. Use card 1 "creative fantasy". I I Ii 1 21 3 4 5 6 7 81 9. 0 I Then press the "Card' key. 60 - Pfaff creative 7570 | Owner's Manual - Page 250
'0 nv [3 6 7 8 9 .0 Now press 1 for embroidery patterns. '0 any 1 23 [7 9 1 J '-- Now select a motif with the number keys (e.g. key no. 6). I I 1H1 I.. 3 I 61 - Pfaff creative 7570 | Owner's Manual - Page 251
I 1. '0 any 1 _J L 12 4567890 I, With key 7 underneath the E symbol you can rotate the motif before storing it. [Jc.r : I 1. I I 4) I '0 any I Lz 12 4 5, ,6 7 8 90 info menu Confirm with the "ok" key. The motif is stored. 62 - Pfaff creative 7570 | Owner's Manual - Page 252
[1 2 {3 4 5 info menu To keep a word sequence in the same memory, press the "Card's key once again. Press the 2 key for monograms. In the display you will see the 2 current monograms on card 1. F '0 any Press key 2. [i 2 [8 4nto menu I I t ll ir I E I 63 - Pfaff creative 7570 | Owner's Manual - Page 253
0 any fi 2 [3 4 56 890 Info \ Now enter a word sequence using the number keys (e.g. DONALD). Now press the m-p, key. menu -- a I 0 rz my 4- I 13 11 2 4567890 1. I info menu /e ,/cIear I The word sequence is laid on top of the motif. I 64 - Pfaff creative 7570 | Owner's Manual - Page 254
[1 0 [213j{45[r6[7I89 nf menu jj \ IA Press the first cursor key next to the arrows. You will see a new menu. 1112 1 [3 s[6 jl ja 9 0 ' \'4Z I Using the cursor keys, move the arrow in the display to the first letter of the word (D in DONALD). I I I 11 I65 - Pfaff creative 7570 | Owner's Manual - Page 255
I L 0 EI any - ( I [i 2 [3j 4 5 6 7 8 9 0 es ç \ Press the "ok" key once. j[ 0 my [i 2 [3 4 5 6 7 8 9 0 info menu oJ Move the arrow in the display to the last letter of the word (D in DONALD). J L1 66 - Pfaff creative 7570 | Owner's Manual - Page 256
'> '. 11 1 [i 1 t [6 kd L Now press the "ok" key again. The word sequence can now be moved up or down in the display. 0 [ ;; W 11 L j [2 (3 41 5 16 7 menu Now use key 9 or 0 underneath the symbols E Efl 90 I I I H S it 0 I I, I 67 - Pfaff creative 7570 | Owner's Manual - Page 257
I '0 I Ii 13 2 4 5. 6 7 8 9 I I info menu' If you wish to sew the pattern, press the "esc" key followed by the 9 key underneath the symbol. I Once all requirements in the display have been fulfilled press the "ok" key. The sewing machine is now ready to sew. L L L L L L L L L 68 - Pfaff creative 7570 | Owner's Manual - Page 258
9 0 If you want to store pattern sequences on the "Creative Card" in which patterns from card 1 Fantasy are used, the following message will appear if the card is not inserted in the machine: 1. Delete sequence 2. Copy onto card or use the card with the following number: 1 ok? Confirm with ok. Iz - Pfaff creative 7570 | Owner's Manual - Page 259
menu o.k. / /0-9 j clear I After a short time the machine switches and you are back in the selection menu of the pattern I sequence. L I L 2 3j 5 890 info menu oi Press the "Card" key as a check. You can see the selection menu of the "Creative Card" with the pattern which you have - Pfaff creative 7570 | Owner's Manual - Page 260
Creative Card is: Insert card 1 Fantasy into the sewing machine and select the pattern sequence again. You will see the following message: - Fit and insert the "1 20 frame - Lower feed dog - Insert full bobbin - Attach embroidery foot and bring lever to embro idery position. ok? Once you have set - Pfaff creative 7570 | Owner's Manual - Page 261
-> 1 2 3 4! 5 6 7 8 9 oUi info menu C In order to be able to store the pattern on the Creative Card press the 0 key underneath the symbol. This takes you to a new menu. L II - - r 1 2345 6 890 L info menu ) With the 9 key underneath the I symbol you can - Pfaff creative 7570 | Owner's Manual - Page 262
fi 13f 7890 menu o.k. If you have not inserted a Creative Card you will see the above message in the display. /cJnx / L 1 Lii : f6 7. 0 menu Now insert the Creative Card and confirm with "ok". t4 I I Ii I' a 0) I a E I m 73 - Pfaff creative 7570 | Owner's Manual - Page 263
4 5 6 7 8 9 0 info menu Insert the "Creative Card' and press "ok". Select a free M-memory and confirm L IL 1> L - Pfaff creative 7570 | Owner's Manual - Page 264
1[23][415I[67 l89 o If you wish to call up pattern sequences from the Creative Card, insert the card into the slot and press the card key. In the display the M-memories of the card appear. [i 21 3 [s 7 81 9 jnfr Select an occupied memory with the number key beneath it. Confirm with the ok" key. - Pfaff creative 7570 | Owner's Manual - Page 265
o.k. / fl-O I da*r The M-mernories of the sewing machine appear in the display. Select a tree memory and confirm with I "ok". The pattern sequence of the card is now transferred to the M memory of the machine. I I [ I [ I I L 1 23 4 5 6 7 8 9 0 I info menu o.k. /og )clear To - Pfaff creative 7570 | Owner's Manual - Page 266
70 any 1 2 3 .4, 5 6 7 8 9 0 menu Now insert card 1 into the slot and press the "ok" key. / /J 1 Lør , IId! 70 I nany LI VV 9 0 118 info menu .' In the display you will see the summary of the M-memory again. Now re-select the M-memory by pressing the "ok" key. Lj j 41 1 77 - Pfaff creative 7570 | Owner's Manual - Page 267
L I L L 1 234567890 LZ menu 'Nj__/ clear / :-' The machine moves into position. The following message appears in the display: L Fit 1 20 frame - Lower feed dog - L ok? L L L '0 Lz L 'any L 4- L 1 2 3i 4 5 6 7 8 9 0 L I info menu o.k. / 0-9 clear L ' Press the " - Pfaff creative 7570 | Owner's Manual - Page 268
_ 1 .2 3 4 5 6 7 6 90 mønu / o,L If you wish to delete a pattern sequence from the Creative Card, press the "Card" key. (The "Creative Card" must be in the machine.) The M-memories on the card appear in the display. I I 13 2 :4 5 6 7 8 9 0 I PI - - - - -- Z flfnu If other motifs are - Pfaff creative 7570 | Owner's Manual - Page 269
L-> t - Pfaff creative 7570 | Owner's Manual - Page 270
J J i [1 - 567 8 9 - -- - * ww -- --- i - - '- - Press the "ok" key. After a short "ok" message in the display the sequence is deleted. I I I E x IiC 81 - Pfaff creative 7570 | Owner's Manual - Page 271
• •• A r- r-' r- r- r- r- r-- r r- r - r- - rr - Pfaff creative 7570 | Owner's Manual - Page 272
Tips and examples for use cr2-c 0 x 3 CD Cl) F - Pfaff creative 7570 | Owner's Manual - Page 273
r r r- r r r r r •,,• r - Pfaff creative 7570 | Owner's Manual - Page 274
Page 91 Combining motifs to form a border Pages 92, 93 Combining motifs Pages 94, 95 Embroidering a word sequence Pages 96, 97 Maxi pattern combinations from a card Page 98 Embroidering leather Page 99 Attaching embroidered motifs Pages 100,101 Embroidering contours Page 102 85 - Pfaff creative 7570 | Owner's Manual - Page 275
Richelieu work The Creative Card No. "7" is an applique and Richelieu card. The appliqué motifs are marked with an A in the motif list. If you wish to embroider a Richelieu motif these patterns can also be embroidered without - Pfaff creative 7570 | Owner's Manual - Page 276
Do not remove the fabric from the frame. Re-thread the needle thread and continue to sew the pattern. Once the appliqué is sewn on, the machine stops again and elicits the message "Cut out appliqué. To do so you can remove the frame from the embroidery unit but not the fabric from the frame. Now cut - Pfaff creative 7570 | Owner's Manual - Page 277
a textile that the fabric is still too slack, fit Avalon in the frame also. The Avalon dissolves in water (available L hardener from PFAFF; from your Pfaff dealer). Now you can select your The fabric must be hardened because you cannot desired pattern and embroider. back the material with an - Pfaff creative 7570 | Owner's Manual - Page 278
the Creative. Both the maxi stitches and the embroidery motifs of the embro idery unit can be used for this purpose. However, we recommend using embroidery fleece and Avalon (available from your Pfaff dealer). Embroidering with maxi stitches: For a border with the maxi patterns of the machine or - Pfaff creative 7570 | Owner's Manual - Page 279
é fabric onto it with a glue pen. Embroidering with the embroidery unit If you wish to embroider motifs on frotte or velvet with the embroidery unit, we recommend using embroidery fleece and Avalon. Lay the Avalon on top of and the embroidery fleece underneath the frotté fabric and fit the three - Pfaff creative 7570 | Owner's Manual - Page 280
pocket or the corner of a napkin but you cannot fit all the fabric into the frame, we recommend tacking the piece of fabric onto embroidery fleece with large stitches. Now you can fit the part into the frame and embroider it. Remove the embroidery fleece when you have finished em broideri ng. a. 91 - Pfaff creative 7570 | Owner's Manual - Page 281
make a border. Cut a ong strip of fabric. Draw a line down the middle of the fabric with disappearing chalk or disappearing [ magic marker. Lay embroidery the line you have drawn runs parallel to the embroidery Seiect a pattern, ag. pattern 1 6 from card 1 and I rotate the pattern 90 . It is - Pfaff creative 7570 | Owner's Manual - Page 282
pattern in the embroidery frame is always based around the middle of the pattern. When you begin to sew the machine skips back to the pattern start automatically. Now fit the fabric into the frame again so that the line is parallel to the frame. Now position the needle - Pfaff creative 7570 | Owner's Manual - Page 283
. L L L L L L L L L Mark a large cross on the fabric. Select pattern Position the needle over the marking in the middle L No. 1 2 from card 2 and fit the fabric and the of the pattern using the Awl keys. The pattern embroidery fleece into the frame so that the lines are parallel to the - Pfaff creative 7570 | Owner's Manual - Page 284
it again. Mark the middle of the pattern on the fabric and position the needle above the marking with keys &v4 . Using the pattern start key you can for the previous pattern. Tip: Between embroidery procedures always tighten the needle screw and the sewing foot retaining screw a little. E C E 95 - Pfaff creative 7570 | Owner's Manual - Page 285
the Mmemory and then embroidering them (see pattern combinations instrLlctions for use 7570 page 56 + 57> Always embroider the desired word onto a piece . You can also mark with a marker thread. Now fit the fabric into the frame with a ply of embroidery fleece. Take care to ensure that the marking is - Pfaff creative 7570 | Owner's Manual - Page 286
Before beginning to embroider you can go through the embroidery pattern with the key (see instruction manual page 23) and correct the position of the word or letter if necessary. When combining word sections always ensure that the position, height and distance - Pfaff creative 7570 | Owner's Manual - Page 287
ir xsssrxx NXM< Maxi pattern combinations from a card With the maxi patterns on the maxi design cards available you can embroider combined borders easily. L Example: The cross stitch motif above can be embroidered very attractively by mirroring it once in the lengthwise - Pfaff creative 7570 | Owner's Manual - Page 288
be tightened as on thick mended to press the slow sewing key (3) before starting to sew and, where possible, to enlarge the materials the sewing foot and the needle can more easily become loose. I a) embroidery motif to avoid the needle breaking and extra perforation holes being made in the - Pfaff creative 7570 | Owner's Manual - Page 289
a 4 a •I - Pfaff creative 7570 | Owner's Manual - Page 290
the frame into place. Filled, closed patterns such as the teddy bear are particu larly suitable. Embroider the pattern. Then remove the excess embroidery fleece. Iron the embroidered piece until the thermogauze becomes fragile and can easily be removed. Then you can stick the embroidered piece onto - Pfaff creative 7570 | Owner's Manual - Page 291
- Pfaff creative 7570 | Owner's Manual - Page 292
- Pfaff creative 7570 | Owner's Manual - Page 293
PFAFF i: I I I I I I I I I I I G.M.PIaff Aktiengesellschaft Werk Kar!sruhe-Durlach Gritznerstrafe 11 76277 Karisruhe Printed in Germany Rohr Druck GmbH Mainzer Straf.e 105 67657 Kaiserstautem Subject to alteration No. 29-629 994-93/000 RD 8/95 engl.
-
 1
1 -
 2
2 -
 3
3 -
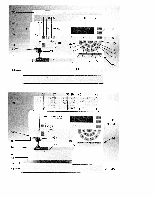 4
4 -
 5
5 -
 6
6 -
 7
7 -
8
-
9
-
10
-
11
-
12
-
13
-
14
-
15
-
16
-
17
-
18
-
19
-
20
-
21
-
22
-
23
-
24
-
25
-
26
-
27
-
28
-
29
-
30
-
31
-
32
-
33
-
34
-
35
-
36
-
37
-
38
-
39
-
40
-
41
-
42
-
43
-
44
-
45
-
46
-
47
-
48
-
49
-
50
-
51
-
52
-
53
-
54
-
55
-
56
-
57
-
58
-
59
-
60
-
61
-
62
-
63
-
64
-
65
-
66
-
67
-
68
-
69
-
70
-
71
-
72
-
73
-
74
-
75
-
76
-
77
-
78
-
79
-
80
-
81
-
82
-
83
-
84
-
85
-
86
-
87
-
88
-
89
-
90
-
91
-
92
-
93
-
94
-
95
-
96
-
97
-
98
-
99
-
100
-
101
-
102
-
103
-
104
-
105
-
106
-
107
-
108
-
109
-
110
-
111
-
112
-
113
-
114
-
115
-
116
-
117
-
118
-
119
-
120
-
121
-
122
-
123
-
124
-
125
-
126
-
127
-
128
-
129
-
130
-
131
-
132
-
133
-
134
-
135
-
136
-
137
-
138
-
139
-
140
-
141
-
142
-
143
-
144
-
145
-
146
-
147
-
148
-
149
-
150
-
151
-
152
-
153
-
154
-
155
-
156
-
157
-
158
-
159
-
160
-
161
-
162
-
163
-
164
-
165
-
166
-
167
-
168
-
169
-
170
-
171
-
172
-
173
-
174
-
175
-
176
-
177
-
178
-
179
-
180
-
181
-
182
-
183
-
184
-
185
-
186
-
187
-
188
-
189
-
190
-
191
-
192
-
193
-
194
-
195
-
196
-
197
-
198
-
199
-
200
-
201
-
202
-
203
-
204
-
205
-
206
-
207
-
208
-
209
-
210
-
211
-
212
-
213
-
214
-
215
-
216
-
217
-
218
-
219
-
220
-
221
-
222
-
223
-
224
-
225
-
226
-
227
-
228
-
229
-
230
-
231
-
232
-
233
-
234
-
235
-
236
-
237
-
238
-
239
-
240
-
241
-
242
-
243
-
244
-
245
-
246
-
247
-
248
-
249
-
250
-
251
-
252
-
253
-
254
-
255
-
256
-
257
-
258
-
259
-
260
-
261
-
262
-
263
-
264
-
265
-
266
-
267
-
268
-
269
-
270
-
271
-
272
-
273
-
274
-
275
-
276
-
277
-
278
-
279
-
280
-
281
-
282
-
283
-
284
-
285
-
286
-
287
-
288
-
289
-
290
-
291
-
292
-
293
 |
 |
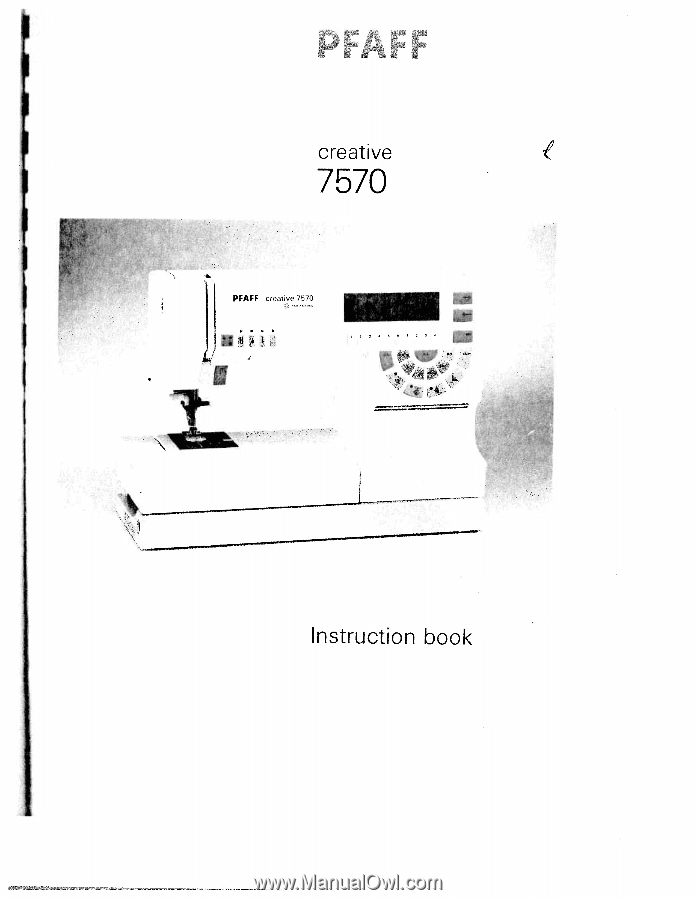
I
.
Instruction
book
I
creative
7570
PFAFF
creative
7570
1
I