Pfaff creative 7570 Owner's Manual - Page 132
F->
 |
View all Pfaff creative 7570 manuals
Add to My Manuals
Save this manual to your list of manuals |
Page 132 highlights
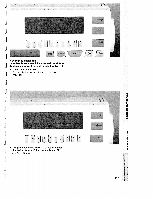
u. Round buttonhole Important! The round buttonhole should be pla ced with the rounding facing the edge. The se wing of the buttonhole, however, begins at the bartack. Mark the length of the buttonholes on the fabric first, making sure to measure from the starting point inwards. Always sew the buttonholes from the inside out wards towards the edge. The round buttonhole is automatically sewn between a length of 7 and 40 mm. Press key 0-9. • Select buttonhole No. 46-48. • Press the "o.k.' key. a) 0 0 C F-> 0 ri ri [1 Hi [8] Hi -_i EZ.. • A pre-programmed buttonhole length of 22 mm appears on the display. If you wish, you can alter this length with the number keys 1-0. [Z1 130
-
 1
1 -
2
-
3
-
4
-
5
-
6
-
7
-
8
-
9
-
10
-
11
-
12
-
13
-
14
-
15
-
16
-
17
-
18
-
19
-
20
-
21
-
22
-
23
-
24
-
25
-
26
-
27
-
28
-
29
-
30
-
31
-
32
-
33
-
34
-
35
-
36
-
37
-
38
-
39
-
40
-
41
-
42
-
43
-
44
-
45
-
46
-
47
-
48
-
49
-
50
-
51
-
52
-
53
-
54
-
55
-
56
-
57
-
58
-
59
-
60
-
61
-
62
-
63
-
64
-
65
-
66
-
67
-
68
-
69
-
70
-
71
-
72
-
73
-
74
-
75
-
76
-
77
-
78
-
79
-
80
-
81
-
82
-
83
-
84
-
85
-
86
-
87
-
88
-
89
-
90
-
91
-
92
-
93
-
94
-
95
-
96
-
97
-
98
-
99
-
100
-
101
-
102
-
103
-
104
-
105
-
106
-
107
-
108
-
109
-
110
-
111
-
112
-
113
-
114
-
115
-
116
-
117
-
118
-
119
-
120
-
121
-
122
-
123
-
124
-
125
-
126
-
 127
127 -
 128
128 -
 129
129 -
 130
130 -
 131
131 -
 132
132 -
 133
133 -
 134
134 -
 135
135 -
 136
136 -
 137
137 -
138
-
139
-
140
-
141
-
142
-
143
-
144
-
145
-
146
-
147
-
148
-
149
-
150
-
151
-
152
-
153
-
154
-
155
-
156
-
157
-
158
-
159
-
160
-
161
-
162
-
163
-
164
-
165
-
166
-
167
-
168
-
169
-
170
-
171
-
172
-
173
-
174
-
175
-
176
-
177
-
178
-
179
-
180
-
181
-
182
-
183
-
184
-
185
-
186
-
187
-
188
-
189
-
190
-
191
-
192
-
193
-
194
-
195
-
196
-
197
-
198
-
199
-
200
-
201
-
202
-
203
-
204
-
205
-
206
-
207
-
208
-
209
-
210
-
211
-
212
-
213
-
214
-
215
-
216
-
217
-
218
-
219
-
220
-
221
-
222
-
223
-
224
-
225
-
226
-
227
-
228
-
229
-
230
-
231
-
232
-
233
-
234
-
235
-
236
-
237
-
238
-
239
-
240
-
241
-
242
-
243
-
244
-
245
-
246
-
247
-
248
-
249
-
250
-
251
-
252
-
253
-
254
-
255
-
256
-
257
-
258
-
259
-
260
-
261
-
262
-
263
-
264
-
265
-
266
-
267
-
268
-
269
-
270
-
271
-
272
-
273
-
274
-
275
-
276
-
277
-
278
-
279
-
280
-
281
-
282
-
283
-
284
-
285
-
286
-
287
-
288
-
289
-
290
-
291
-
292
-
293
 |
 |

u
.
Round
buttonhole
Important!
The
round
buttonhole
should
be
pla
ced
with
the
rounding
facing
the
edge.
The
se
wing
of
the
buttonhole,
however,
begins
at
the
bartack.
Mark
the
length
of
the
buttonholes
on
the
fabric
first,
making
sure
to
measure
from
the
starting
point
inwards.
Always
sew
the
buttonholes
from
the
inside
out
wards
towards
the
edge.
The
round
buttonhole
is
automatically
sewn
between
a
length
of
7
and
40
mm.
Press
key
0—9.
•
Select
buttonhole
No.
46—48.
•
Press
the
“o.k.’
key.
•
A
pre-programmed
buttonhole
length
of
22
mm
appears
on
the
display.
If
you
wish,
you
can
alter
this
length
with
the
number
keys
1—0.
a)
0
0
C
0
F->
ri
[1
Hi
ri
[8]
Hi
-_i
EZ..
[Z1
130