Pfaff creative 7570 Owner's Manual - Page 112
Darning, straight, stitch, Program, position, Important
 |
View all Pfaff creative 7570 manuals
Add to My Manuals
Save this manual to your list of manuals |
Page 112 highlights
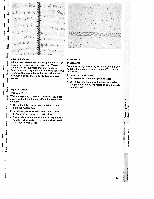
H L' L - II I -- ,1 j • -- -- 1. I I '. Darning with straight stitch Program 00 Fit darning toot No. 6. Set the needle at its highest position by turning the handwheel, and push the pin of the darning foot fully into the hole of the sewing foot holder slightly pressing the darning foot between thumb and forefinger. When doing this, the guide fork should place itself around the presser bar and the wire must be behind the fixing screw. • Now guide the fabric back and forth evenly; the length of the darn will be set by the size of the hole. As you are determining the stitch length yourself while sewing with the feed dog lowered, you should sew at an even speed. When you have reached the width of the dam aged area, darn over the damaged area again from right to left. Darning position: This guarantees a durable darn. Lower the presser foot lifter pressing it lightly to the rear until it snaps into the darning position. Important Only in this position you have the optimum thread tension for darning. • Place the darning work in the darning hoop. TIP: The faster you sew, the easier and more even the darning will be. It you are moving the workpiece too slowly, small knots will appear on the wrong side of the fabric. • Lower the feed dog. C) • Pull up the bobbin thread and hold the threads I when you start sewing. Cu 110
-
 1
1 -
2
-
3
-
4
-
5
-
6
-
7
-
8
-
9
-
10
-
11
-
12
-
13
-
14
-
15
-
16
-
17
-
18
-
19
-
20
-
21
-
22
-
23
-
24
-
25
-
26
-
27
-
28
-
29
-
30
-
31
-
32
-
33
-
34
-
35
-
36
-
37
-
38
-
39
-
40
-
41
-
42
-
43
-
44
-
45
-
46
-
47
-
48
-
49
-
50
-
51
-
52
-
53
-
54
-
55
-
56
-
57
-
58
-
59
-
60
-
61
-
62
-
63
-
64
-
65
-
66
-
67
-
68
-
69
-
70
-
71
-
72
-
73
-
74
-
75
-
76
-
77
-
78
-
79
-
80
-
81
-
82
-
83
-
84
-
85
-
86
-
87
-
88
-
89
-
90
-
91
-
92
-
93
-
94
-
95
-
96
-
97
-
98
-
99
-
100
-
101
-
102
-
103
-
104
-
105
-
106
-
 107
107 -
 108
108 -
 109
109 -
 110
110 -
 111
111 -
 112
112 -
 113
113 -
 114
114 -
 115
115 -
 116
116 -
 117
117 -
118
-
119
-
120
-
121
-
122
-
123
-
124
-
125
-
126
-
127
-
128
-
129
-
130
-
131
-
132
-
133
-
134
-
135
-
136
-
137
-
138
-
139
-
140
-
141
-
142
-
143
-
144
-
145
-
146
-
147
-
148
-
149
-
150
-
151
-
152
-
153
-
154
-
155
-
156
-
157
-
158
-
159
-
160
-
161
-
162
-
163
-
164
-
165
-
166
-
167
-
168
-
169
-
170
-
171
-
172
-
173
-
174
-
175
-
176
-
177
-
178
-
179
-
180
-
181
-
182
-
183
-
184
-
185
-
186
-
187
-
188
-
189
-
190
-
191
-
192
-
193
-
194
-
195
-
196
-
197
-
198
-
199
-
200
-
201
-
202
-
203
-
204
-
205
-
206
-
207
-
208
-
209
-
210
-
211
-
212
-
213
-
214
-
215
-
216
-
217
-
218
-
219
-
220
-
221
-
222
-
223
-
224
-
225
-
226
-
227
-
228
-
229
-
230
-
231
-
232
-
233
-
234
-
235
-
236
-
237
-
238
-
239
-
240
-
241
-
242
-
243
-
244
-
245
-
246
-
247
-
248
-
249
-
250
-
251
-
252
-
253
-
254
-
255
-
256
-
257
-
258
-
259
-
260
-
261
-
262
-
263
-
264
-
265
-
266
-
267
-
268
-
269
-
270
-
271
-
272
-
273
-
274
-
275
-
276
-
277
-
278
-
279
-
280
-
281
-
282
-
283
-
284
-
285
-
286
-
287
-
288
-
289
-
290
-
291
-
292
-
293
 |
 |
