Philips DVDR75 User manual
Philips DVDR75 Manual
 |
View all Philips DVDR75 manuals
Add to My Manuals
Save this manual to your list of manuals |
Philips DVDR75 manual content summary:
- Philips DVDR75 | User manual - Page 1
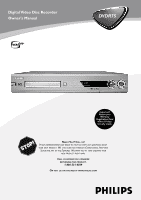
Digital Video Disc Recorder Owner's Manual ® DVDR75 Important! Return your Warranty Registration Card within 10 days. See why inside. NEED HELP? CALL US! PHILIPS REPRESENTATIVES ARE READY TO HELP YOU WITH ANY QUESTIONS ABOUT YOUR NEW PRODUCT. WE CAN GUIDE YOU THROUGH CONNECTIONS, FIRST-TIME SETUP, - Philips DVDR75 | User manual - Page 2
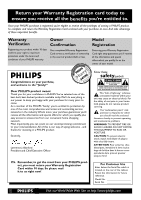
best-built, best-backed products available today.We'll do everything in our power to keep you happy with your purchase for many years to come. As a member of the PHILIPS "family," you're entitled to protection by one of the most comprehensive warranties and outstanding service maintenance problems. - Philips DVDR75 | User manual - Page 3
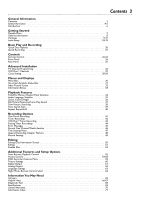
Screen 50 Editing 51 Finalize Disc 52 Additional Features and Setup Options Auto Resume, Playback Control 53 Access Control 54-58 DVD Recorder Features Menu 59 Picture Settings 60 Digital Output 61 Analog Output 62 Language Settings 63 Night Mode, Remote Control Used 64 Information You - Philips DVDR75 | User manual - Page 4
Code (NEC), which provides guidelines for proper grounding and, in particular, specifies that the cable ground shall be connected to the grounding system of the building, as close to the point of cable entry as practical. Declaration of Conformity Model Number: DVDR75 Trade Name: Philips - Philips DVDR75 | User manual - Page 5
: a) When the power supply cord or plug is damaged, b) If liquid has spilled or objects have fallen into the product, c) If the product has been exposed to rain or water, d) If the product does not operate normally by following the operating instructions. Adjust only those controls covered by the - Philips DVDR75 | User manual - Page 6
/Step-by-Step/Zoomed Play q Progressive Scan compatibility q Repeat and Repeat A-B playback q Time Search q VCR Plus+ Programming Package Contents q DVD Recorder q Remote control with two AA batteries q AC power cord q One blank Philips DVD+RW q One RF coaxial cable (black with silver tip, with - Philips DVDR75 | User manual - Page 7
DVD Region Codes and Color Systems DVDs must meet the requirements for Region Codes and Color Systems before you can use them with the DVD Recorder. DVDs must be labelled for ALL regions or for Region 1 in order to play on this DVD Recorder.You cannot play Discs that are labeled for other regions - Philips DVDR75 | User manual - Page 8
by pressing SYSTEM MENU on the remote control. See page 30. Even if a feature is set up in the Recorder's menu, it will not be available if the current Disc does not include that feature. DVD Player Upgrades If a DVD does not play properly, please contact Philips at 1-800-531-0039 for assistance - Philips DVDR75 | User manual - Page 9
your TV remote control may have a button or switch that lets you choose the Video In channel directly. See your TV manual for details. Or, go to your lowest TV channel and change channels down until you see the blue Philips DVD background picture on the TV screen. q Connect the Recorder directly to - Philips DVDR75 | User manual - Page 10
RF coaxial cable to the Antenna In jack on your TV. Your TV's Antenna In jack may be labelled RF In,Antenna In, or 75 ohm. Check your TV's manual for details. 3 Connect the supplied power cord to the MAINS (AC Power) jack on the rear of the DVD Recorder. Connect the power cords of the Recorder and - Philips DVDR75 | User manual - Page 11
RF In or 75 ohm. Check your TV manual for details. Or, use an Audio/Video connection between the Recorder and the TV. See pages 12-14. 4 Connect the supplied power cord to the MAINS (AC Power) jack on the rear of the DVD Recorder. Connect the power cords of the Recorder, Cable Box/Satellite Receiver - Philips DVDR75 | User manual - Page 12
cable to the Recorder's TV jack and to the Antenna In jack on your TV. Your TV's Antenna In jack may be labelled RF In,Antenna In, or 75 ohm. Check your TV's manual for details. 5 Connect the supplied power cord to the MAINS (AC Power) jack on the rear of the DVD Recorder. Connect the power cords - Philips DVDR75 | User manual - Page 13
RF coaxial cable to the Antenna In jack on your TV. Your TV's Antenna In jack may be labelled RF In,Antenna In, or 75 ohm. Check your TV's manual for details. 5 Connect the supplied power cord to the MAINS (AC Power) jack on the rear of the DVD Recorder. Connect the power cords of the Recorder and - Philips DVDR75 | User manual - Page 14
RF coaxial cable to the Antenna In jack on your TV. Your TV's Antenna In jack may be labelled RF In,Antenna In, or 75 ohm. Check your TV manual for details. 5 Connect the supplied power cord to the MAINS (AC Power) jack on the rear of the DVD Recorder. Connect the power cords of the Recorder and the - Philips DVDR75 | User manual - Page 15
RF coaxial cable to the Antenna In jack on your TV. Your TV's Antenna In jack may be labelled RF In,Antenna In, or 75 ohm. Check your TV manual for details. 5 Connect the supplied power cord to the MAINS (AC Power) jack on the rear of the DVD Recorder. Connect the power cords of the Recorder, Stereo - Philips DVDR75 | User manual - Page 16
RF coaxial cable to the Antenna In jack on your TV. Your TV's Antenna In jack may be labelled RF In,Antenna In, or 75 ohm. Check your TV manual for details. 5 Connect the supplied power cord to the MAINS (AC Power) jack on the rear of the DVD Recorder. Connect the power cords of the Recorder, Stereo - Philips DVDR75 | User manual - Page 17
try to copy them, the Recorder display may show "COPY PROTECT." • If the Recorder's display shows "NO SIGNAL," adjust the tracking or play the tape on the VCR/Camcorder. See your VCR/Camcorder manual. • Do not connect a Progressive Scan video source (such as a DVD Player) to the IN EXT 1 COMPONENT - Philips DVDR75 | User manual - Page 18
for your connection. Or, check your TV owner's manual for details. Follow the steps below to set up the Recorder. You cannot turn off the Recorder until you finish the Initial Setup.The only way to quit the Initial Setup is to disconnect the power cord. If you quit, the Initial Setup screens - Philips DVDR75 | User manual - Page 19
456 789 DISC SELECT 0 MENU CH SYSTEM OK 8 4-6 CH TIMER FSS TV VOLUME RETURN CLEAR PLAY I I STOP AUDIO REC/OTR PAUSE Press OK to continue 6 "If you have connected the antenna - press OK" appears next. If you have connected an Antenna or Cable TV signal to the Recorder's ANTENNA jack - Philips DVDR75 | User manual - Page 20
15 seconds. Auto resume is On when you purchase the Recorder. However, you can turn it On or Off. See page 53. I I STOP AUDIO REC/OTR PAUSE Helpful Hints • If the Disc is Locked by Access Control, you must enter the fourdigit code or unlock the Disc. See pages 54-58. • DVDs have a region code - Philips DVDR75 | User manual - Page 21
, unfinalized, recordable DVD+RW/DVD+R. Recording options are on pages 41-52. 1 Press OPEN/CLOSE A on the front of the Recorder to open the disc tray. Or, press and hold STOP C on the remote control for about three seconds to open or close the Disc tray. 2 Insert a recordable DVD+RW/DVD+R, with the - Philips DVDR75 | User manual - Page 22
PAUSE STANDBY y Button Press to turn on or off the power of the DVD Recorder. PLAY MODE Button Press during Disc play to choose a Repeat, Shuffle, or Scan mode. SYSTEM MENU Button Press to access or remove the Menu Bars of the DVD Recorder. See page 30. OK Button Press to acknowledge or approve - Philips DVDR75 | User manual - Page 23
/ TV The following buttons will work with some Philips TVs when you hold down the DVD/TV button on the side of the remote. Hold down the DVD/TV button at the same time you press these buttons. Otherwise, these buttons will change channels or power at the Recorder. • CH+8 or CH-9 Press to change TV - Philips DVDR75 | User manual - Page 24
Disc, or the current TV channel. Remote sensor The sensor receives signals from the remote. Point the remote here, not at your TV, when using the remote control to operate the DVD Recorder Camcorder or other equipment to the DVD Recorder. See page 17. When recording material that is playing on the - Philips DVDR75 | User manual - Page 25
25 MAINS jack Connect the supplied AC power cord here. See pages 10-16. TV jack Connect the supplied RF coaxial cable to the Recorder's TV jack and to the RF IN or ANTENNA IN jack (75 ohm) on your television. ANTENNA jack Connect your antenna or Cable TV signal here. See pages 10-16. IN EXT - Philips DVDR75 | User manual - Page 26
show on the screen as the searching progresses.This will take a few minutes, depending finished. MONITOR STANDBY TV / DVD T / C PLAY MODE REC. MODE 1 4 7 DISC SELECT 23 56 89 0 Recorder did not set, add the channel. • The Recorder detects whether you connected an Antenna or Cable TV signal - Philips DVDR75 | User manual - Page 27
. Installation VCR Plus+ ch. VCR Plus+ ch. Channel K K... u 001 s 018 B L 002 -- -- -- 003 -- -- -- 004 -- -- -- 005 -- -- -- L... To store Press OK VCR Plus+ Channels 27 MONITOR STANDBY TV / DVD T / C PLAY MODE REC. MODE 1 4 7 DISC SELECT 23 56 89 0 MENU CH SYSTEM OK - Philips DVDR75 | User manual - Page 28
to set the clock manually, choose Off.The Recorder will not update the time automatically according to error message when you turn on the Recorder. Check the PBS channel and try again. Or, set the clock manually. See page 29. MONITOR STANDBY TV / DVD T / C PLAY MODE REC. MODE 8 123 456 7 DISC - Philips DVDR75 | User manual - Page 29
Manual If the Recorder does not set the time and date correctly using the Time/Date Automatic feature, set the clock manually by following the steps below. Manual to remove all menus. MONITOR STANDBY TV / DVD T / C PLAY MODE REC. MODE 123 456 789 DISC SELECT 0 MENU CH SYSTEM OK 1,11 1-10 - Philips DVDR75 | User manual - Page 30
quality, depending on the equipment you connected to the DVD Recorder.Also set up Languages,Access Control, Record Settings, Remote Control settings, Installation features, and other DVD Recorder features as detailed throughout this manual. W Title/Track Select to choose an available Title or - Philips DVDR75 | User manual - Page 31
recording 9 stop stop ; pause pause play 0 ; pause pause recording K fast forward (4 or 32 times x4 the regular speed) J fast reverse (1/8, 1/4, or 1/2 x4 the regular speed) H 1/4 slow motion DVD+R DVD+R RW DVD+RW DVD DVD-Video SVCD Super Video-CD Video-CD VCD no Disc no disc Disc error - Philips DVDR75 | User manual - Page 32
the DVD Recorder or its remote control to recording. Later recordings will be overwritten. On a DVD+R, resume play from the Disc Pointer location by pressing OK. However, on a DVD+R, recording Recorder). See page 33. C10 07:55AM 00:01:24 . M1 Wed 08/27/2003 K C06 11:30AM B 0100:00:22 . M1 Sun 06/15 - Philips DVDR75 | User manual - Page 33
are on page 45. Disc locked Tuner Information box Appears Recorder. Make sure you have connected an Antenna or Cable TV signal to the ANTENNA jack on the Recorder. See pages 10-17 Recording. It does not appear during recording or Disc playback. Timer recording due later today Timer recording - Philips DVDR75 | User manual - Page 34
the current Title has a menu, the Title menu will appear on the screen. Otherwise, the Disc menu will appear.The menu will list features available on the current DVD and will vary for every DVD. For a DVD+RW or DVD+R, the Index Picture Screen will appear. See page 32. 2 Press CH+8, CH-9, ;, and : to - Philips DVDR75 | User manual - Page 35
MODE REC. MODE 123 456 789 DISC SELECT 0 MENU CH SYSTEM OK CH TIMER FSS TV VOLUME RETURN CLEAR PLAY I 1,2 I STOP AUDIO REC/OTR PAUSE Subtitles Some DVDs include subtitles in different languages. Or, material you recorded onto a DVD+RW or DVD+R might include subtitles.To choose - Philips DVDR75 | User manual - Page 36
T / C PLAY MODE REC. MODE 123 456 789 DISC SELECT 0 MENU CH SYSTEM OK CH TIMER FSS TV VOLUME RETURN CLEAR PLAY I STOP AUDIO REC/OTR PAUSE 1,7 2-5 6 I Camera Angle Some DVDs include scenes recorded from different angles.To watch segments from a different angle, follow these steps - Philips DVDR75 | User manual - Page 37
To quickly pause play, press PAUSE k on the remote. To advance the still picture one frame at a DISC SELECT 0 MENU CH SYSTEM OK CH TIMER FSS TV VOLUME RETURN CLEAR PLAY 1,5 2-3 4 Sound Choose a sound setting based on the capabilities of the equipment to which you connected the DVD Recorder - Philips DVDR75 | User manual - Page 38
-half as fast as normal (1/2). Select 1 to play the Disc at normal speed again. Select 0 or press PAUSE k on the remote control to pause the picture. 4 To return to normal play, press PLAY :. d HE st K L F -1 -1/2 -1/4 -1/8 s0 B 1/8 1/4 1/2 1 DVD pause 0:00:22 0:00:05 5 Press SYSTEM MENU to - Philips DVDR75 | User manual - Page 39
6 Press SYSTEM MENU to remove the Menu Bar. Time Search, Scan 39 MONITOR STANDBY TV / DVD T / C PLAY MODE REC. MODE 123 456 789 DISC SELECT 0 MENU CH SYSTEM OK 4 1,6 2,3,5 CH TIMER FSS TV VOLUME RETURN CLEAR PLAY Scan Scanning plays the first 10 seconds of each Chapter/Track on the - Philips DVDR75 | User manual - Page 40
TIMER FSS TV VOLUME RETURN CLEAR PLAY Repeat A-B You also may set the DVD Recorder to play only a specific portion of a Title, Chapter, or Track repeatedly. Follow these steps. 1 Press PLAY : to start Disc play. 2 When the Disc reaches the point at which you want repeat- ed play to begin, press - Philips DVDR75 | User manual - Page 41
end of the Disc automatically. Previous recordings are not overwritten. 3 Press MONITOR to see TV channels through the DVD Recorder. Make sure you have programmed channels. See page 26. 4 Press CH+8, CH-9, or the Number buttons to select the channel you wish to record. If you are using a Cable Box - Philips DVDR75 | User manual - Page 42
y to turn off the Recorder. For the timer recording, the Recorder will turn itself on, record, then turn itself off when finished.A red light will encircle the Record I button on the Recorder during recording. If you plan to play a DVD+R on another DVD Player, finalize the Disc. Follow the steps on - Philips DVDR75 | User manual - Page 43
eight digits, printed in most TV guides next to the start time of a TV program.You can program a timer recording quickly by entering the code for your program. Before you begin, complete the VCR Plus+® channel setup. See page 27. 1 Press TIMER on the remote control. 2 Press CH+8 to select VCR Plus - Philips DVDR75 | User manual - Page 44
TV / DVD T / C PLAY MODE REC. MODE 123 456 789 DISC SELECT 0 MENU CH SYSTEM OK 2,3,5 CH TIMER FSS TV VOLUME RETURN CLEAR PLAY 4 I I STOP AUDIO REC/OTR PAUSE Helpful Hint • Press STANDBY y on the remote to turn off the Recorder and stop a timer recording that is in progress. - Philips DVDR75 | User manual - Page 45
let the download finish. Data error Make sure all information for the timer recording is correct and complete. Insert recordable disc There is not a DVD+R or DVD+RW in the Recorder. Put a recordable DVD+R or DVD+RW in the disc tray before turning off the Recorder for the timer recording. Memory full - Philips DVDR75 | User manual - Page 46
of the Recorder to indicate recording is in progress. See page 21. 2 Press TV/DVD on the remote to put the Recorder in TV position. TV will appear briefly on the Recorder's display panel. 3 Use the TV remote control to select the channel you want to watch at the TV. (If you have a Philips TV, you - Philips DVDR75 | User manual - Page 47
M1 Sun 06/15/2003 L C10 12:01AM 00:58:53 . M6 Sun 10/26/2003 2 Press CH+8 or CH-9 to select the Index Picture of the recording you want to full title Press OK. The Disc will play from the beginning of the Title you selected. q Erase this title Press OK. The DVD Recorder will ask you to confirm - Philips DVDR75 | User manual - Page 48
selected and overwrite the video material beyond this point, including later Titles. 6 Press STOP C to stop recording. 4 6 MONITOR STANDBY TV / DVD T / C PLAY MODE REC. MODE 123 456 789 DISC 0 SYSTEM MENU SELECT CH OK 1,4 CH TIMER FSS TV VOLUME RETURN CLEAR PLAY I STOP AUDIO - Philips DVDR75 | User manual - Page 49
1,5 1-4 I I STOP AUDIO REC/OTR PAUSE Mode M1 M2 M2x M3 M4 M6 Picture quality Recording time per Disc Highest quality; least 1 hour recording time per Disc Equals quality of a pre-recorded DVD 2 hours Better quality than an S-VHS videotape 2.5 hours Equals quality of an S-VHS videotape - Philips DVDR75 | User manual - Page 50
edits compatible appears when the current DVD+RW is not compatible with other DVD Players because you have added Chapter Markers or made Chapters invisible. See page 51. • If a DVD+R was recorded on a different DVD Recorder, the settings may not be accessible. • A disc name may contain a maximum of - Philips DVDR75 | User manual - Page 51
when you play the Disc on other DVD Players, these editing changes are available for the DVD Recorder. 1 During DVD+RW or DVD+R play, press FSS. Picture Screen for the current Title. Press OK. "This will update the index picture Press OK to confirm" will appear. Press OK again. (If you - Philips DVDR75 | User manual - Page 52
screen, 3 Press CH-9 repeatedly to select Finalize disc. Finalize disc appears in the menu only when an unfinalized DVD+R is in the Recorder. W X YZ a ~ 1 2 1en off no off L Access control s Auto resume Finalize disc Disc features Enter code ... On Press OK 4 Press OK. "Finalizing" will - Philips DVDR75 | User manual - Page 53
in the Recorder. W X YZ a ~ 1 2 1en off no off Access control Auto resume PBC Disc Features s On L Off 4 Press CH+8 or CH-9 to select On or Off, then press OK. 5 Press SYSTEM MENU to remove the menus. MONITOR STANDBY TV / DVD T / C PLAY MODE REC. MODE 123 456 789 DISC SELECT 0 MENU - Philips DVDR75 | User manual - Page 54
did not code the Disc. Philips cannot guarantee the availability of Access Control with all Discs, and therefore denies any liability associated with unintended watching of Discs. Make sure your Discs play according to your Access Control settings before you allow children access to the DVD Recorder - Philips DVDR75 | User manual - Page 55
lock will be highlighted. Press :. W X YZ a ~ 1 2 1en off no off Access control Auto resume Finalize disc s Child lock LB@ Parental level Change country Change code @ MONITOR STANDBY TV / DVD T / C PLAY MODE REC. MODE 1 4 7 DISC SELECT 23 56 89 0 MENU CH SYSTEM OK CH TIMER FSS - Philips DVDR75 | User manual - Page 56
code. If you select Play Once, the Disc will play one time. If you stop playback, open the Disc tray, or turn off the Recorder's power, the Access Control screen will reappear when you try to play the Disc again. If you select Play Always, the Disc will play even if you turn off the DVD Recorder - Philips DVDR75 | User manual - Page 57
code. W X YZ a ~ 1 2 1en off no off s Access control Auto resume Finalize disc [] [] [] [] Enter code MONITOR STANDBY TV / DVD T / C PLAY MODE REC. MODE 1 4 7 DISC -17 6 - R 4 - PG-13 3 - PG 1 - G • Finalize disc will appear in this menu only when a non-finalized DVD+R is in the Recorder. - Philips DVDR75 | User manual - Page 58
is coded, then press OK. W X YZ a ~ 1 2 1en off no off Access control Auto resume Finalize disc s American Samoa L Bermuda Canada Puerto Rico 6 Press SYSTEM MENU to remove the menus. MONITOR STANDBY TV / DVD T / C PLAY MODE REC. MODE 123 456 789 DISC SELECT 0 MENU CH SYSTEM OK CH - Philips DVDR75 | User manual - Page 59
Disc type and status of the Recorder. power L Normal Demo mode W X YZ a ~ 1 2 1en off no off Status box G Standby r Display Features s Bright L Dimmed Off 5 Press SYSTEM MENU repeatedly to remove the menus. MONITOR STANDBY TV / DVD T / C PLAY MODE REC. MODE 123 456 789 DISC - Philips DVDR75 | User manual - Page 60
MENU to remove the menus. Helpful Hints • The picture format you select must be on the Disc. If not, the settings for TV Shape will not affect the picture. • Some widescreen TVs may show only part of the DVD Recorder's menu.Adjust the screen mode on your TV. See your TV owner's manual for details. - Philips DVDR75 | User manual - Page 61
Adjust Digital Output only if you used the Recorder's Coaxial DIGITAL AUDIO OUT jack. (If you built-in digital multi-channel decoder. PCM represents Pulse Code Modulation. W X YZ a ~ 1 2 1en 61 MONITOR STANDBY TV / DVD T / C PLAY MODE REC. MODE 123 456 789 DISC SELECT 0 MENU CH SYSTEM - Philips DVDR75 | User manual - Page 62
15, choose a setting for Analog Output. You do not need to adjust this setting if you used the Recorder from the left and right audio channels if the DVD Recorder is connected to a Stereo TV. q Select Surround MONITOR STANDBY TV / DVD T / C PLAY MODE REC. MODE 123 456 789 DISC SELECT 0 MENU CH - Philips DVDR75 | User manual - Page 63
press OK. The changes will be effective only if the language is available on the Disc. Some DVDs allow you to change languages in the Disc Menu only. q If you selected Recording audio, press CH+8 or CH-9 to select Stereo or SAP, then press OK. Some TV programs broadcast in stereo or in a second - Philips DVDR75 | User manual - Page 64
you have a Philips DVD Player and want to use its remote for the Recorder, select DVD Player.You might not access all the Recorder's features unless you use the Recorder's remote. W X YZ a ~ 1 2 1en off no off Remote control Remote control used s DVD Player L DVD Recorder 5 Press SYSTEM MENU - Philips DVDR75 | User manual - Page 65
that has Component Video In jacks.The IN jacks allow the Recorder to receive high-quality video from other equipment, such as a DVD Player. The OUT jacks are also compatible with Progressive Scan (if your TV has Progressive Scan). Digital: Sound that has been converted into numerical values. Digital - Philips DVDR75 | User manual - Page 66
compatible before you modified the Disc. To modify a Disc, place the Disc in the DVD Recorder's disc tray. Do not close the tray.Then, press and hold the Number 2 button on the remote control until the tray closes.The Disc is now modified.Try it on the other Player. If the Disc still will not play - Philips DVDR75 | User manual - Page 67
DVD.The DVD must be coded for All regions or Region 1 in order to play on this DVD Recorder. See page 7. • See if the Disc is defective by trying another Disc. Make sure the Disc is not scratched or warped. Carefully clean the Disc. See page 6. The DVD Recorder does not respond to the remote control - Philips DVDR75 | User manual - Page 68
the operating instructions, a wrong Disc in use, or incorrect connections. Contact the Philips Customer Care Center for further assistance in solving the problem. 4 If there is no failure, disconnect the power cord again, then reconnect it to the Recorder and an AC power outlet.The DVD Recorder will - Philips DVDR75 | User manual - Page 69
AD Converter Signal handling Video Out S-Video Out Component Video/ Progressive Scan Out 10-bit 9-bit Components 1 Vpp into 75 Ohm Y: 1 Vpp into 75 Ohm C: 0.300 Vpp into 75 Ohm Y: 1 Vpp into 75 Ohm PB: 0.7 Vpp into 75 Ohm PR: 0.7 Vpp into 75 Ohm CABINET Dimensions (w x h x d): 17 x 3 x 13 inches - Philips DVDR75 | User manual - Page 70
of antenna systems outside of the product. • product repair and/or part replacement because of misuse, accident, unauthorized repair or other cause not within the control of Philips. • reception problems caused by signal conditions or cable or antenna systems outside the unit. • a product that - Philips DVDR75 | User manual - Page 71
, 40 play once 56 playable discs 7 playback audio 63 playback control 53 playing a disc 20 pluscode 43, 45 power cord 10-16, 25 preserving memories 17 previous j button 23, 24, 34, 38 progressive scan 12, 60 protection 50 quick disc playback 20 quick recording 21 rear panel 25 rec/otr - Philips DVDR75 | User manual - Page 72
This owner's manual is made of recyclable materials. Remember to recycle! IB8451E001 3139 246 1336 1
-
 1
1 -
 2
2 -
 3
3 -
 4
4 -
 5
5 -
 6
6 -
 7
7 -
8
-
9
-
10
-
11
-
12
-
13
-
14
-
15
-
16
-
17
-
18
-
19
-
20
-
21
-
22
-
23
-
24
-
25
-
26
-
27
-
28
-
29
-
30
-
31
-
32
-
33
-
34
-
35
-
36
-
37
-
38
-
39
-
40
-
41
-
42
-
43
-
44
-
45
-
46
-
47
-
48
-
49
-
50
-
51
-
52
-
53
-
54
-
55
-
56
-
57
-
58
-
59
-
60
-
61
-
62
-
63
-
64
-
65
-
66
-
67
-
68
-
69
-
70
-
71
-
72
 |
 |
DVDR75
Digital Video Disc Recorder
Owner's Manual
Important!
Return your
Warranty
Registration Card
within 10 days.
See why inside.
®
N
EED
H
ELP
?C
ALL US
!
P
HILIPS REPRESENTATIVES ARE READY TO HELPYOU WITH ANY QUESTIONS ABOUT
YOUR NEW PRODUCT
.W
E CAN GUIDE YOU THROUGH
C
ONNECTIONS
,F
IRST
-
TIME
S
ETUP
,
AND ANY OF THE
F
EATURES
.W
E WANT YOU TO START ENJOYING YOUR
NEW PRODUCT RIGHT AWAY
.
C
ALL US BEFORE YOU CONSIDER
RETURNING THE PRODUCT
.
1-800-531-0039
O
R VISIT US ON THE WEB AT WWW
.
PHILIPS
.
COM