Philips DVDR75 User manual - Page 49
Record Settings
 |
View all Philips DVDR75 manuals
Add to My Manuals
Save this manual to your list of manuals |
Page 49 highlights
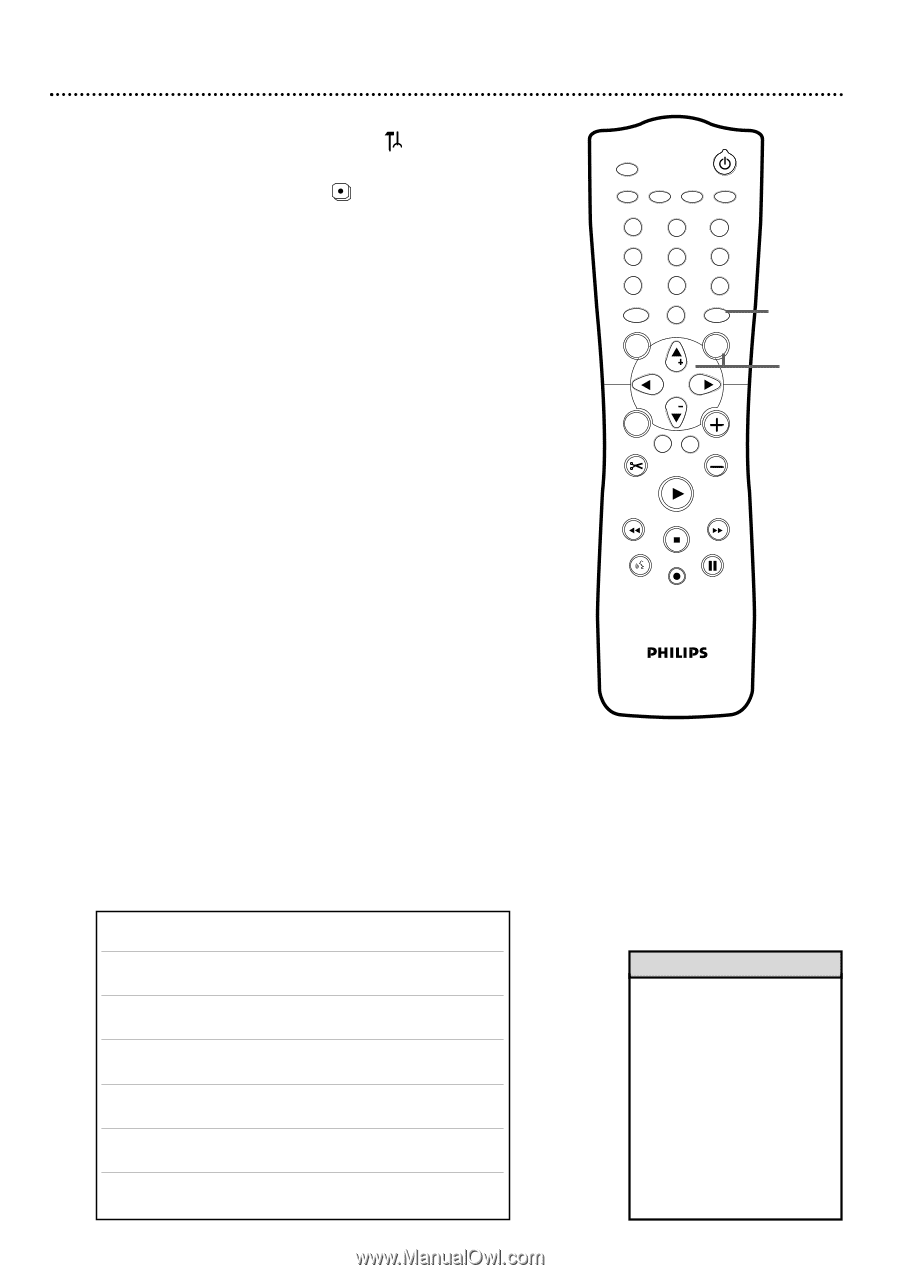
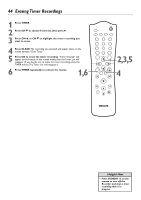
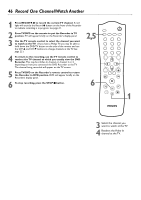
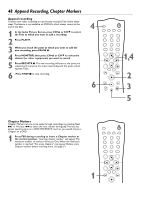
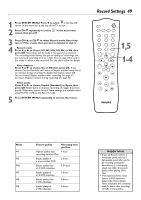
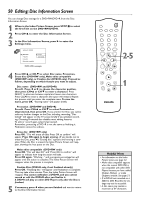
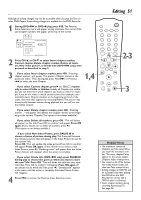
1 Press SYSTEM MENU. Press ; to select in the top left corner of the menu bar at the top of the TV screen. 2 Press CH-9 repeatedly to select screen, then press :. in the next menu 3 Press CH+8 or CH-9 to select Record mode,Auto chapters, or Filter mode, then proceed as detailed in step 4. 4 q Record mode Press ; or : to choose M1, M2, M2x, M3, M4, or M6, then press OK. Recordings will be made in the speed you selected. The recording mode defines the picture quality of recordings and the maximum recording time for a Disc.You can play a Disc only in the mode in which it was recorded. See the chart below for details. q Auto chapters Press ; or : to choose On or Off, then press OK. If you choose On, the Recorder will insert a Chapter marker every five to six minutes during recording.To disable this feature, select Off. You can insert Chapter markers after recording. See page 51. Or, insert Chapter markers during recording. See page 48. q Filter mode Press ; or : to choose Stndrd (Standard) or Sport, then press OK. Select Sport to improve recording of images that move quickly. Otherwise, choose Stndrd.These settings are available when using M3, M4, or M6 as the Record mode. 5 Press SYSTEM MENU repeatedly to remove the menus. Record Settings 49 MONITOR STANDBY TV / DVD T / C PLAY MODE REC. MODE 123 456 789 DISC SELECT 0 MENU CH SYSTEM OK CH TIMER FSS TV VOLUME RETURN CLEAR PLAY 1,5 1-4 I I STOP AUDIO REC/OTR PAUSE Mode M1 M2 M2x M3 M4 M6 Picture quality Recording time per Disc Highest quality; least 1 hour recording time per Disc Equals quality of a pre-recorded DVD 2 hours Better quality than an S-VHS videotape 2.5 hours Equals quality of an S-VHS videotape 3 hours Better quality than a VHS videotape 4 hours Equals quality of a VHS videotape 6 hours Helpful Hints • If you set Record mode to a low-quality speed, set it to a high-quality speed after you finish recording. Leaving the Recorder set to a low-quality speed may affect the picture quality when playing DVDs later. • VHS represents Video Home System. S-VHS represents Super-Video Home System. These videotapes are commonly used for home video recordings on VCRs or Camcorders.
-
 1
1 -
2
-
3
-
4
-
5
-
6
-
7
-
8
-
9
-
10
-
11
-
12
-
13
-
14
-
15
-
16
-
17
-
18
-
19
-
20
-
21
-
22
-
23
-
24
-
25
-
26
-
27
-
28
-
29
-
30
-
31
-
32
-
33
-
34
-
35
-
36
-
37
-
38
-
39
-
40
-
41
-
42
-
43
-
 44
44 -
 45
45 -
 46
46 -
 47
47 -
 48
48 -
 49
49 -
 50
50 -
 51
51 -
 52
52 -
 53
53 -
 54
54 -
55
-
56
-
57
-
58
-
59
-
60
-
61
-
62
-
63
-
64
-
65
-
66
-
67
-
68
-
69
-
70
-
71
-
72
 |
 |