Pioneer P4000 Owner's Manual - Page 32
Audio Adjustments, Operating this unit - subwoofer
 |
UPC - 012562547978
View all Pioneer P4000 manuals
Add to My Manuals
Save this manual to your list of manuals |
Page 32 highlights
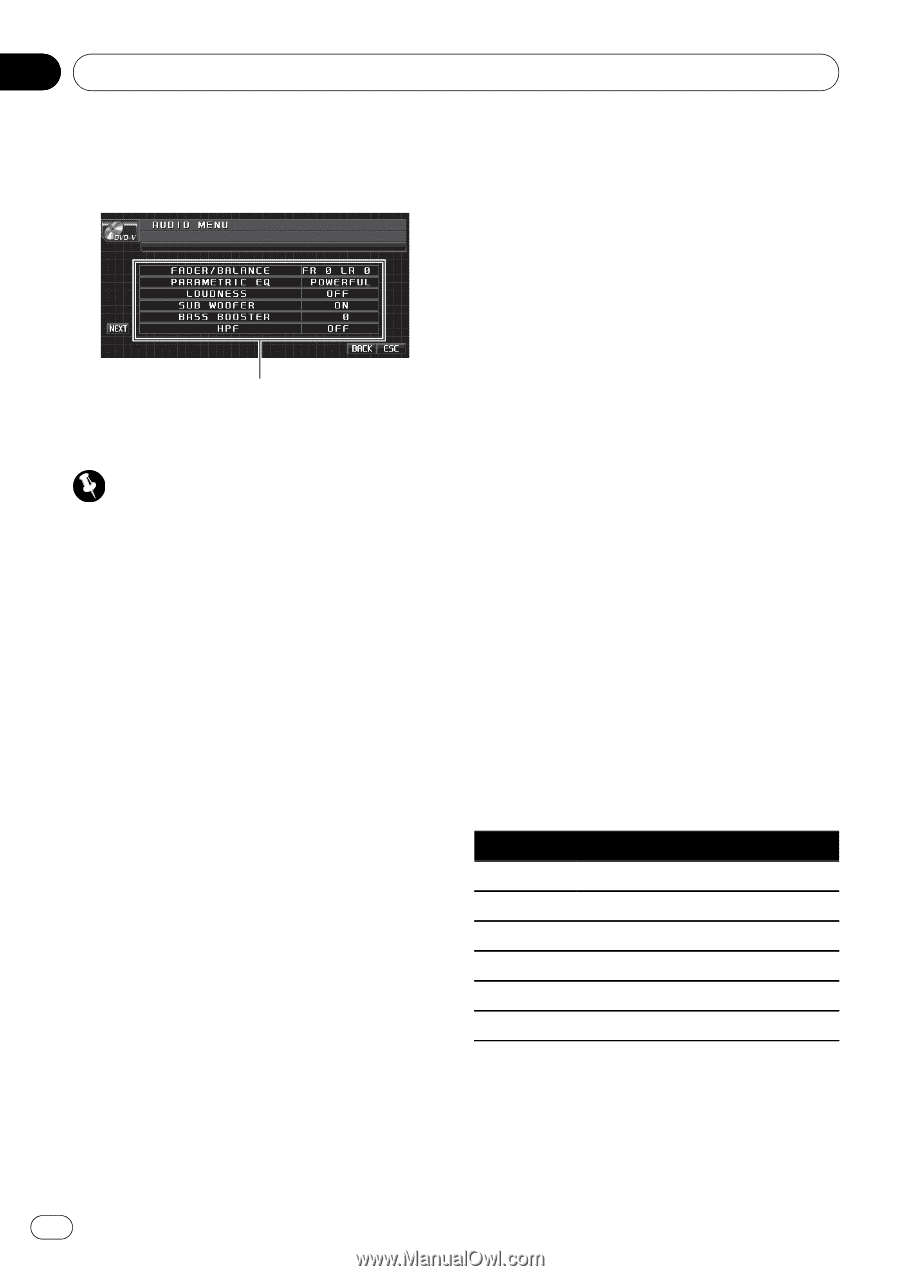
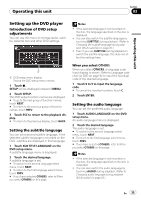
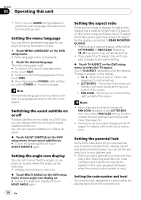
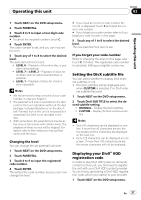
Section 03 Operating this unit Audio Adjustments Introduction of audio adjustments 1 1 Audio display Shows the audio adjustment status. Important If the multi-channel processor (DEQ-P8000) is connected to this unit, the audio function will be changed to the multi-channel processor's audio menu. For details, refer to Introduction of DSP adjustments on page 70. 1 Touch AV MENU and then touch AUDIO MENU to display the audio function names. The audio function names are displayed and operable ones are highlighted. # To go to the next group of function names, touch NEXT. # To return to the previous group of function names, touch PREV. # When selecting FM and Bluetooth telephone as the source, you cannot switch to SLA. 2 Touch ESC to return to the ordinary display. # To return to the previous display, touch BACK. Using balance adjustment You can change the fader/balance setting so that it can provide the ideal listening environment in all occupied seats. 1 Touch FADER/BALANCE on the audio function menu. # When the rear output setting is S.W, BALANCE will be displayed instead of FADER/BALANCE. Refer to Setting the rear output and subwoofer controller on page 39. 2 Touch a or b to adjust front/rear speaker balance. Each time you touch a or b it moves the front/rear speaker balance towards the front or the rear. FRONT:15 to REAR:15 is displayed as the front/rear speaker balance moves from front to rear. # FR: 0 is the proper setting when only two speakers are used. # When the rear output setting is S.W, you cannot adjust front/rear speaker balance. Refer to Setting the rear output and subwoofer controller on page 39. 3 Touch c or d to adjust left/right speaker balance. Each time you touch c or d it moves the left/ right speaker balance towards the left or the right. LEFT:15 to RIGHT:15 is displayed as the left/ right speaker balance moves from left to right. Using the equalizer The equalizer lets you adjust the equalization to match the car's interior acoustic characteristics as desired. Recalling equalizer curves There are six stored equalizer curves which you can easily recall at any time. Here is a list of the equalizer curves. Display Equalizer curve POWERFUL Powerful NATURAL Natural VOCAL Vocal CUSTOM Custom FLAT Flat SUPER BASS Super bass ! CUSTOM is an adjusted equalizer curve that you create. If you make adjustments to an equalizer curve, the equalizer curve setting is memorized in CUSTOM. 32 En
-
 1
1 -
2
-
3
-
4
-
5
-
6
-
7
-
8
-
9
-
10
-
11
-
12
-
13
-
14
-
15
-
16
-
17
-
18
-
19
-
20
-
21
-
22
-
23
-
24
-
25
-
26
-
 27
27 -
 28
28 -
 29
29 -
 30
30 -
 31
31 -
 32
32 -
 33
33 -
 34
34 -
 35
35 -
 36
36 -
 37
37 -
38
-
39
-
40
-
41
-
42
-
43
-
44
-
45
-
46
-
47
-
48
-
49
-
50
-
51
-
52
-
53
-
54
-
55
-
56
-
57
-
58
-
59
-
60
-
61
-
62
-
63
-
64
-
65
-
66
-
67
-
68
-
69
-
70
-
71
-
72
-
73
-
74
-
75
-
76
-
77
-
78
-
79
-
80
-
81
-
82
-
83
-
84
-
85
-
86
-
87
-
88
-
89
-
90
-
91
-
92
-
93
-
94
-
95
-
96
-
97
-
98
-
99
 |
 |