Pioneer P4000 Owner's Manual - Page 45
Using the AUX source
 |
UPC - 012562547978
View all Pioneer P4000 manuals
Add to My Manuals
Save this manual to your list of manuals |
Page 45 highlights
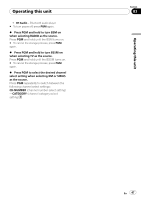
Operating this unit Section 03 Operating this unit 4 Press EQ to complete the 4-point adjustment. The adjusted position data is saved. # Do not turn off the engine while saving the adjusted position data. 5 Press EQ to proceed to the 16-point adjustment. The 16-point touch panel adjustment screen appears. # To cancel the adjustment, press and hold VOLUME/MUTE. 6 Gently touch the center of the + mark displayed on the screen with the touch panel adjustment pen. After you touch all the marks, the adjusted position data is saved. # Do not turn off the engine while saving the adjusted position data. 7 Press and hold VOLUME/MUTE to complete the adjustment. Using the AUX source A separately sold auxiliary device such as VCR or portable device can be connected to this unit. When connected, auxiliary device is automatically recognized as AUX source and assigned to AUX. About AUX connection method You have two methods to connect auxiliary device to this unit. Mini pin plug cable (AUX 1) When connecting auxiliary device using a mini plug cable iPod and portable audio/video player can be connected to this unit via mini plug cable. ! If an iPod with video capabilities is con- nected to this unit via 3.5 mm plug (4 pole) cable (e.g., CD-V150M), you can enjoy the video contents of the iPod. ! It is possible to connect a portable audio/ video player by using a 3.5 mm plug (4 pole) to RCA cable, which is sold separately. However, depending on the cable, reverse connection between Red (right side audio) cable and yellow (video) cable is required. Otherwise, audio and video may not be correctly reproduced. % Insert the stereo mini plug into the AUX input jack on this unit. For more details, refer to What's What on page 15. IP-BUS-RCA interconnector (AUX 2) When connecting auxiliary device using an IPBUS-RCA Interconnector (sold separately) % Use an IP-BUS-RCA Interconnector such as the CD-RB20/CD-RB10 (sold separetely) to connect this unit to auxiliary device featuring RCA output. For more details, refer to the IP-BUS-RCA Interconnector owner's manual. # You can only make this type of connection if the auxiliary device has RCA outputs. Selecting AUX as the source % Touch the source icon and then touch AUX 1/AUX 2 to select AUX as the source. # If the auxiliary setting is not turned on, AUX cannot be selected. For more details, see Switching the auxiliary setting on page 38. Setting the AUX title The title displayed for the AUX source can be changed. ! Each title can be up to 10 characters long. 1 After you have selected AUX as the source, touch AV MENU and FUNCTION MENU and then touch NAME EDIT. # When the touch panel keys are not displayed, you can display them by touching the screen. En 45
-
 1
1 -
2
-
3
-
4
-
5
-
6
-
7
-
8
-
9
-
10
-
11
-
12
-
13
-
14
-
15
-
16
-
17
-
18
-
19
-
20
-
21
-
22
-
23
-
24
-
25
-
26
-
27
-
28
-
29
-
30
-
31
-
32
-
33
-
34
-
35
-
36
-
37
-
38
-
39
-
 40
40 -
 41
41 -
 42
42 -
 43
43 -
 44
44 -
 45
45 -
 46
46 -
 47
47 -
 48
48 -
 49
49 -
 50
50 -
51
-
52
-
53
-
54
-
55
-
56
-
57
-
58
-
59
-
60
-
61
-
62
-
63
-
64
-
65
-
66
-
67
-
68
-
69
-
70
-
71
-
72
-
73
-
74
-
75
-
76
-
77
-
78
-
79
-
80
-
81
-
82
-
83
-
84
-
85
-
86
-
87
-
88
-
89
-
90
-
91
-
92
-
93
-
94
-
95
-
96
-
97
-
98
-
99
 |
 |
