Ricoh Aficio MP C3000 General Settings Guide - Page 218
Registering a User Code, System Settings, Administrator Tools, Address Book Management, Program/Change
 |
View all Ricoh Aficio MP C3000 manuals
Add to My Manuals
Save this manual to your list of manuals |
Page 218 highlights
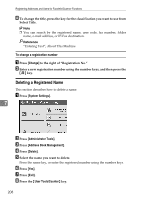
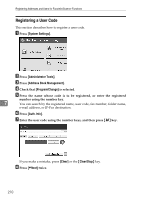
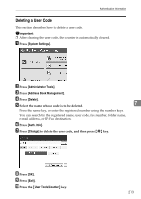
Registering Addresses and Users for Facsimile/Scanner Functions Registering a User Code This section describes how to register a user code. A Press [System Settings]. B Press [Administrator Tools]. C Press [Address Book Management]. D Check that [Program/Change] is selected. E Press the name whose code is to be registered, or enter the registered number using the number key. 7 You can search by the registered name, user code, fax number, folder name, e-mail address, or IP-Fax destination. F Press [Auth. Info]. G Enter the user code using the number keys, and then press {q} key. If you make a mistake, press [Clear] or the {Clear/Stop} key. H Press [TNext] twice. 210
-
 1
1 -
2
-
3
-
4
-
5
-
6
-
7
-
8
-
9
-
10
-
11
-
12
-
13
-
14
-
15
-
16
-
17
-
18
-
19
-
20
-
21
-
22
-
23
-
24
-
25
-
26
-
27
-
28
-
29
-
30
-
31
-
32
-
33
-
34
-
35
-
36
-
37
-
38
-
39
-
40
-
41
-
42
-
43
-
44
-
45
-
46
-
47
-
48
-
49
-
50
-
51
-
52
-
53
-
54
-
55
-
56
-
57
-
58
-
59
-
60
-
61
-
62
-
63
-
64
-
65
-
66
-
67
-
68
-
69
-
70
-
71
-
72
-
73
-
74
-
75
-
76
-
77
-
78
-
79
-
80
-
81
-
82
-
83
-
84
-
85
-
86
-
87
-
88
-
89
-
90
-
91
-
92
-
93
-
94
-
95
-
96
-
97
-
98
-
99
-
100
-
101
-
102
-
103
-
104
-
105
-
106
-
107
-
108
-
109
-
110
-
111
-
112
-
113
-
114
-
115
-
116
-
117
-
118
-
119
-
120
-
121
-
122
-
123
-
124
-
125
-
126
-
127
-
128
-
129
-
130
-
131
-
132
-
133
-
134
-
135
-
136
-
137
-
138
-
139
-
140
-
141
-
142
-
143
-
144
-
145
-
146
-
147
-
148
-
149
-
150
-
151
-
152
-
153
-
154
-
155
-
156
-
157
-
158
-
159
-
160
-
161
-
162
-
163
-
164
-
165
-
166
-
167
-
168
-
169
-
170
-
171
-
172
-
173
-
174
-
175
-
176
-
177
-
178
-
179
-
180
-
181
-
182
-
183
-
184
-
185
-
186
-
187
-
188
-
189
-
190
-
191
-
192
-
193
-
194
-
195
-
196
-
197
-
198
-
199
-
200
-
201
-
202
-
203
-
204
-
205
-
206
-
207
-
208
-
209
-
210
-
211
-
212
-
 213
213 -
 214
214 -
 215
215 -
 216
216 -
 217
217 -
 218
218 -
 219
219 -
 220
220 -
 221
221 -
 222
222 -
 223
223 -
224
-
225
-
226
-
227
-
228
-
229
-
230
-
231
-
232
-
233
-
234
-
235
-
236
-
237
-
238
-
239
-
240
-
241
-
242
-
243
-
244
-
245
-
246
-
247
-
248
-
249
-
250
-
251
-
252
-
253
-
254
-
255
-
256
-
257
-
258
-
259
-
260
-
261
-
262
-
263
-
264
-
265
-
266
-
267
-
268
-
269
-
270
-
271
-
272
-
273
-
274
-
275
-
276
-
277
-
278
-
279
-
280
-
281
-
282
-
283
-
284
-
285
-
286
-
287
-
288
-
289
-
290
-
291
-
292
-
293
-
294
-
295
-
296
-
297
-
298
-
299
-
300
-
301
-
302
-
303
-
304
-
305
-
306
-
307
-
308
-
309
-
310
-
311
-
312
-
313
-
314
-
315
-
316
 |
 |

Registering Addresses and Users for Facsimile/Scanner Functions
210
7
Registering a User Code
This section describes how to register a user code.
A
Press
[
System Settings
]
.
B
Press
[
Administrator Tools
]
.
C
Press
[
Address Book Management
]
.
D
Check that
[
Program/Change
]
is selected.
E
Press the name whose code is to be registered, or enter the registered
number using the number key.
You can search by the registered name, user code, fax number, folder name,
e-mail address, or IP-Fax destination.
F
Press
[
Auth. Info
]
.
G
Enter the user code using the number keys, and then press
{
q
}
key.
If you make a mistake, press
[
Clear
]
or the
{
Clear/Stop
}
key.
H
Press
[
T
Next
]
twice.