Samsung SCH-U740 User Manual (ENGLISH) - Page 67
Creating and Sending Messages in Landscape Mode, Receiving Picture-Video Messages, Picture-Video
 |
UPC - 635753465860
View all Samsung SCH-U740 manuals
Add to My Manuals
Save this manual to your list of manuals |
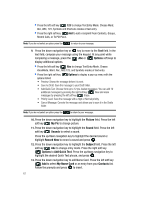
Page 67 highlights
Note: If you do not select an option press the to return to your message. 6. Press the down navigation key to highlight the Picture-Video field. Press the left soft key My Pic-My Video to add a Picture/Video, and follow the prompts. Press to attach the highlighted object. 7. If creating a Picture message, press the up/down navigation key to highlight the Sound field. Press the left soft key Sounds to select a sound. Press the up/down navigation key to highlight the desired sound or highlight Record New to record a sound and press . 8. Press the down navigation key to highlight the Subject field. Press the left soft key Abc to change entry mode. Press the right soft key Options to Add Quick Text. Press the up/down navigation key to highlight the desired Quick Text phrase, and press . 9. Press the down navigation key to add Name Card. Press the left soft key Add to select My Name Card or an entry from your Contacts list. Follow the prompts and press to insert. 10. Once all fields are complete, press intended recipient(s). to send the message to the Creating and Sending Messages in Landscape Mode • For more detailed procedures, refer to "Creating and Sending Messages Landscape Mode" on page 127. Receiving Picture-Video Messages When you receive a new Picture-Video Message, NEW PIC-VIDEO MSG appears in the display along with the options View Now, or View Later. Note: For the option Reject to appear in the display when you receive a Picture-Video Message, Auto Receive mode must be set to Off in the Message Settings menu. 1. When you receive a new Picture-Video Message, press Loading... appears in the display. View Now. 2. After loading, the image (and text if any) contained in the Picture-Video Message appear in the display. 3. Use the navigation keys to scroll through the message or view the entire picture if necessary. Section 7: Messaging 64
-
 1
1 -
2
-
3
-
4
-
5
-
6
-
7
-
8
-
9
-
10
-
11
-
12
-
13
-
14
-
15
-
16
-
17
-
18
-
19
-
20
-
21
-
22
-
23
-
24
-
25
-
26
-
27
-
28
-
29
-
30
-
31
-
32
-
33
-
34
-
35
-
36
-
37
-
38
-
39
-
40
-
41
-
42
-
43
-
44
-
45
-
46
-
47
-
48
-
49
-
50
-
51
-
52
-
53
-
54
-
55
-
56
-
57
-
58
-
59
-
60
-
61
-
 62
62 -
 63
63 -
 64
64 -
 65
65 -
 66
66 -
 67
67 -
 68
68 -
 69
69 -
 70
70 -
 71
71 -
 72
72 -
73
-
74
-
75
-
76
-
77
-
78
-
79
-
80
-
81
-
82
-
83
-
84
-
85
-
86
-
87
-
88
-
89
-
90
-
91
-
92
-
93
-
94
-
95
-
96
-
97
-
98
-
99
-
100
-
101
-
102
-
103
-
104
-
105
-
106
-
107
-
108
-
109
-
110
-
111
-
112
-
113
-
114
-
115
-
116
-
117
-
118
-
119
-
120
-
121
-
122
-
123
-
124
-
125
-
126
-
127
-
128
-
129
-
130
-
131
-
132
-
133
-
134
-
135
-
136
-
137
-
138
-
139
-
140
-
141
-
142
-
143
-
144
-
145
-
146
-
147
-
148
-
149
-
150
-
151
-
152
-
153
-
154
-
155
-
156
-
157
-
158
-
159
-
160
-
161
-
162
-
163
 |
 |
