Samsung SPH700AE User Manual (ENGLISH) - Page 20
Saving Custom Picture Settings, Setting up DNIe
 |
UPC - 036725240216
View all Samsung SPH700AE manuals
Add to My Manuals
Save this manual to your list of manuals |
Page 20 highlights
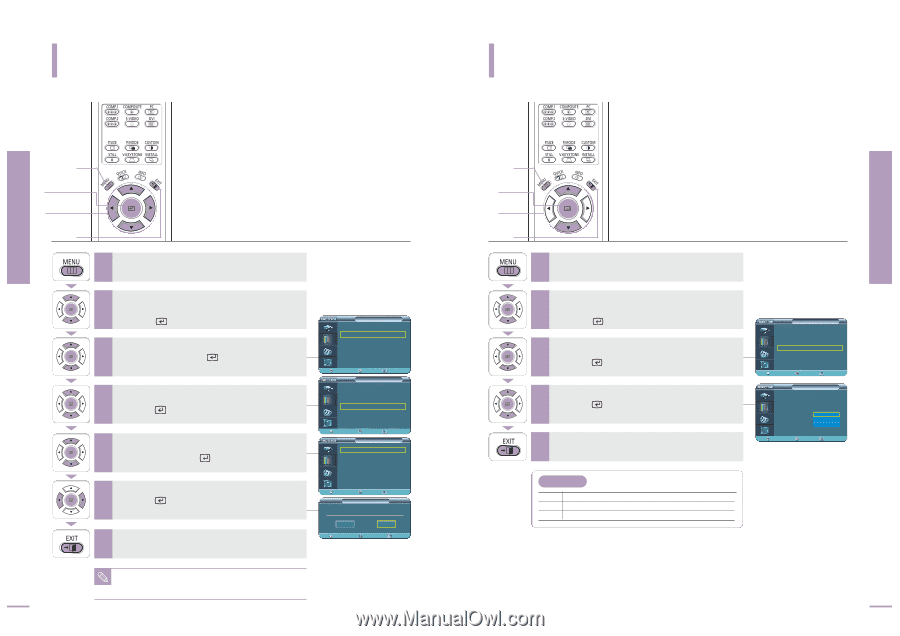
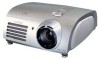
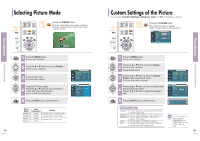
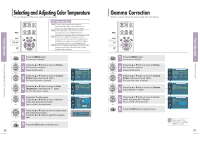
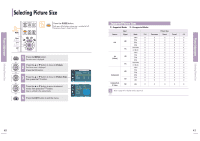
Saving Custom Picture Settings Picture Adjustment Saving Custom Picture Settings Used to save custom picture (Contrast, Brightness, Sharpness, Color, Tint, Color Temperature and Gamma) settings. MENU 1 Select 2, 3, 4, 5, 6 2, 3, 4, 5, 6 EXIT 7 1 Press the MENU button. The main menu is displayed. 2 Press the L or M button to move to Picture. The Picture menu is displayed. Press the button. 3 Press the L or M button to move to Custom Picture, then press the button. The Custom Picture menu is displayed. 4 Press the L or M button to move to Save, then press the button. 5 Press the L or M button to move to desired mode, then press the button. 6 Press the œ or √ button to move to OK, then press the button. Setup is switched to the selected mode. 7 Press the EXIT button to exit the menu. The User1, User2 and User3 modes are saved differently according to external input sources (Component1/ Component2/ 38 NOTE S-Video/Composite/PC/DVI). Picture Picture Mode : Movie 1 √ Custom Picture √ Picture Size : Full √ DNIe : Off √ Film Mode : On √ Overscan : On √ Move Enter Return Custom Picture ... More Color Temperature √ Gamma : Gamma Mode1 √ Save √ Move User1 User2 User3 Enter Return Save √ √ √ Move Enter Return Save Save Current Setting to User1? OK Move Cancel Enter Return Setting up DNIe DNIe (Digital Natural Image engine) is an image enhancing function developed by Samsung Electronics. It enables users to enjoy brighter, sharper and more dynamic pictures. MENU 1 Select 2, 3, 4 .../† 2, 3, 4 EXIT 5 1 Press the MENU button. The main menu is displayed. 2 Press the L or M button to move to Picture. The Picture menu is displayed. Press the button. 3 Press the L or M button to move to DNIe, then press the button. 4 Press the L or M button to move to On, then press the button. Setup is switched to the selected mode. 5 Press the EXIT button to exit the menu. DNIe Mode Off DNle Mode Off Demo DNle On/Off Picture Comparison Mode On DNle Mode On Picture Picture Mode : Movie 1 √ Custom Picture √ Picture Size : Full √ DNIe : Off √ Film Mode : On √ Overscan : On √ Move Enter Return Picture Picture Mode Custom Picture Picture Size DNIe Film Mode Overscan : Movie 1 : Full : Off Off : On Demo : On On Move Enter Return 39 Setting up DNIe Picture Adjustment
-
 1
1 -
2
-
3
-
4
-
5
-
6
-
7
-
8
-
9
-
10
-
11
-
12
-
13
-
14
-
 15
15 -
 16
16 -
 17
17 -
 18
18 -
 19
19 -
 20
20 -
 21
21 -
 22
22 -
 23
23 -
 24
24 -
 25
25 -
26
-
27
-
28
-
29
-
30
-
31
-
32
-
33
-
34
-
35
-
36
-
37
-
38
-
39
-
40
-
41
-
42
 |
 |